Dell 1135N User Guide - Page 35
Using overlay, Editing a watermark, Creating a new overlay, Using a overlay
 |
View all Dell 1135N manuals
Add to My Manuals
Save this manual to your list of manuals |
Page 35 highlights
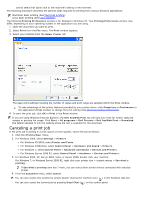
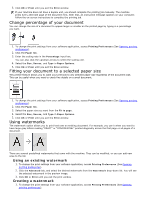
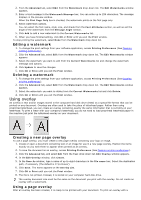
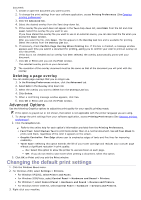
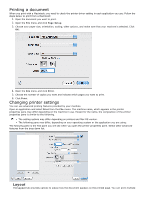
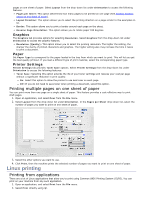
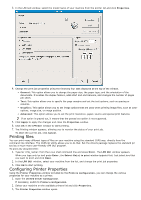
2. From the Advanced tab, select Edit from the Watermark drop-down list. The Edit Watermarks window appears. 3. Enter a text message in the Watermark Message box. You can enter up to 256 characters. The message displays in the preview window. When the First Page Only box is checked, the watermark prints on the first page only. 4. Select watermark options. You can select the font name, style, size, and shade from the Font Attributes section, as well as set the angle of the watermark from the Message Angle section. 5. Click Add to add a new watermark to the Current Watermarks list. 6. When you have finished editing, click OK or Print until you exit the Print window. To stop printing the watermark, select None from the Watermark drop-down list. Editing a watermark 1. To change the print settings from your software application, access Printing Preferences (See Opening printing preferences). 2. Click the Advanced tab, select Edit from the Watermark drop-down list. The Edit Watermarks window appears. 3. Select the watermark you want to edit from the Current Watermarks list and change the watermark message and options. 4. Click Update to save the changes. 5. Click OK or Print until you exit the Print window. Deleting a watermark 1. To change the print settings from your software application, access Printing Preferences (See Opening printing preferences). 2. Click the Advanced tab, select Edit from the Watermark drop-down list. The Edit Watermarks window appears. 3. Select the watermark you want to delete from the Current Watermarks list and click Delete. 4. Click OK or Print until you exit the Print window. Using overlay An overlay is text and/or images stored in the computer hard disk drive (HDD) as a special file format that can be printed on any document. Overlays are often used to take the place of letterhead paper. Rather than using preprinted letterhead, you can create an overlay containing exactly the same information that is currently on your letterhead. To print a letter with your company's letterhead, you do not need to load preprinted letterhead paper in the machine just print the letterhead overlay on your document. Creating a new page overlay To use a page overlay, you must create a new page overlay containing your logo or image. 1. Create or open a document containing text or an image for use in a new page overlay. Position the items exactly as you wish them to appear when printed as an overlay. 2. To save the document as an overlay, access Printing Preferences (See Opening printing preferences). 3. Click the Advanced tab, and select Edit from the Text drop-down list. Edit Overlay window appears. 4. In the Edit Overlay window, click Create. 5. In the Save As window, type a name of up to eight characters in the File name box. Select the destination path, if necessary (The default is C:\Formover). 6. Click Save. The name appears on the Overlay List. 7. Click OK or Print until you exit the Print window. 8. The file is not printed. Instead, it is stored on your computer hard disk drive. The overlay document size must be the same as the document you print with the overlay. Do not create an overlay with a watermark. Using a page overlay After an overlay has been created, it is ready to be printed with your document. To print an overlay with a
-
 1
1 -
2
-
3
-
4
-
5
-
6
-
7
-
8
-
9
-
10
-
11
-
12
-
13
-
14
-
15
-
16
-
17
-
18
-
19
-
20
-
21
-
22
-
23
-
24
-
25
-
26
-
27
-
28
-
29
-
 30
30 -
 31
31 -
 32
32 -
 33
33 -
 34
34 -
 35
35 -
 36
36 -
 37
37 -
 38
38 -
 39
39 -
 40
40 -
41
-
42
-
43
-
44
-
45
-
46
-
47
-
48
-
49
-
50
-
51
-
52
-
53
-
54
-
55
-
56
-
57
-
58
-
59
-
60
-
61
-
62
-
63
-
64
-
65
-
66
-
67
-
68
-
69
-
70
-
71
-
72
-
73
-
74
-
75
-
76
-
77
-
78
-
79
-
80
-
81
-
82
-
83
-
84
-
85
-
86
-
87
-
88
-
89
-
90
-
91
-
92
-
93
-
94
-
95
-
96
-
97
-
98
-
99
-
100
-
101
-
102
-
103
-
104
-
105
-
106
-
107
-
108
-
109
-
110
-
111
-
112
-
113
-
114
-
115
-
116
-
117
-
118
-
119
-
120
-
121
-
122
-
123
-
124
-
125
-
126
-
127
-
128
-
129
-
130
-
131
-
132
-
133
-
134
-
135
-
136
-
137
-
138
 |
 |