Dell 1135N User Guide - Page 78
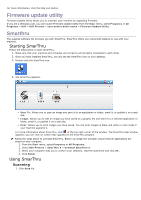
Firmware update utility, Smarthru, Starting SmarThru - scan to email
 |
View all Dell 1135N manuals
Add to My Manuals
Save this manual to your list of manuals |
Page 78 highlights
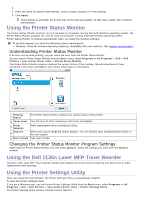
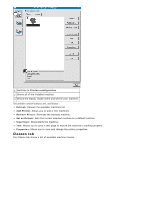
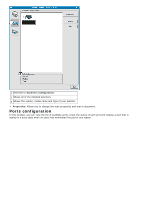
For more information, click the help icon button. Firmware update utility Firmware Update Utility allows you to maintain your machine by upgrading firmware. If you are a Windows user, you can launch Firmware Update Utility from the Start menu, select Programs or All Programs > Dell > Dell Printers > your printer driver name > Firmware Update Utility. Smarthru The supplied software CD provides you with SmarThru. SmarThru offers you convenient features to use with your machine. Starting SmarThru Follow the steps below to start SmarThru: 1. Make sure that your machine and computer are turned on and properly connected to each other. 2. Once you have installed SmarThru, you will see the SmarThru icon on your desktop. 3. Double-click the SmarThru icon. 4. The SmarThru appears. Scan To: Allows you to scan an image and save it to an application or folder, email it, or publish it on a web site. Image: Allows you to edit an image you have saved as a graphic file and send it to a selected application or folder, email it, or publish it on a web site. Print: Allows you to print images you have saved. You can print images in black and white or color mode if your machine supports it. For more information about SmarThru, click at the top right corner of the window. The SmarThru help window appears; you can view on screen help supplied on the SmarThru program. Follow the steps below to uninstall SmarThru. Before you begin the uninstall, ensure that all applications are closed on your computer. 1. From the Start menu, select Programs or All Programs. 2. Select Dell Printers > SmarThru 4 > Uninstall SmarThru 4. 3. When your computer asks you to confirm your selection, read the statement and click OK. 4. Click Finish. Using SmarThru Scanning 1. Click Scan To.
-
 1
1 -
2
-
3
-
4
-
5
-
6
-
7
-
8
-
9
-
10
-
11
-
12
-
13
-
14
-
15
-
16
-
17
-
18
-
19
-
20
-
21
-
22
-
23
-
24
-
25
-
26
-
27
-
28
-
29
-
30
-
31
-
32
-
33
-
34
-
35
-
36
-
37
-
38
-
39
-
40
-
41
-
42
-
43
-
44
-
45
-
46
-
47
-
48
-
49
-
50
-
51
-
52
-
53
-
54
-
55
-
56
-
57
-
58
-
59
-
60
-
61
-
62
-
63
-
64
-
65
-
66
-
67
-
68
-
69
-
70
-
71
-
72
-
 73
73 -
 74
74 -
 75
75 -
 76
76 -
 77
77 -
 78
78 -
 79
79 -
 80
80 -
 81
81 -
 82
82 -
 83
83 -
84
-
85
-
86
-
87
-
88
-
89
-
90
-
91
-
92
-
93
-
94
-
95
-
96
-
97
-
98
-
99
-
100
-
101
-
102
-
103
-
104
-
105
-
106
-
107
-
108
-
109
-
110
-
111
-
112
-
113
-
114
-
115
-
116
-
117
-
118
-
119
-
120
-
121
-
122
-
123
-
124
-
125
-
126
-
127
-
128
-
129
-
130
-
131
-
132
-
133
-
134
-
135
-
136
-
137
-
138
 |
 |
