Dell 1320c User Guide - Page 110
Removing the Used Fuser, Installing a New Fuser
 |
UPC - 662919013061
View all Dell 1320c manuals
Add to My Manuals
Save this manual to your list of manuals |
Page 110 highlights
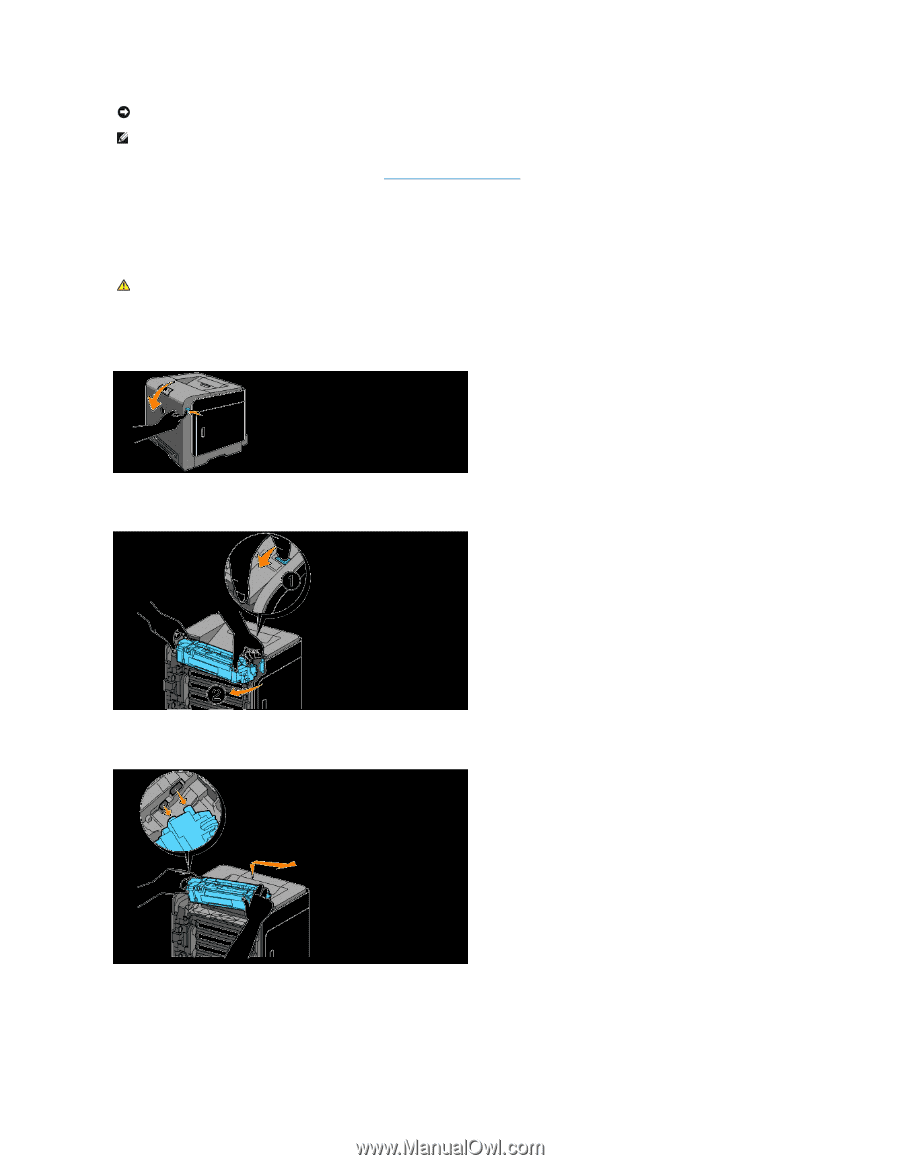
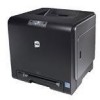
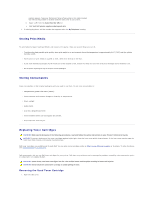
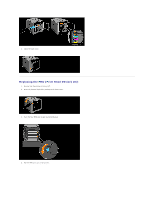
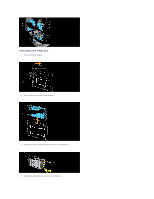
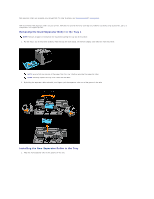
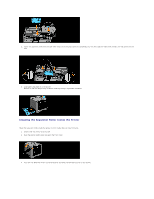
NOTICE: To protect the drums of the toner cartridges against bright light, close the front cover within three minutes. If the front cover remains open for more than three minutes, print quality may deteriorate. NOTE: Remove any print jobs from the output tray, and close the multipurpose feeder before opening the front cover. Dell fuser is available only through Dell. To order by phone, see "Contacting Dell™" on page 215. Dell recommends Dell fuser for your printer. Dell does not provide warranty coverage for problems caused by using accessories, parts, or components not supplied by Dell. Removing the Used Fuser CAUTION: To avoid burns, do not replace the fuser immediately after printing, as the fuser gets very hot during this process. 1. Turn off the printer and wait for 30 minutes for the fuser to cool down before removal. 2. Push the button (right side) and open the front cover. 3. Press the button on the right side of the fuser. 4. By holding both sides of the installed fuser, slightly fix the left side of the fuser and turn the right edge towards the front of the printer. Installing a New Fuser 1. Unpack a new fuser and hold both sides of the fuser with both hands. 2. Insert the left edge of the fuser to the wholes inside of the printer.
-
 1
1 -
2
-
3
-
4
-
5
-
6
-
7
-
8
-
9
-
10
-
11
-
12
-
13
-
14
-
15
-
16
-
17
-
18
-
19
-
20
-
21
-
22
-
23
-
24
-
25
-
26
-
27
-
28
-
29
-
30
-
31
-
32
-
33
-
34
-
35
-
36
-
37
-
38
-
39
-
40
-
41
-
42
-
43
-
44
-
45
-
46
-
47
-
48
-
49
-
50
-
51
-
52
-
53
-
54
-
55
-
56
-
57
-
58
-
59
-
60
-
61
-
62
-
63
-
64
-
65
-
66
-
67
-
68
-
69
-
70
-
71
-
72
-
73
-
74
-
75
-
76
-
77
-
78
-
79
-
80
-
81
-
82
-
83
-
84
-
85
-
86
-
87
-
88
-
89
-
90
-
91
-
92
-
93
-
94
-
95
-
96
-
97
-
98
-
99
-
100
-
101
-
102
-
103
-
104
-
 105
105 -
 106
106 -
 107
107 -
 108
108 -
 109
109 -
 110
110 -
 111
111 -
 112
112 -
 113
113 -
 114
114 -
 115
115 -
116
-
117
-
118
-
119
-
120
-
121
-
122
-
123
-
124
-
125
-
126
-
127
-
128
-
129
-
130
-
131
-
132
-
133
-
134
-
135
-
136
-
137
 |
 |