Dell 1320c User Guide - Page 133
Windows Server 2008 Firewall Before Printer Software Installation - driver windows 8 1
 |
UPC - 662919013061
View all Dell 1320c manuals
Add to My Manuals
Save this manual to your list of manuals |
Page 133 highlights
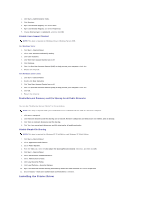
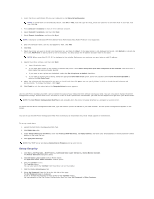
e. Select TCP/IP Settings from the list at the left side of the page. If the IP address is 0.0.0.0, wait for a few minutes to resolve the IP address automatically, and then display the TCP/IP Settings page again. You can also print and check the printer settings from the Report page. To print the Report page, press and hold the Continue button on the operator panel. Disable Microsoft® Windows® XP, Windows Vista®, Windows Server® 2003 (after SP1) , or Windows Server 2008 Firewall Before Printer Software Installation NOTE: This step may not be necessary if you have Windows XP Service Pack 2 installed. If your printer is connected directly to a network and the Windows XP, Windows Vista, Windows Server 2003 (after SP1), or Windows Server 2008 firewall is enabled, you cannot view your networked printer(s) when you run the Dell™ printer installation software. To prevent this situation, disable the firewall before you install the Dell printer software. To disable or enable the firewall, perform the following steps. NOTICE: Dell recommends that you enable your Windows XP, Windows Vista, Windows Server 2003 (after SP1), or Windows Server 2008 firewall after you install the printer software. Enabling the Windows XP, Windows Vista, Windows Server 2003 (after SP1), or Windows Server 2008 firewall after you install the printer software does not limit the use of your network printer. 1. Click the Start button and click Help and Support. 2. In the Search box, type firewall and then press Enter. In the list, click Turn Windows Firewall on or off and then follow the instructions on the screen. Local Printer Setup 1. Insert the Drivers and Utilities CD into your computer to start Easy Setup Navigator. NOTE: If the CD does not automatically launch, click Start® Run, and then type D:\setup_assist.exe (where D is the drive letter of your CD), and then click OK. 2. Press Software Installation to launch the installation software. 3. Select Network Installation, and then click Next. 4. Select Local Installation, and then click Next. 5. Select the printer you want to install from the printer list, and then click Next. If the target printer is not displayed on the list, click Refresh to refresh the list or click Add Printer to add a printer to the list manually. You may specify the IP address and port name at this point. If you have installed this printer on the server computer, select the I am setting up this printer on a server check box. NOTE: When using AutoIP, 0.0.0.0 is displayed in the installer. Before you can continue, you must enter a valid IP address. 6. Specify the printer settings, and then click Next. a. Enter the printer name. b. If you want other users on the network to access this printer, select Share this printer with other computers on the network, and then enter a share name that users will easily identify. c. If you want to set a printer as the default, select the Set this printer as default check box. d. If you want to restrict color printing, select the appropriate Dell ColorTrack option. Enter the password when Color-Password Enabled is selected for Dell ColorTrack. 7. Select the software and documentation you want to install, and then click Next. You can specify folders in which to install the Dell software and documentation. To change the folders, click Browse. 8. Click Finish to exit the wizard when the Congratulations! screen appears. If necessary, click Print Test Page to print a test page. Enable Network Discovery and File Sharing for all Public Networks You can skip "Disable User Account Control" for this procedure. NOTE: This step is required when you use Windows Vista or Windows Server 2008 for the server computer. 1. Click Start® Network. 2. Click Network discovery and file sharing are turned off. Network computers and devices are not visible. Click to change. 3. Click Turn on network discovery and file sharing. 4. Click Yes, turn on network discovery and file sharing for all public networks. Remote Printer Setup Before Installation
-
 1
1 -
2
-
3
-
4
-
5
-
6
-
7
-
8
-
9
-
10
-
11
-
12
-
13
-
14
-
15
-
16
-
17
-
18
-
19
-
20
-
21
-
22
-
23
-
24
-
25
-
26
-
27
-
28
-
29
-
30
-
31
-
32
-
33
-
34
-
35
-
36
-
37
-
38
-
39
-
40
-
41
-
42
-
43
-
44
-
45
-
46
-
47
-
48
-
49
-
50
-
51
-
52
-
53
-
54
-
55
-
56
-
57
-
58
-
59
-
60
-
61
-
62
-
63
-
64
-
65
-
66
-
67
-
68
-
69
-
70
-
71
-
72
-
73
-
74
-
75
-
76
-
77
-
78
-
79
-
80
-
81
-
82
-
83
-
84
-
85
-
86
-
87
-
88
-
89
-
90
-
91
-
92
-
93
-
94
-
95
-
96
-
97
-
98
-
99
-
100
-
101
-
102
-
103
-
104
-
105
-
106
-
107
-
108
-
109
-
110
-
111
-
112
-
113
-
114
-
115
-
116
-
117
-
118
-
119
-
120
-
121
-
122
-
123
-
124
-
125
-
126
-
127
-
 128
128 -
 129
129 -
 130
130 -
 131
131 -
 132
132 -
 133
133 -
 134
134 -
 135
135 -
 136
136 -
 137
137
 |
 |