Dell C1765NFW Dell Users Guide - Page 73
Hardware and Sound, User Account Control
 |
View all Dell C1765NFW manuals
Add to My Manuals
Save this manual to your list of manuals |
Page 73 highlights
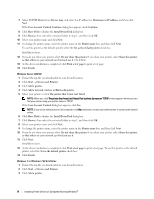
4 Click Add a network, wireless or Bluetooth printer. 5 Select your printer or click The printer that I want isn't listed. When you select your printer, go to step 8. When you click The printer that I want isn't listed, go to step 6. 6 Select Add a printer using a TCP/IP address or host name, and then click Next. 7 Select TCP/IP Device from Device type, and enter the IP address for Hostname or IP address, and then click Next. If the User Account Control dialog box appears, click Yes. NOTE: If you are an administrator on the computer, click Yes; otherwise, contact your administrator to continue the desired action. 8 Click Have Disk to display the Install From Disk dialog box. 9 Click Browse, then select the extracted folder in step 1, and then click OK. 10 Select your printer name and click Next. 11 To change the printer name, enter the printer name in the Printer name box, and then click Next. Installation starts. 12 As the driver installation is completed, click Print a test page to print a test page. To use this printer as the default printer, select the Set as the default printer check box. 13 Click Finish. Windows 8, Windows 8 64-bit Edition, or Windows Server 2012 1 Extract the zip file you downloaded to your desired location. 2 Right-click the bottom left corner of the screen, and then click Control Panel. 3 Click Hardware and Sound (Hardware for Windows Server 2012) → Devices and Printers → Add a printer. 4 Click Have Disk to display the Install From Disk dialog box. 5 Click Browse, and then select the extracted folder in step 1. 6 Click OK. 7 Select your printer name and click Next. 8 To change the printer name, enter the printer name in the Printer name box, and then click Next. Installation starts. 9 If you do not share your printer, select Do not share this printer. If you share your printer, select Share this printer so that others on your network can find and use it. Click Next. 10 As the driver installation is completed, click Print a test page to print a test page. To use this printer as the default printer, select the Set as the default printer check box. 11 Click Finish. Installing Printer Drivers on Computers Running Windows® 71
-
 1
1 -
2
-
3
-
4
-
5
-
6
-
7
-
8
-
9
-
10
-
11
-
12
-
13
-
14
-
15
-
16
-
17
-
18
-
19
-
20
-
21
-
22
-
23
-
24
-
25
-
26
-
27
-
28
-
29
-
30
-
31
-
32
-
33
-
34
-
35
-
36
-
37
-
38
-
39
-
40
-
41
-
42
-
43
-
44
-
45
-
46
-
47
-
48
-
49
-
50
-
51
-
52
-
53
-
54
-
55
-
56
-
57
-
58
-
59
-
60
-
61
-
62
-
63
-
64
-
65
-
66
-
67
-
 68
68 -
 69
69 -
 70
70 -
 71
71 -
 72
72 -
 73
73 -
 74
74 -
 75
75 -
 76
76 -
 77
77 -
 78
78 -
79
-
80
-
81
-
82
-
83
-
84
-
85
-
86
-
87
-
88
-
89
-
90
-
91
-
92
-
93
-
94
-
95
-
96
-
97
-
98
-
99
-
100
-
101
-
102
-
103
-
104
-
105
-
106
-
107
-
108
-
109
-
110
-
111
-
112
-
113
-
114
-
115
-
116
-
117
-
118
-
119
-
120
-
121
-
122
-
123
-
124
-
125
-
126
-
127
-
128
-
129
-
130
-
131
-
132
-
133
-
134
-
135
-
136
-
137
-
138
-
139
-
140
-
141
-
142
-
143
-
144
-
145
-
146
-
147
-
148
-
149
-
150
-
151
-
152
-
153
-
154
-
155
-
156
-
157
-
158
-
159
-
160
-
161
-
162
-
163
-
164
-
165
-
166
-
167
-
168
-
169
-
170
-
171
-
172
-
173
-
174
-
175
-
176
-
177
-
178
-
179
-
180
-
181
-
182
-
183
-
184
-
185
-
186
-
187
-
188
-
189
-
190
-
191
-
192
-
193
-
194
-
195
-
196
-
197
-
198
-
199
-
200
-
201
-
202
-
203
-
204
-
205
-
206
-
207
-
208
-
209
-
210
-
211
-
212
-
213
-
214
-
215
-
216
-
217
-
218
-
219
-
220
-
221
-
222
-
223
-
224
-
225
-
226
-
227
-
228
-
229
-
230
-
231
-
232
-
233
-
234
-
235
-
236
-
237
-
238
-
239
-
240
-
241
-
242
-
243
-
244
-
245
-
246
-
247
-
248
-
249
-
250
-
251
-
252
-
253
-
254
-
255
-
256
-
257
-
258
-
259
-
260
-
261
-
262
-
263
-
264
-
265
-
266
-
267
-
268
-
269
-
270
-
271
-
272
-
273
-
274
-
275
-
276
-
277
-
278
-
279
-
280
-
281
-
282
-
283
-
284
-
285
-
286
-
287
-
288
-
289
-
290
-
291
-
292
-
293
-
294
-
295
-
296
-
297
-
298
-
299
-
300
-
301
-
302
-
303
-
304
-
305
-
306
-
307
-
308
-
309
-
310
-
311
-
312
-
313
-
314
-
315
-
316
-
317
-
318
-
319
-
320
-
321
-
322
-
323
-
324
-
325
-
326
-
327
-
328
-
329
-
330
-
331
-
332
-
333
-
334
-
335
-
336
-
337
-
338
-
339
-
340
-
341
-
342
-
343
-
344
-
345
-
346
-
347
-
348
-
349
-
350
-
351
-
352
-
353
-
354
-
355
-
356
-
357
-
358
-
359
-
360
-
361
-
362
-
363
-
364
-
365
-
366
-
367
-
368
-
369
-
370
-
371
-
372
-
373
-
374
-
375
-
376
 |
 |