Dell V305 User Guide - Page 45
Printing All Photos - printer software
 |
UPC - 884116004004
View all Dell V305 manuals
Add to My Manuals
Save this manual to your list of manuals |
Page 45 highlights
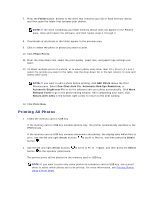
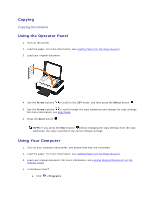
7. From the Folders pane, browse to the drive that contains your CD or flash memory device, and then open the folder that contains your photos. NOTE: If the drive containing your flash memory device does not appear in the Folders pane, close and reopen the software, and then repeat steps 1 through 2. 8. Thumbnails of all photos in the folder appear in the preview area. 9. Click to select the photo or photos you want to print. 10. Click Photo Prints. 11. From the drop-down lists, select the print quality, paper size, and paper type settings you want. 12. To select multiple prints of a photo, or to select photo sizes other than 10 x 15 cm (4 x 6 in.), select the options you want in the table. Use the drop-down list in the last column to view and select other sizes. NOTE: If you want to edit a photo before printing, click Edit Photo above the Print Preview pane. Select One-Click Auto Fix, Automatic Red-Eye Reduction, or Automatic Brightness Fix to let the software edit your photo automatically. Click More Retouch Tools to go to the photo-editing window. After completing your edits, click Return with edits in the bottom right corner to return to the print window. 13. Click Print Now. Printing All Photos 1. Insert the memory card or USB key. If the memory card or USB key contains photos only, the printer automatically switches to the PHOTO mode. If the memory card or USB key contains documents and photos, the display asks which files to print. Use the left and right Arrow buttons to scroll to Photos, and then press the Select button . 2. Use the left and right Arrow buttons button on the operator panel twice. to scroll to Print Images, and then press the Select The printer prints all the photos on the memory card or USB key. NOTE: If you want to print only some photos on a memory card or USB key, use a proof sheet to select which photos are to be printed. For more information, see Printing Photos Using a Proof Sheet.
-
 1
1 -
2
-
3
-
4
-
5
-
6
-
7
-
8
-
9
-
10
-
11
-
12
-
13
-
14
-
15
-
16
-
17
-
18
-
19
-
20
-
21
-
22
-
23
-
24
-
25
-
26
-
27
-
28
-
29
-
30
-
31
-
32
-
33
-
34
-
35
-
36
-
37
-
38
-
39
-
 40
40 -
 41
41 -
 42
42 -
 43
43 -
 44
44 -
 45
45 -
 46
46 -
 47
47 -
 48
48 -
 49
49 -
 50
50 -
51
-
52
-
53
-
54
-
55
-
56
-
57
-
58
-
59
-
60
-
61
-
62
-
63
-
64
-
65
-
66
-
67
-
68
-
69
-
70
-
71
-
72
-
73
-
74
-
75
-
76
-
77
-
78
-
79
-
80
-
81
-
82
-
83
-
84
-
85
-
86
-
87
-
88
-
89
-
90
-
91
-
92
-
93
-
94
-
95
-
96
-
97
-
98
-
99
-
100
-
101
-
102
-
103
-
104
-
105
-
106
-
107
-
108
-
109
-
110
-
111
-
112
-
113
-
114
-
115
-
116
-
117
-
118
-
119
-
120
-
121
-
122
-
123
-
124
-
125
-
126
-
127
-
128
-
129
-
130
-
131
-
132
-
133
 |
 |