Dell V305 User Guide - Page 5
Understanding the Operator Panel
 |
UPC - 884116004004
View all Dell V305 manuals
Add to My Manuals
Save this manual to your list of manuals |
Page 5 highlights
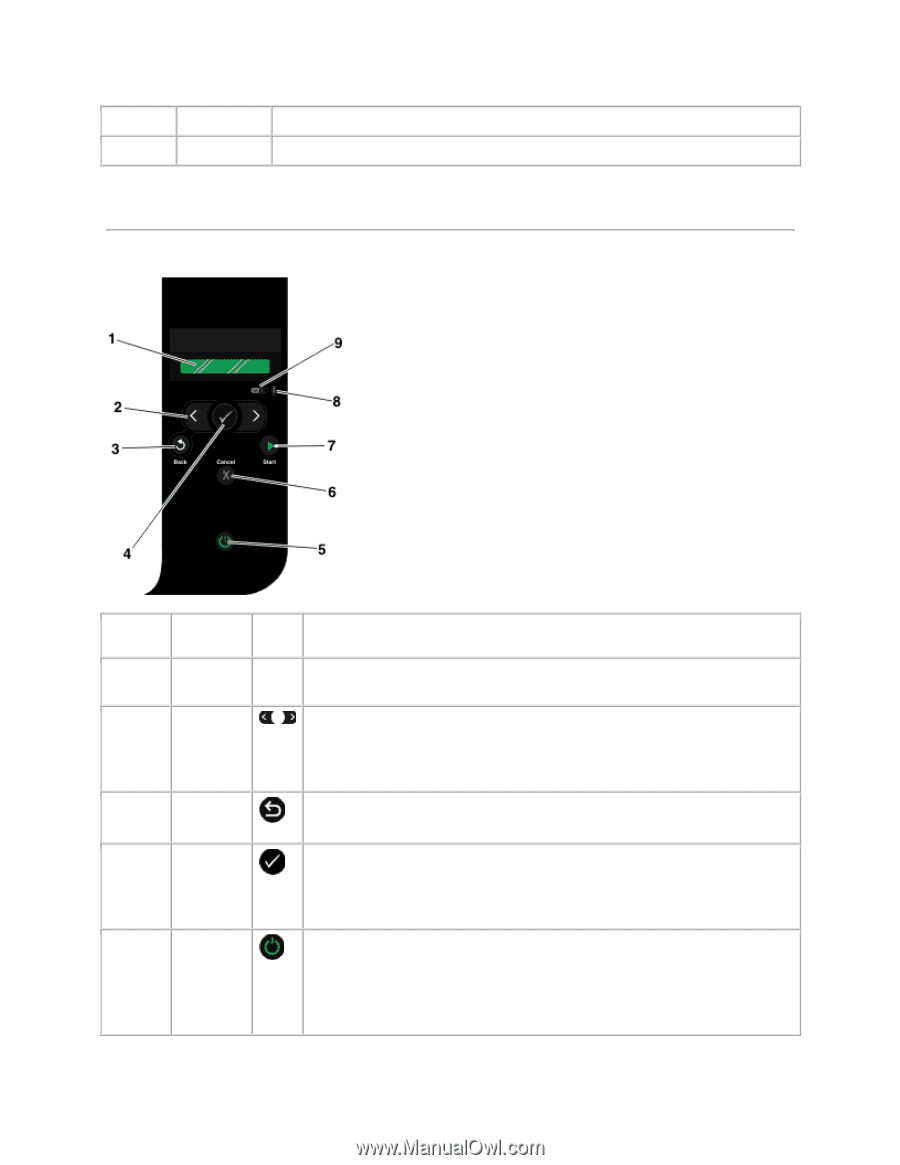
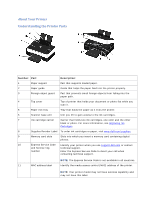
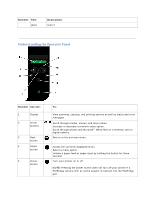
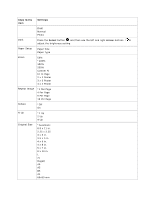
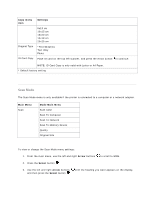
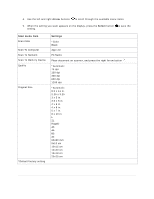
Number: Part: glass Description: scan it. Understanding the Operator Panel Number Use the: 1 Display 2 Arrow buttons 3 Back button 4 Select button 5 Power button To: View scanning, copying, and printing options as well as status and error messages. Scroll through modes, menus, and menu items. Increase or decrease a numeric value option. Scroll through photos and Microsoft® Office files on a memory card or digital camera. Return to the previous menu. Access the currently displayed menu. Select a menu option. Initiate a paper feed or paper eject by holding the button for three seconds. Turn your printer on or off. NOTE: Pressing the power button does not turn off your printer if a PictBridge camera with an active session is inserted into the PictBridge port.
-
 1
1 -
 2
2 -
 3
3 -
 4
4 -
 5
5 -
 6
6 -
 7
7 -
 8
8 -
 9
9 -
 10
10 -
 11
11 -
12
-
13
-
14
-
15
-
16
-
17
-
18
-
19
-
20
-
21
-
22
-
23
-
24
-
25
-
26
-
27
-
28
-
29
-
30
-
31
-
32
-
33
-
34
-
35
-
36
-
37
-
38
-
39
-
40
-
41
-
42
-
43
-
44
-
45
-
46
-
47
-
48
-
49
-
50
-
51
-
52
-
53
-
54
-
55
-
56
-
57
-
58
-
59
-
60
-
61
-
62
-
63
-
64
-
65
-
66
-
67
-
68
-
69
-
70
-
71
-
72
-
73
-
74
-
75
-
76
-
77
-
78
-
79
-
80
-
81
-
82
-
83
-
84
-
85
-
86
-
87
-
88
-
89
-
90
-
91
-
92
-
93
-
94
-
95
-
96
-
97
-
98
-
99
-
100
-
101
-
102
-
103
-
104
-
105
-
106
-
107
-
108
-
109
-
110
-
111
-
112
-
113
-
114
-
115
-
116
-
117
-
118
-
119
-
120
-
121
-
122
-
123
-
124
-
125
-
126
-
127
-
128
-
129
-
130
-
131
-
132
-
133
 |
 |