Dell V305 User Guide - Page 56
Scanning Documents for Editing
 |
UPC - 884116004004
View all Dell V305 manuals
Add to My Manuals
Save this manual to your list of manuals |
Page 56 highlights
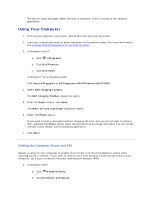
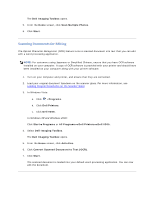
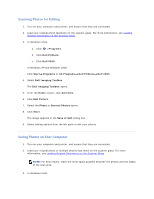
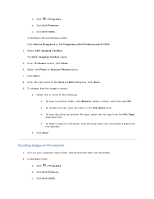
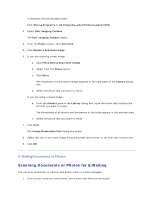
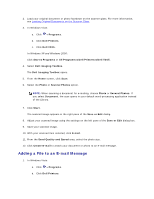
The Dell Imaging Toolbox opens. 5. From the Home screen, click Scan Multiple Photos. 6. Click Start. Scanning Documents for Editing The Optical Character Recognition (OCR) feature turns a scanned document into text that you can edit with a word-processing application. NOTE: For customers using Japanese or Simplified Chinese, ensure that you have OCR software installed on your computer. A copy of OCR software is provided with your printer and should have been installed on your computer along with your printer software. 1. Turn on your computer and printer, and ensure that they are connected. 2. Load your original document facedown on the scanner glass. For more information, see Loading Original Documents on the Scanner Glass. 3. In Windows Vista: a. Click Programs. b. Click Dell Printers. c. Click Dell V305. In Windows XP and Windows 2000: Click Start Programs or All Programs Dell Printers Dell V305. 4. Select Dell Imaging Toolbox. The Dell Imaging Toolbox opens. 5. From the Home screen, click Activities. 6. Click Convert Scanned Document to Text (OCR). 7. Click Start. The scanned document is loaded into your default word-processing application. You can now edit the document.
-
 1
1 -
2
-
3
-
4
-
5
-
6
-
7
-
8
-
9
-
10
-
11
-
12
-
13
-
14
-
15
-
16
-
17
-
18
-
19
-
20
-
21
-
22
-
23
-
24
-
25
-
26
-
27
-
28
-
29
-
30
-
31
-
32
-
33
-
34
-
35
-
36
-
37
-
38
-
39
-
40
-
41
-
42
-
43
-
44
-
45
-
46
-
47
-
48
-
49
-
50
-
 51
51 -
 52
52 -
 53
53 -
 54
54 -
 55
55 -
 56
56 -
 57
57 -
 58
58 -
 59
59 -
 60
60 -
 61
61 -
62
-
63
-
64
-
65
-
66
-
67
-
68
-
69
-
70
-
71
-
72
-
73
-
74
-
75
-
76
-
77
-
78
-
79
-
80
-
81
-
82
-
83
-
84
-
85
-
86
-
87
-
88
-
89
-
90
-
91
-
92
-
93
-
94
-
95
-
96
-
97
-
98
-
99
-
100
-
101
-
102
-
103
-
104
-
105
-
106
-
107
-
108
-
109
-
110
-
111
-
112
-
113
-
114
-
115
-
116
-
117
-
118
-
119
-
120
-
121
-
122
-
123
-
124
-
125
-
126
-
127
-
128
-
129
-
130
-
131
-
132
-
133
 |
 |