Dell V305 User Guide - Page 87
Adding the Shared Printer on Other Network Computers
 |
UPC - 884116004004
View all Dell V305 manuals
Add to My Manuals
Save this manual to your list of manuals |
Page 87 highlights
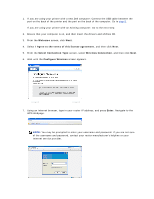
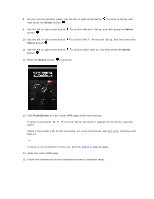
4. Click OK. Adding the Shared Printer on Other Network Computers To share the printer with other computers on the network, perform the following steps on the client computers: In Windows Vista: 1. Click Control Panel. 2. Click Hardware and Sound. 3. Click Printers. 4. Click Add a printer. 5. Click Add a network, wireless or Bluetooth printer. 6. To manually connect to the shared printer, click The printer I want isn't listed. 7. From the Find a printer by name or TCP/IP address dialog box, click Select a shared printer by name, and then type the printer share name. To view the name of the computer that you want to share the printer with, go to the host computer. a. Click Control Panel. b. Click System and Maintenance. c. Click System. 8. Click Next. 9. Follow instructions on the computer screen to complete the installation. In Windows XP and Windows 2000: 1. In Windows XP, click Start Settings Control Panel Printers and Other Hardware Printers and Faxes. In Windows 2000, click Start Settings Printers. 2. Click Add a printer. 3. From the Add Printer Wizard dialog box, click Next. 4. From the Local or Network Printer dialog box, click A network printer, or a printer attached to another computer.
-
 1
1 -
2
-
3
-
4
-
5
-
6
-
7
-
8
-
9
-
10
-
11
-
12
-
13
-
14
-
15
-
16
-
17
-
18
-
19
-
20
-
21
-
22
-
23
-
24
-
25
-
26
-
27
-
28
-
29
-
30
-
31
-
32
-
33
-
34
-
35
-
36
-
37
-
38
-
39
-
40
-
41
-
42
-
43
-
44
-
45
-
46
-
47
-
48
-
49
-
50
-
51
-
52
-
53
-
54
-
55
-
56
-
57
-
58
-
59
-
60
-
61
-
62
-
63
-
64
-
65
-
66
-
67
-
68
-
69
-
70
-
71
-
72
-
73
-
74
-
75
-
76
-
77
-
78
-
79
-
80
-
81
-
 82
82 -
 83
83 -
 84
84 -
 85
85 -
 86
86 -
 87
87 -
 88
88 -
 89
89 -
 90
90 -
 91
91 -
 92
92 -
93
-
94
-
95
-
96
-
97
-
98
-
99
-
100
-
101
-
102
-
103
-
104
-
105
-
106
-
107
-
108
-
109
-
110
-
111
-
112
-
113
-
114
-
115
-
116
-
117
-
118
-
119
-
120
-
121
-
122
-
123
-
124
-
125
-
126
-
127
-
128
-
129
-
130
-
131
-
132
-
133
 |
 |