Epson C31CA85090 Software User Guide - Page 34
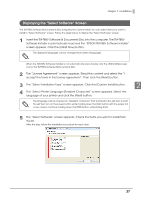
The Select Module screen appears again. Click the [Finish] button.
 |
View all Epson C31CA85090 manuals
Add to My Manuals
Save this manual to your list of manuals |
Page 34 highlights
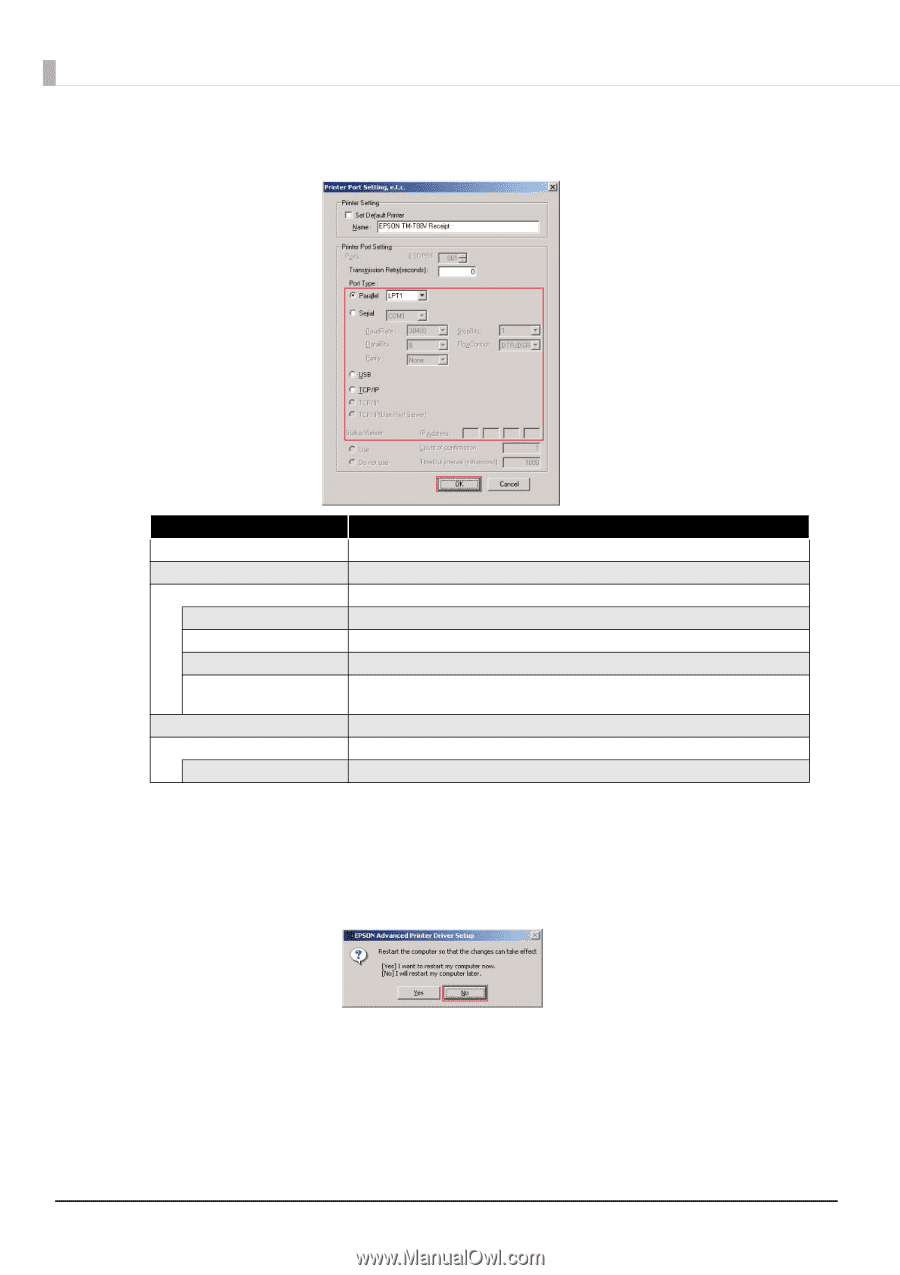
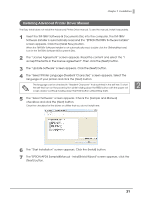
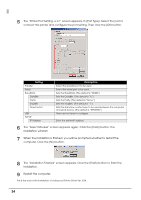
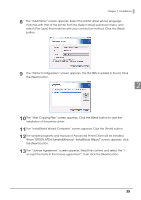
5 The "Printer Port Setting, e.t.c" screen appears. In [Port Type], Select the port to connect the printer and configure the port setting. Then click the [OK] button. Setting Parallel Serial BaudRate DataBits Parity StopBits FlowControl USB TCP/IP IP Address Description Select the parallel port to be used. Select the serial port to be used. Sets the BaudRate. (The default is "38400.") Sets the DataBits. (The default is "8.") Sets the Parity. (The default is "None.") Sets the StopBits. (The default is "1.") Sets the data flow control type to be used between the computer and serial device. (The default is "DTR/DSR.") There are no items to configure. Enter the printer IP address. 6 The "Select Module" screen appears again. Click the [Finish] button. The installation will start. 7 When the installation is finished, you will be prompted whether to restart the computer. Click the [No] button. 8 The "Installation Finished" screen appears. Click the [Finish] button to finish the installation. 9 Restart the computer. This is the end of the installation of Advanced Printer Driver Ver. 3.04. 34
-
 1
1 -
2
-
3
-
4
-
5
-
6
-
7
-
8
-
9
-
10
-
11
-
12
-
13
-
14
-
15
-
16
-
17
-
18
-
19
-
20
-
21
-
22
-
23
-
24
-
25
-
26
-
27
-
28
-
 29
29 -
 30
30 -
 31
31 -
 32
32 -
 33
33 -
 34
34 -
 35
35 -
 36
36 -
 37
37 -
 38
38 -
 39
39 -
40
-
41
-
42
-
43
-
44
-
45
-
46
-
47
-
48
-
49
-
50
-
51
-
52
-
53
-
54
-
55
-
56
-
57
-
58
-
59
-
60
-
61
-
62
-
63
-
64
-
65
-
66
-
67
-
68
-
69
-
70
-
71
-
72
-
73
-
74
-
75
-
76
-
77
-
78
-
79
-
80
-
81
-
82
-
83
-
84
-
85
-
86
-
87
-
88
-
89
-
90
-
91
-
92
-
93
-
94
-
95
-
96
-
97
-
98
-
99
-
100
-
101
-
102
-
103
-
104
-
105
-
106
-
107
-
108
-
109
-
110
-
111
-
112
-
113
-
114
-
115
-
116
-
117
-
118
-
119
-
120
-
121
-
122
-
123
-
124
-
125
-
126
-
127
-
128
 |
 |