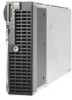
HP BL260c HP BladeSystem c-Class Enclosure Troubleshooting Guide
HP BL260c - ProLiant - G5 Manual
 |
UPC - 883585668663
View all HP BL260c manuals
Add to My Manuals
Save this manual to your list of manuals |
HP BL260c manual content summary:
- HP BL260c | HP BladeSystem c-Class Enclosure Troubleshooting Guide - Page 1
HP BladeSystem c-Class Enclosure Troubleshooting Guide Part Number 460224-002 July 2009 (Second Edition) - HP BL260c | HP BladeSystem c-Class Enclosure Troubleshooting Guide - Page 2
for the person who installs, administers, and troubleshoots HP BladeSystem c-Class products. Only persons experienced in server blade technology and configuration should attempt these procedures. HP assumes you are qualified in the servicing of computer equipment and trained in recognizing hazards - HP BL260c | HP BladeSystem c-Class Enclosure Troubleshooting Guide - Page 3
discharge...12 Common problem resolution ...14 Troubleshooting with the HP BladeSystem Insight Display 14 Loose connections ...14 Service notifications...14 Firmware updates...15 HP BladeSystem Insight Display troubleshooting 16 Insight Display overview...16 Troubleshooting the Insight Display - HP BL260c | HP BladeSystem c-Class Enclosure Troubleshooting Guide - Page 4
...91 Verifying firmware versions...92 System maintenance tools...93 Drivers ...93 ProLiant Support Packs ...93 Version control ...93 Operating system version support ...93 HP Smart Update Manager...93 System Online ROM flash component utility 94 ROMPaq utility diskette or USB drive key 94 ROM - HP BL260c | HP BladeSystem c-Class Enclosure Troubleshooting Guide - Page 5
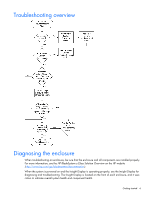
screen to resolve all reported errors. If the procedures provided by the Insight Display do not correct the issue, then use the procedures in this guide to further troubleshoot the issue. CAUTION: Always contact an authorized service provider to replace the midplane assembly. Getting started 5 - HP BL260c | HP BladeSystem c-Class Enclosure Troubleshooting Guide - Page 6
. For more information, see the HP BladeSystem c-Class Solution Overview on the HP website (http://www.hp.com/go/bladesystem/documentation). When the system is powered on and the Insight Display is operating properly, use the Insight Display for diagnosing and troubleshooting. The Insight Display is - HP BL260c | HP BladeSystem c-Class Enclosure Troubleshooting Guide - Page 7
Red Description Component bay is not populated DVD-ROM drive is populated, no disc is inserted Component bay is populated, component is powered off Component bay is populated, component is powered Display panel ("HP BladeSystem Insight Display components" on page 76, "HP BladeSystem Insight Display - HP BL260c | HP BladeSystem c-Class Enclosure Troubleshooting Guide - Page 8
Health Summary • Enclosure Settings • Enclosure Info • Blade or Port Info • Turn Enclosure UID on/off • KVM Menu-This option is available if the enclosure supports KVM. TIP: Within any menu option, navigate the specific problems detected by the Onboard Administrator. Always begin the troubleshooting - HP BL260c | HP BladeSystem c-Class Enclosure Troubleshooting Guide - Page 9
components or components installed in the wrong bay. • Configuration errors include problems with server blades and the corresponding interconnect modules. • Power errors include insufficient power for a device or the power subsystem redundancy is degraded. • Cooling errors indicate insufficient - HP BL260c | HP BladeSystem c-Class Enclosure Troubleshooting Guide - Page 10
then press the OK button to scroll through all errors. The type and number of errors are displayed at the top of the error screen. To view troubleshooting the server. Important safety information Before servicing this product, read the Important Safety Information document provided with the server - HP BL260c | HP BladeSystem c-Class Enclosure Troubleshooting Guide - Page 11
or field serviceable parts. Do manual 145.0 lb to material handling. 480.0 lb These symbols, on power power cords to completely disconnect power from the system. Warnings and cautions WARNING: Only authorized technicians trained by HP should attempt to repair this equipment. All troubleshooting - HP BL260c | HP BladeSystem c-Class Enclosure Troubleshooting Guide - Page 12
for 65.8 kg to 217.7 manual handling. kg • Obtain adequate assistance to lift and stabilize the chassis during installation or 145.0 lb to removal. 480.0 lb • The server is unstable when not fastened to the rails. • When mounting the server in a rack, remove the power supplies and any other - HP BL260c | HP BladeSystem c-Class Enclosure Troubleshooting Guide - Page 13
tools. • Use a portable field service kit with a folding static-dissipating work mat. If you do not have any of the suggested equipment for proper grounding, have an authorized reseller install the part. For more information on static electricity or assistance with product installation, contact - HP BL260c | HP BladeSystem c-Class Enclosure Troubleshooting Guide - Page 14
Access the Health Summary screen to review and troubleshoot all reported errors. For more Service notifications To view the latest service notifications, refer to the HP website (http://www.hp.com/go/bizsupport). Select the appropriate server model, and then click the Troubleshoot a Problem - HP BL260c | HP BladeSystem c-Class Enclosure Troubleshooting Guide - Page 15
of a particular server blade or option firmware from the HP Support website (http://www.hp.com/support) • Components for option firmware updates available from the HP Storage Products Software and Drivers website (http://www.hp.com/support/proliantstorage) HP offers a subscription service that can - HP BL260c | HP BladeSystem c-Class Enclosure Troubleshooting Guide - Page 16
Display screen, navigate the cursor to the Enclosure Health icon and press OK. For information on driver and firmware updates, see the HP website (http://www.hp.com/go/blades/). Troubleshooting the Insight Display The Insight Display is the diagnostics panel for the enclosure. It is controlled by - HP BL260c | HP BladeSystem c-Class Enclosure Troubleshooting Guide - Page 17
that the power supplies are installed and operate properly. Complete step 1 again. • If the Onboard Administrator health LED is on, then continue to the next step. Action Check the Insight Display to be sure that no firmware updates are in progress. HP BladeSystem Insight Display troubleshooting 17 - HP BL260c | HP BladeSystem c-Class Enclosure Troubleshooting Guide - Page 18
firmware update, then wait until the firmware update is complete. When the update is complete, continue to the next step. • If the enclosure is not performing a firmware update, then continue to the next step. Action Verify the number the next step. HP BladeSystem Insight Display troubleshooting 18 - HP BL260c | HP BladeSystem c-Class Enclosure Troubleshooting Guide - Page 19
Symptoms: HP BladeSystem troubleshooting procedures require powering down an entire enclosure. To avoid possible data loss, always secure permission before powering down an enclosure. CAUTION: To avoid data loss, do not remove an Onboard Administrator when the Insight Display shows a firmware update - HP BL260c | HP BladeSystem c-Class Enclosure Troubleshooting Guide - Page 20
power to the enclosure. 2 Be sure that the power supplies are installed and are operating properly. 3 Complete step 1 again. Action Check the Insight Display to be sure that no firmware updates the Onboard Administrator (suspect OA #X) in OA bay Y. HP BladeSystem Insight Display troubleshooting 20 - HP BL260c | HP BladeSystem c-Class Enclosure Troubleshooting Guide - Page 21
#X failed. If OA #X has failed, do one of the following: • If replacing OA #X with a service spare part, then continue to the next step. • If replacing OA #X with OA #Y, then continue to step 8. Administrator password from the label on the OA tray. HP BladeSystem Insight Display troubleshooting 21 - HP BL260c | HP BladeSystem c-Class Enclosure Troubleshooting Guide - Page 22
the Onboard Administrator firmware is the correct version. Update the Onboard Administrator firmware, if necessary. 4 Complete the Onboard Administrator setup wizard or restore a previously saved enclosure configuration file. 5 If not using LDAP for authentication, then manually update the passwords - HP BL260c | HP BladeSystem c-Class Enclosure Troubleshooting Guide - Page 23
Administrator (OA #X). 2 Remove the OA tray and install a service spare or known-working OA tray. 3 Install the active Onboard and 10. Action Test the Insight Display cable connection: 1 Power down the devices installed in device bays 9 and 10. HP BladeSystem Insight Display troubleshooting 23 - HP BL260c | HP BladeSystem c-Class Enclosure Troubleshooting Guide - Page 24
Step Step 13 HP BladeSystem c7000 Enclosure Insight Display action and verification Verification 1 OA #X in OA bay X. 7 Install OA #Y, if present. Contact an authorized service provider to complete the midplane assembly replacement (on page 69). HP BladeSystem Insight Display troubleshooting 24 - HP BL260c | HP BladeSystem c-Class Enclosure Troubleshooting Guide - Page 25
installed in the appropriate bay. Location errors can occur on server blades, storage blades, power supplies, and fans. To correct a location error: 1. Use the arrow buttons to navigate to Fix This, and press OK. 2. Review and complete the corrective action suggested by the Insight Display. Remove - HP BL260c | HP BladeSystem c-Class Enclosure Troubleshooting Guide - Page 26
components. Device errors Device errors occur when a component has degraded health, a non-critical device-specific error, or has failed. Device errors can occur on all components, including: • Server blades • Storage blades • Power supplies • Interconnect modules Enclosure troubleshooting 26 - HP BL260c | HP BladeSystem c-Class Enclosure Troubleshooting Guide - Page 27
all removal and replacement procedures used in this document, see the appropriate enclosure maintenance and service guide on the HP website (http://www.hp.com/go/bladesystem/documentation). For specific component LED definitions and component identification, see "Component identification (on page 72 - HP BL260c | HP BladeSystem c-Class Enclosure Troubleshooting Guide - Page 28
server blade that has the the Onboard Administrator highest vfan sensor, or has failed and iLO 2. to complete BIOS POST. Procedures: Fan LED is flashing amber CAUTION: Some troubleshooting procedures require powering then verify that the fan firmware is not being updated for the suspect fan. - HP BL260c | HP BladeSystem c-Class Enclosure Troubleshooting Guide - Page 29
LED continues to flash after completing all of the Insight Display troubleshooting steps, then continue to the next step. Action A connection problem between the fan and the Insight Display is indicated. Contact an HP authorized service provider and complete the steps in the "Midplane assembly - HP BL260c | HP BladeSystem c-Class Enclosure Troubleshooting Guide - Page 30
LED continues to flash after completing all of the Insight Display troubleshooting steps, then continue to the next step. Action A connection problem between the fan and the Insight Display is indicated. Contact an HP authorized service provider and complete the steps in the "Midplane assembly - HP BL260c | HP BladeSystem c-Class Enclosure Troubleshooting Guide - Page 31
appropriate enclosure maintenance and service guide on the HP website (http://www.hp.com/go/bladesystem/documentation). For specific component LED definitions and component identification, see "Component identification (on page 72)." Symptoms: Power supply failure Symptom The power LED is off. The - HP BL260c | HP BladeSystem c-Class Enclosure Troubleshooting Guide - Page 32
it with a service spare power supply. Verification If the power supply LEDs indicate normal condition, then the original power supply had failed and the repair is complete. • If the power supply LEDs indicate other than normal condition and you are troubleshooting an HP BladeSystem c7000 Enclosure - HP BL260c | HP BladeSystem c-Class Enclosure Troubleshooting Guide - Page 33
off, then the suspect power supply has failed. Continue to the next step. If the fault LED is on, then the original power supply did not fail. Remove the service spare power supply and install the original power supply. Continue to step 14. Action Install the OA tray. Enclosure troubleshooting 33 - HP BL260c | HP BladeSystem c-Class Enclosure Troubleshooting Guide - Page 34
and all fault LEDs remain off, then continue as indicated: • When troubleshooting an HP BladeSystem c7000 Enclosure, continue to the next step. • When troubleshooting an HP BladeSystem c3000 Enclosure, continue with step 5. If the power LEDs and the fault LEDs indicate a fault, then the test the OA - HP BL260c | HP BladeSystem c-Class Enclosure Troubleshooting Guide - Page 35
(on page 69). Server blade troubleshooting Server blades interact with the enclosure power, cooling, and management infrastructure. This section describes how to troubleshoot a server blade failure inside the enclosure. Other server blade troubleshooting applies to problems that do not involve - HP BL260c | HP BladeSystem c-Class Enclosure Troubleshooting Guide - Page 36
server blade maintenance and service guide on the HP website (http://www.hp.com/go/bladesystem/documentation). For specific An Insight Display configuration error - is reported for this device bay. To correct the issue, follow the Insight Display steps. An Insight Display power error is - - HP BL260c | HP BladeSystem c-Class Enclosure Troubleshooting Guide - Page 37
. Troubleshoot the processor to correct the issue. Perform the following steps as instructed in the server blade documentation: 1 Remove the server blade. 2 Remove the processor. 3 Install a spare processor. 4 Install the server blade in the original device bay. 5 If the server blade powers up - HP BL260c | HP BladeSystem c-Class Enclosure Troubleshooting Guide - Page 38
specific error report. If not using the HP OS agents, then an error may not be logged and a memory error is indicated. Correct the issue listed in the IML log. If no issue is listed, then replace the memory. Procedures: Server blade errors CAUTION: Some troubleshooting procedures require powering - HP BL260c | HP BladeSystem c-Class Enclosure Troubleshooting Guide - Page 39
the device bay with the damaged connector until the midplane assembly is replaced. Action Reseat the suspect server blade. Verification If the server blade powers up, then the repair is complete. If the server blade does not power up, then continue to the next step. Enclosure troubleshooting 39 - HP BL260c | HP BladeSystem c-Class Enclosure Troubleshooting Guide - Page 40
c3000 Enclosure, then remove the c3000 OA tray and replace it with a service spare part. If troubleshooting an HP BladeSystem c7000 Enclosure, then continue to the next step. Verification If the server blade powers up, then the original BladeSystem c3000 OA tray failed. Continue to step 13 - HP BL260c | HP BladeSystem c-Class Enclosure Troubleshooting Guide - Page 41
OA #X and install OA #Y, if present, or a spare OA #Y into OA bay 1. Verification If the server blade powers up, then OA #X failed. If replacing a single Onboard Administrator with a service spare part, then continue with the next step. If replacing the active Onboard Administrator with OA#Y, then - HP BL260c | HP BladeSystem c-Class Enclosure Troubleshooting Guide - Page 42
14 Step 15 Server blade errors action configuration file. 5 If not using LDAP for authentication, then manually update the passwords. Action Install OA #Y in OA bay Y. Install a service spare Onboard Administrator in OA bay X to replace the failed Onboard Administrator. Enclosure troubleshooting - HP BL260c | HP BladeSystem c-Class Enclosure Troubleshooting Guide - Page 43
Action Contact an authorized service provider to complete the midplane assembly replacement (on page 69). Partner blade troubleshooting Partner blades are a special class of blade that are installed in a device bay. The partner blades are either connected to a server blade or interconnect module in - HP BL260c | HP BladeSystem c-Class Enclosure Troubleshooting Guide - Page 44
blade is powered up, then power down the partner server blade before powering up the partner blade. Partner blades for interconnect modules require the interconnect module to be installed for operation. Partner blade health LED is - green, but another LED on this partner blade is red - HP BL260c | HP BladeSystem c-Class Enclosure Troubleshooting Guide - Page 45
or service spare part. Verification If the partner blade health LED is green, then the suspect Onboard Administrator failed. The repair is complete. If the partner blade health LED is off, then the suspect Onboard Administrator did not fail. Continue as directed: • If troubleshooting an HP - HP BL260c | HP BladeSystem c-Class Enclosure Troubleshooting Guide - Page 46
69). Onboard Administrator troubleshooting The Onboard Administrator manages the power, cooling, configuration, and status of the enclosure. For more information, see the Onboard Administrator documentation on the HP website (http://www.hp.com/support). For specific component LED definitions and - HP BL260c | HP BladeSystem c-Class Enclosure Troubleshooting Guide - Page 47
fault LED is off. Verification If no power supply LEDs are on, then see "Power supply troubleshooting (on page 31)." If at least one power supply indicates normal LED status, then continue to the next step. Action HP BladeSystem c7000 Enclosure If the OA tray has a single Onboard Administrator - HP BL260c | HP BladeSystem c-Class Enclosure Troubleshooting Guide - Page 48
indicates that the second or non-suspect Onboard Administrator has completed power-on tests. If the second or non-suspect HP BladeSystem c3000 OA operates properly, then replace the suspect Onboard OA tray. 3 Install all Onboard Administrators in their original locations. Enclosure troubleshooting 48 - HP BL260c | HP BladeSystem c-Class Enclosure Troubleshooting Guide - Page 49
power authorized service provider Update the Onboard Administrator firmware, if necessary. 4 Complete the Onboard Administrator setup wizard or restore a previously saved enclosure configuration file. 5 If not using LDAP for authentication, then manually update the passwords. Enclosure troubleshooting - HP BL260c | HP BladeSystem c-Class Enclosure Troubleshooting Guide - Page 50
modules, interact with the enclosure for management, power, and cooling. This section describes how to diagnose problems that occur during the interaction between interconnect modules and the enclosure. For specific interconnect module troubleshooting procedures, see the component documentation. For - HP BL260c | HP BladeSystem c-Class Enclosure Troubleshooting Guide - Page 51
module health LED is off, then the suspect Onboard Administrator is not causing the error. • If troubleshooting an HP BladeSystem c7000 Enclosure, then continue to the next step. • If troubleshooting an HP BladeSystem c3000 Enclosure, then continue to step 7. Action Replace the OA tray: 1 Remove all - HP BL260c | HP BladeSystem c-Class Enclosure Troubleshooting Guide - Page 52
, iLO 2, and BIOS is updated to the newest versions available. Always verify firmware versions before proceeding with the steps in this section. To use the internal DVD-ROM drive, be sure that the front USB connector is enabled. Some HP BladeSystem c3000 Enclosures may be configured in one of the - HP BL260c | HP BladeSystem c-Class Enclosure Troubleshooting Guide - Page 53
DVD-ROM troubleshooting (on page 56)." Action 1 Use the Insight Display to select Connect a server. 2 Press the OK button. Verification If the Insight Display reports "No Support," then the server blade does not support Enclosure DVD. If any of the buttons indicate an iLO firmware upgrade is - HP BL260c | HP BladeSystem c-Class Enclosure Troubleshooting Guide - Page 54
to the selected button is green, indicating that the server blade is connected to the DVD-ROM drive. The selected button should now read "Disconnect." Procedures: DVD-ROM drive troubleshooting CAUTION: Some troubleshooting procedures require powering down an entire enclosure. To avoid possible data - HP BL260c | HP BladeSystem c-Class Enclosure Troubleshooting Guide - Page 55
Step Step 3 Step 4 Step 5 Step 6 Step 7 DVD-ROM drive troubleshooting action and verification Action 1 Eject the internal DVD-ROM drive. • For an HP BladeSystem c3000 Enclosure installed in a rack, press the top corner of DVD-ROM drive. • For an HP BladeSystem c3000 Tower Enclosure, press the right - HP BL260c | HP BladeSystem c-Class Enclosure Troubleshooting Guide - Page 56
DVD-ROM status icons are gray, indicating that the server blade is not connected to the DVD-ROM drive. Return to step 4. Procedures: HP BladeSystem c3000 Enclosure DVD-ROM troubleshooting CAUTION: Some troubleshooting procedures require powering down an entire enclosure. To avoid possible data loss - HP BL260c | HP BladeSystem c-Class Enclosure Troubleshooting Guide - Page 57
Support," then the device does not support Enclosure DVD-ROM. If any of the buttons indicate an iLO firmware upgrade is needed, then upgrade the iLO firmware that the server blade is connected to the DVD-ROM drive. The selected button should now read "Disconnect." Enclosure troubleshooting 57 - HP BL260c | HP BladeSystem c-Class Enclosure Troubleshooting Guide - Page 58
icon and the firmware update progress bar. Step Step 1 Step 2 Step 3 Step 4 External DVD-ROM troubleshooting action and verification Action Test the DVD-ROM drive connections: 1 Verify that the DVD-ROM drive USB cable is plugged into the active OA USB connector. 2 Verify that power is connected to - HP BL260c | HP BladeSystem c-Class Enclosure Troubleshooting Guide - Page 59
72)." Symptoms: c3000 enclosure KVM errors The procedures in this section assume that the firmware for Onboard Administrator, iLO 2, and BIOS is updated to the newest versions available. Always verify firmware versions before continuing with the steps in this section. Enclosure troubleshooting 59 - HP BL260c | HP BladeSystem c-Class Enclosure Troubleshooting Guide - Page 60
internal DVD-ROM drive. • The rear firmware update progress bar. Step Step 1 External KVM switch troubleshooting action and verification Action Press the KVM keyboard Print Screen key and use the external KVM Switch Port Selection menu to select a working port. Verification If the KVM monitor powers - HP BL260c | HP BladeSystem c-Class Enclosure Troubleshooting Guide - Page 61
: Some troubleshooting procedures require powering down an entire enclosure. To avoid possible data loss, always secure permission before powering down an enclosure. CAUTION: To avoid data loss, do not remove an Onboard Administrator when the Insight Display shows a firmware update in progress - HP BL260c | HP BladeSystem c-Class Enclosure Troubleshooting Guide - Page 62
and the firmware update progress bar. The KVM monitor must support a minimum resolution of 1024x768 to operate properly with the c3000 KVM module. Step External KVM monitor troubleshooting action and verification Step 1 Step 2 Step 3 Action Connect the KVM monitor directly to a server blade VGA - HP BL260c | HP BladeSystem c-Class Enclosure Troubleshooting Guide - Page 63
with the Lock icon and the firmware update progress bar. The KVM monitor must support a minimum resolution of 1024x768 to operate properly with the c3000 KVM module. Step KVM USB troubleshooting action and verification Step 1 Step 2 Action Connect to the DVD-ROM drive: 1 Use Insight Display to - HP BL260c | HP BladeSystem c-Class Enclosure Troubleshooting Guide - Page 64
of the Insight Display Main Menu, then contact an authorized service provider to complete the midplane assembly replacement (on page 69). Procedures: KVM Linux troubleshooting CAUTION: Some troubleshooting procedures require powering down an entire enclosure. To avoid possible data loss, always - HP BL260c | HP BladeSystem c-Class Enclosure Troubleshooting Guide - Page 65
problems CAUTION: Some troubleshooting procedures require powering down an entire enclosure. To avoid possible data loss, always secure permission before powering down an enclosure. CAUTION: To avoid data loss, do not remove an Onboard Administrator when the Insight Display shows a firmware update - HP BL260c | HP BladeSystem c-Class Enclosure Troubleshooting Guide - Page 66
: Some troubleshooting procedures require powering down an entire enclosure. To avoid possible data loss, always secure permission before powering down an enclosure. CAUTION: To avoid data loss, do not remove an Onboard Administrator when the Insight Display shows a firmware update in progress - HP BL260c | HP BladeSystem c-Class Enclosure Troubleshooting Guide - Page 67
, then verify that the Onboard Administrator and iLO are configured properly. See the Onboard Administrator user guide and the iLO documentation on the HP website (http://www.hp.com/support). If an IP address was obtained for the server blade, continue to the next step. Action Verify that compatible - HP BL260c | HP BladeSystem c-Class Enclosure Troubleshooting Guide - Page 68
server blade is powered on using one of the following methods: • Use the Onboard Administrator web-based interface. • Use the server blade LEDs. A server blade that is powered an authorized service provider to complete the midplane assembly replacement (on page 69). Enclosure troubleshooting 68 - HP BL260c | HP BladeSystem c-Class Enclosure Troubleshooting Guide - Page 69
: Some troubleshooting procedures require powering down an entire enclosure. To avoid possible data loss, always secure permission before powering down an enclosure. CAUTION: To avoid data loss, do not remove an Onboard Administrator when the Insight Display shows a firmware update in progress - HP BL260c | HP BladeSystem c-Class Enclosure Troubleshooting Guide - Page 70
part number using the following OA CLI command. In place of X, enter the PID number. set enclosure part_number X 5 Update the enclosure serial number using the following OA CLI command. In place of X, enter the serial number. set enclosure serial_number X Verification If troubleshooting the HP - HP BL260c | HP BladeSystem c-Class Enclosure Troubleshooting Guide - Page 71
number update using the following OA CLI command: set enclosure PDU_type X In place of X, enter 1, 2, or 3, according to the power setup: • 1 for single-phase power • 2 for three-phase power, North America • 3 for three-phase power, international • 4 for DC power Action Install all server blades - HP BL260c | HP BladeSystem c-Class Enclosure Troubleshooting Guide - Page 72
Power supply bay 1 4 Power supply bay 2 5 Power supply bay 3 6 Power supply bay 4 7 Insight Display 8 Power supply bay 5 9 Power supply bay 6 10 Air intake slot (Do not block.) *For more information, see "Device bay numbering Be sure to review device bay numbering to determine which - HP BL260c | HP BladeSystem c-Class Enclosure Troubleshooting Guide - Page 73
IMPORTANT: When looking at the rear of the enclosure, device bay numbering is reversed. Full-height device bay numbering Half-height device bay numbering Component identification 73 - HP BL260c | HP BladeSystem c-Class Enclosure Troubleshooting Guide - Page 74
Power supply LEDs Power LED 1 (green) Off On Off Fault LED 2 (amber) Off Off On Power supply bay numbering Condition No AC power to the power supply Normal Power supply failure Component identification 74 - HP BL260c | HP BladeSystem c-Class Enclosure Troubleshooting Guide - Page 75
configure the enclosure initially. It also provides information about the health and operation of the enclosure. See the HP BladeSystem Onboard Administrator User Guide red (no power)-The Insight driver and firmware updates, see the HP website (http://www.hp.com/go/blades/). Component identification 75 - HP BL260c | HP BladeSystem c-Class Enclosure Troubleshooting Guide - Page 76
access to enclosure components. HP BladeSystem Insight Display components Item 1 2 3 4 5 6 Description Insight Display screen Left arrow button Right arrow button OK button Down arrow button Up arrow button Function Displays Main Menu error messages and instructions Moves the menu or navigation - HP BL260c | HP BladeSystem c-Class Enclosure Troubleshooting Guide - Page 77
23 Description Fan bay 1 Fan bay 2 Fan bay 3 Fan bay 4 Fan bay 5 Interconnect bay 2 Interconnect bay 4 Interconnect bay 6 Interconnect bay 8 Onboard Administrator bay 2 OA tray Power supply exhaust vent (do not block) Fan bay 10 Fan bay 9 Fan bay 8 Fan bay 7 Fan bay 6 AC - HP BL260c | HP BladeSystem c-Class Enclosure Troubleshooting Guide - Page 78
Interconnect bay numbering To support network connections for specific signals, install the interconnect module into the appropriate bay. Server blade signal Interconnect bay number NICs 1, 2, 3, and documentation on the HP website (http://www.hp.com/support). Component identification 78 - HP BL260c | HP BladeSystem c-Class Enclosure Troubleshooting Guide - Page 79
Onboard Administrator components Item 1 2 3 4 Description Onboard Administrator bay 1 Onboard Administrator bay 2 (redundant, if used) Enclosure link-up port Enclosure link-down port Onboard Administrator LEDs and buttons Item 1 2 3 Description Onboard Administrator UID LED Enclosure UID LED - HP BL260c | HP BladeSystem c-Class Enclosure Troubleshooting Guide - Page 80
Item 4 5 Description Onboard Administrator health LED Onboard Administrator reset button Fan bay numbering Fan LED LED color Solid green Solid amber Flashing amber Fan status The fan is working. The fan has failed. See the Insight Display screen. Component identification 80 - HP BL260c | HP BladeSystem c-Class Enclosure Troubleshooting Guide - Page 81
HP BladeSystem c3000 Enclosure components Enclosure front components Item 1 2 3 4 5 Description Device bays ("Device bay numbering" on page 72) CD/DVD-ROM drive blank or CD/DVD-ROM drive rear of the enclosure. Be sure to review device bay numbering to determine which external network connections on - HP BL260c | HP BladeSystem c-Class Enclosure Troubleshooting Guide - Page 82
Full-height device bay numbering Half-height device bay numbering Component identification 82 - HP BL260c | HP BladeSystem c-Class Enclosure Troubleshooting Guide - Page 83
HP BladeSystem Insight Display components Item 1 2 3 4 5 6 Description Insight Display screen Left arrow button Right arrow button OK button Down arrow button Up arrow button Function Displays Main Menu error messages and instructions Moves the menu or navigation bar selection left one position - HP BL260c | HP BladeSystem c-Class Enclosure Troubleshooting Guide - Page 84
Reset button USB port Health LED 4 Active LED 5 UID LED 6 Serial port Status - - Green = Normal Red = OA firmware issue. See the HP Onboard Administrator User Guide on the HP website (http://www.hp.com/go/bladesystem/docum entation). Green = Primary OA module Off = Standby OA module Blue - HP BL260c | HP BladeSystem c-Class Enclosure Troubleshooting Guide - Page 85
place, then tilt it for viewing. Enclosure rear components Item 1 2 3 4 5 6 7 8 Description KVM module bay Interconnect bay 1 Fan bays ("Fan bay numbering" on page 86) Interconnect bay 2 Enclosure link-down port Enclosure link-up port Onboard Administrator 1/iLO port Onboard Administrator 2/iLO - HP BL260c | HP BladeSystem c-Class Enclosure Troubleshooting Guide - Page 86
Item 9 10 11 Description Power supply bays ("Power supply bay numbering" on page 87) Interconnect bay 4 Interconnect bay 3 Fan bay numbering Fan LEDs LED color Solid green Solid amber Flashing amber Fan status The fan is working. The fan has failed. See the Insight Display screen. - HP BL260c | HP BladeSystem c-Class Enclosure Troubleshooting Guide - Page 87
Power supply bay numbering Power supply LED Power LED Off Green Green Off Status No AC power to power supply units AC is present. Standby output is on, output is disabled. AC is present. Standby output is on, power supply DC output is on and OK. Power supply failure (includes overvoltage and - HP BL260c | HP BladeSystem c-Class Enclosure Troubleshooting Guide - Page 88
Interconnect bay numbering To support network connections for specific signals, install the interconnect module in the appropriate bay. Server blade signal NICs 1, 2, 3, and 4 (embedded) Mezzanine 1 Mezzanine 2 Mezzanine 3 Interconnect bay number 1 Interconnect bay label Notes - 2 Four port - HP BL260c | HP BladeSystem c-Class Enclosure Troubleshooting Guide - Page 89
it can be installed through the HP PSP ("ProLiant Support Packs" on page 93). NOTE: The current version of SmartStart provides the memory spare part numbers for the server blade. To download the latest version, see the HP website (http://www.hp.com/support). Integrated Management Log The IML records - HP BL260c | HP BladeSystem c-Class Enclosure Troubleshooting Guide - Page 90
be installed on a shared HP ProLiant Windows application server. The software supports HP EVA storage devices, HP ProLiant, BladeSystems, HP Integrity and HP 9000 servers running Microsoft Windows, Red Hat Enterprise Linux, Novell SUSE and Novell Netware. Download from the HP website (http://h20392 - HP BL260c | HP BladeSystem c-Class Enclosure Troubleshooting Guide - Page 91
, SAS and SATA hard drives, and memory modules. For additional information, refer to the Management CD in the HP ProLiant Essentials Foundation Pack or the HP SIM website (http://www.hp.com/go/hpsim). System Management homepage To access the System Management homepage of a server, go to https - HP BL260c | HP BladeSystem c-Class Enclosure Troubleshooting Guide - Page 92
o Power subsystem o Thermal subsystem o iLO 2 o iLO 2: Management Processor - Integrated Lights-Out 2 • Check the HP BladeSystem firmware using the Systems Management Homepage ("System Management homepage" on page 91). o Server blade firmware o Storage controllers o Hard drives o NICs • Check the HP - HP BL260c | HP BladeSystem c-Class Enclosure Troubleshooting Guide - Page 93
can be downloaded from the HP website (http://www.hp.com/support). ProLiant Support Packs PSPs represent operating system-specific bundles of ProLiant optimized drivers, utilities, and management agents. Refer to the PSP website (http://h18000.www1.hp.com/products/servers/management/psp.html - HP BL260c | HP BladeSystem c-Class Enclosure Troubleshooting Guide - Page 94
the configuration files required to upgrade the ROM firmware. This procedure is most effective when flashing the ROM on a small number of servers located in close proximity. To flash the ROM using ROMPaq: 1. Download the system ROMPaq utility diskette or USB drive key for each target server blade - HP BL260c | HP BladeSystem c-Class Enclosure Troubleshooting Guide - Page 95
utilities. For additional information about the ROMPaq utility, see the server blade documentation or the HP website (http://www.hp.com/support). ROM Update Utility The ROM update utility is being replaced by the HP Smart Update Manager on the Firmware Maintenance CD version 7.50 and later. The ROM - HP BL260c | HP BladeSystem c-Class Enclosure Troubleshooting Guide - Page 96
a replacement part is required to address a system problem. The specialist will also determine whether you can replace the part. • For specific information about customer replaceable parts, refer to the maintenance and service guide on the HP website (http://www.hp.com/support). Contacting HP 96 - HP BL260c | HP BladeSystem c-Class Enclosure Troubleshooting Guide - Page 97
information, if installed o Verification of latest drivers installed o Verification of latest ROM/BIOS o Verification of latest firmware on array controllers and drives • Results from attempts to clear NVRAM Operating system information you need Depending on the problem, you may be asked for certain - HP BL260c | HP BladeSystem c-Class Enclosure Troubleshooting Guide - Page 98
Insight Agents, is having a problem o IRQ and I/O address information in text format • An updated Emergency Repair Diskette • If HP drivers are installed: o Version of the PSP used o List of drivers from the PSP • The drive subsystem and file system information: o Number and size of partitions and - HP BL260c | HP BladeSystem c-Class Enclosure Troubleshooting Guide - Page 99
used on the server, including the names, versions, dates, and sizes (can be taken directly from the CONFIG.TXT or SURVEY.TXT files) • If HP drivers are installed: o Version of the PSP used o List of drivers from the PSP • Printouts or electronic copies (to e-mail to a support technician) of: o SYS - HP BL260c | HP BladeSystem c-Class Enclosure Troubleshooting Guide - Page 100
selected for installation: End User Support, Entire Distribution, Developer System Support, or Core System Support • If HP drivers are installed with a DU: o DU number o List of drivers in the DU diskette • The drive subsystem and file system information: o Number and size of partitions and logical - HP BL260c | HP BladeSystem c-Class Enclosure Troubleshooting Guide - Page 101
Acronyms and abbreviations ADU Array Diagnostics Utility CLI Command Line Interface DHCP Dynamic Host Configuration Protocol DNS domain name system DU driver update FRU field replaceable unit HP SIM HP Systems Insight Manager I/O input/output iLO Integrated Lights-Out iLO 2 Integrated Lights-Out 2 - HP BL260c | HP BladeSystem c-Class Enclosure Troubleshooting Guide - Page 102
Access Protocol MAC Media Access Control NIC network interface card NVRAM non-volatile memory OA Onboard Administrator PDU power distribution unit PID product ID POST Power-On Self Test PSP ProLiant Support Pack SNMP Simple Network Management Protocol SSH Secure Shell UID unit identification USB - HP BL260c | HP BladeSystem c-Class Enclosure Troubleshooting Guide - Page 103
D device bay numbering 72, 73, 82 device failure errors 26 diagnosing component health 7 diagnosing problems 7 diagnosing system health 7 diagnostic tools 89 diagnostics utility 89 drivers 93 DVD-ROM drive 52, 54, 56, 58, 81 DVD-ROM drive troubleshooting 52, 54 DVD-ROM troubleshooting, procedures 52 - HP BL260c | HP BladeSystem c-Class Enclosure Troubleshooting Guide - Page 104
Display, overview of 16 HP Insight Diagnostics 89 HP Insight Diagnostics survey functionality 89 HP Insight Remote Support software 90 HP ProLiant Essentials Foundation Pack 91 HP Smart Update Manager overview 93 HP Systems Insight Manager, overview 91 HP technical support 96 I IML (Integrated - HP BL260c | HP BladeSystem c-Class Enclosure Troubleshooting Guide - Page 105
blade bay numbering 72 server blade enclosure bay numbering 72 server blade troubleshooting 35, 38 server blade troubleshooting, procedures 38 service notifications 14 Smart Update Manager 93 software 89 software resources 89 static electricity 12 Subscriber's Choice 95 Sun Solaris 99 supported - HP BL260c | HP BladeSystem c-Class Enclosure Troubleshooting Guide - Page 106
symptoms 44 troubleshooting, partner blades 43, 44 troubleshooting, power supply 31, 32 troubleshooting, server blade 35, 36, 38 troubleshooting, server blade symptoms 36 U UID LED 16, 79 updating the firmware 91 upgrades compatibility matrix 91 USB drive key 94 using this guide 5 utilities 89 V VCA
-
 1
1 -
 2
2 -
 3
3 -
 4
4 -
 5
5 -
 6
6 -
 7
7 -
8
-
9
-
10
-
11
-
12
-
13
-
14
-
15
-
16
-
17
-
18
-
19
-
20
-
21
-
22
-
23
-
24
-
25
-
26
-
27
-
28
-
29
-
30
-
31
-
32
-
33
-
34
-
35
-
36
-
37
-
38
-
39
-
40
-
41
-
42
-
43
-
44
-
45
-
46
-
47
-
48
-
49
-
50
-
51
-
52
-
53
-
54
-
55
-
56
-
57
-
58
-
59
-
60
-
61
-
62
-
63
-
64
-
65
-
66
-
67
-
68
-
69
-
70
-
71
-
72
-
73
-
74
-
75
-
76
-
77
-
78
-
79
-
80
-
81
-
82
-
83
-
84
-
85
-
86
-
87
-
88
-
89
-
90
-
91
-
92
-
93
-
94
-
95
-
96
-
97
-
98
-
99
-
100
-
101
-
102
-
103
-
104
-
105
-
106
 |
 |

HP BladeSystem c-Class Enclosure
Troubleshooting Guide
Part Number 460224-002
July 2009 (Second Edition)