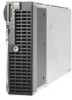
HP BL260c HP BladeSystem c-Class Enclosure Troubleshooting Guide - Page 70
Midplane assembly replacement action and verification, set enclosure part_number X
 |
UPC - 883585668663
View all HP BL260c manuals
Add to My Manuals
Save this manual to your list of manuals |
Page 70 highlights
Step Step 1 Step 2 Step 3 Midplane assembly replacement action and verification Action Contact an authorized service provider to perform the following steps: 1 Power down all server blades. 2 Disconnect power from the enclosure. 3 Remove all devices from all device bays. Be sure to note the location for each device. 4 Remove all interconnect modules. 5 Remove all fans. 6 Remove all Onboard Administrators from the enclosure. 7 Remove the OA tray. 8 Remove the rear cage. 9 Remove the midplane assembly. 10 Install a service spare midplane assembly. 11 Install the rear cage. Action 1 Install following components in their original locations in the enclosure: • Power supplies • Fans • Onboard Administrator • OA tray 2 Power up the enclosure. Verification When the Insight Display indicates that the Onboard Administrator has completed all power-on tests, continue to the next step. Action Update the PID and serial numbers: 1 Locate the enclosure label on the front left mounting tab. 2 Record the enclosure PID and serial number. 3 Log in to OA CLI using the Administrator account. 4 Update the enclosure part number using the following OA CLI command. In place of X, enter the PID number. set enclosure part_number X 5 Update the enclosure serial number using the following OA CLI command. In place of X, enter the serial number. set enclosure serial_number X Verification If troubleshooting the HP BladeSystem c3000 Enclosure, then continue to step 5. If troubleshooting the HP BladeSystem c7000 Enclosure, then continue to the next step. Midplane assembly replacement 70
-
 1
1 -
2
-
3
-
4
-
5
-
6
-
7
-
8
-
9
-
10
-
11
-
12
-
13
-
14
-
15
-
16
-
17
-
18
-
19
-
20
-
21
-
22
-
23
-
24
-
25
-
26
-
27
-
28
-
29
-
30
-
31
-
32
-
33
-
34
-
35
-
36
-
37
-
38
-
39
-
40
-
41
-
42
-
43
-
44
-
45
-
46
-
47
-
48
-
49
-
50
-
51
-
52
-
53
-
54
-
55
-
56
-
57
-
58
-
59
-
60
-
61
-
62
-
63
-
64
-
 65
65 -
 66
66 -
 67
67 -
 68
68 -
 69
69 -
 70
70 -
 71
71 -
 72
72 -
 73
73 -
 74
74 -
 75
75 -
76
-
77
-
78
-
79
-
80
-
81
-
82
-
83
-
84
-
85
-
86
-
87
-
88
-
89
-
90
-
91
-
92
-
93
-
94
-
95
-
96
-
97
-
98
-
99
-
100
-
101
-
102
-
103
-
104
-
105
-
106
 |
 |
