HP BL260c HP BladeSystem c-Class Enclosure Troubleshooting Guide - Page 19
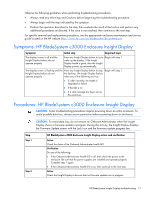
Symptoms: HP BladeSystem c7000 Enclosure Insight Display
 |
UPC - 883585668663
View all HP BL260c manuals
Add to My Manuals
Save this manual to your list of manuals |
Page 19 highlights
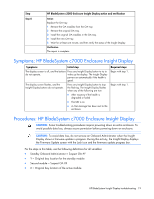
Step Step 8 HP BladeSystem c3000 Enclosure Insight Display action and verification Action Replace the OA tray: 1 Remove the OA modules from the OA tray. 2 Remove the original OA tray. 3 Install the original OA modules in the OA tray. 4 Install the new OA tray. 5 Wait for at least one minute, and then verify the status of the Insight Display. Verification The repair is complete. Symptoms: HP BladeSystem c7000 Enclosure Insight Display Symptoms Initial step The display screen is off, and the buttons Press any Insight Display button to try to do not operate. wake up the display. The Insight Display powers on automatically if the health is good. The display screen flashes, and the Insight Display buttons do not operate. Press any Insight Display button to stop the flashing. The Insight Display flashes when any of the following are true: • After inactivity if the health is degraded or failed • The UID is on • A chat message has been sent to the enclosure Required steps Begin with step 1. Begin with step 1. Procedures: HP BladeSystem c7000 Enclosure Insight Display CAUTION: Some troubleshooting procedures require powering down an entire enclosure. To avoid possible data loss, always secure permission before powering down an enclosure. CAUTION: To avoid data loss, do not remove an Onboard Administrator when the Insight Display shows a firmware update in progress. During this activity, the Insight Display displays the Firmware Update screen with the Lock icon and the firmware update progress bar. For the steps in this table, use the following definitions for all variables: • Standby Onboard Administrator = Suspect OA #Y • Y = Original bay location for the standby module • Second module = Suspect OA #X • X = Original bay location of the active module HP BladeSystem Insight Display troubleshooting 19
-
 1
1 -
2
-
3
-
4
-
5
-
6
-
7
-
8
-
9
-
10
-
11
-
12
-
13
-
 14
14 -
 15
15 -
 16
16 -
 17
17 -
 18
18 -
 19
19 -
 20
20 -
 21
21 -
 22
22 -
 23
23 -
 24
24 -
25
-
26
-
27
-
28
-
29
-
30
-
31
-
32
-
33
-
34
-
35
-
36
-
37
-
38
-
39
-
40
-
41
-
42
-
43
-
44
-
45
-
46
-
47
-
48
-
49
-
50
-
51
-
52
-
53
-
54
-
55
-
56
-
57
-
58
-
59
-
60
-
61
-
62
-
63
-
64
-
65
-
66
-
67
-
68
-
69
-
70
-
71
-
72
-
73
-
74
-
75
-
76
-
77
-
78
-
79
-
80
-
81
-
82
-
83
-
84
-
85
-
86
-
87
-
88
-
89
-
90
-
91
-
92
-
93
-
94
-
95
-
96
-
97
-
98
-
99
-
100
-
101
-
102
-
103
-
104
-
105
-
106
 |
 |
