HP BL260c HP BladeSystem c-Class Enclosure Troubleshooting Guide - Page 43
Partner blade troubleshooting
 |
UPC - 883585668663
View all HP BL260c manuals
Add to My Manuals
Save this manual to your list of manuals |
Page 43 highlights
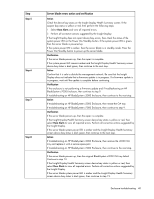
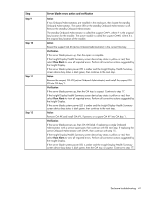
Step Step 16 Step 17 Step 18 Step 19 Server blade errors action and verification Action Complete the repair process: 1 Login to OA #Y using the Administrator account and current password. 2 Verify that the standby Onboard Administrator (OA #X) firmware is the correct version. 3 To synchronize the firmware on both Onboard Administrators, update the firmware on the active Onboard Administrator to the correct version. This action also synchronizes the enclosure settings on the standby Onboard Administrator. 4 Restore the original IP address settings to the standby Onboard Administrator (OA #X). Action Reseat the OA tray: 1 Remove the active Onboard Administrator. 2 Reseat the OA tray. 3 Install OA #X in OA bay X. Verification Wait for up to 2 minutes, then check the Insight Display. If the Insight Display illuminates and the Insight Display buttons operate properly, then install OA #Y, if present, in OA bay Y to complete the repair. If the issue still exists, continue to the next step. Action Replace the OA tray: 1 Remove OA #X. 2 Remove the OA tray. 3 Install a service spare OA tray. 4 Install OA #X in bay X. Verification Wait for up to 2 minutes, then check the Insight Display. If the Insight Display illuminates and the Insight Display buttons operate properly, then install OA #Y, if present, in bay Y to complete the repair. If the issue still exists, then the OA tray did not fail. Continue to the next step. Action Contact an authorized service provider to complete the midplane assembly replacement (on page 69). Partner blade troubleshooting Partner blades are a special class of blade that are installed in a device bay. The partner blades are either connected to a server blade or interconnect module in the same enclosure. This section describes the unique troubleshooting characteristics of those partner blades. For more information, see the component documentation. Enclosure troubleshooting 43
-
 1
1 -
2
-
3
-
4
-
5
-
6
-
7
-
8
-
9
-
10
-
11
-
12
-
13
-
14
-
15
-
16
-
17
-
18
-
19
-
20
-
21
-
22
-
23
-
24
-
25
-
26
-
27
-
28
-
29
-
30
-
31
-
32
-
33
-
34
-
35
-
36
-
37
-
 38
38 -
 39
39 -
 40
40 -
 41
41 -
 42
42 -
 43
43 -
 44
44 -
 45
45 -
 46
46 -
 47
47 -
 48
48 -
49
-
50
-
51
-
52
-
53
-
54
-
55
-
56
-
57
-
58
-
59
-
60
-
61
-
62
-
63
-
64
-
65
-
66
-
67
-
68
-
69
-
70
-
71
-
72
-
73
-
74
-
75
-
76
-
77
-
78
-
79
-
80
-
81
-
82
-
83
-
84
-
85
-
86
-
87
-
88
-
89
-
90
-
91
-
92
-
93
-
94
-
95
-
96
-
97
-
98
-
99
-
100
-
101
-
102
-
103
-
104
-
105
-
106
 |
 |
