Panasonic WJHD500A WJHD500A User Guide - Page 15
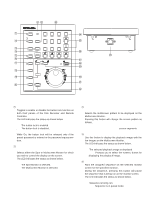
Mounting Into The Rack, Screws M4 X10.
 |
View all Panasonic WJHD500A manuals
Add to My Manuals
Save this manual to your list of manuals |
Page 15 highlights
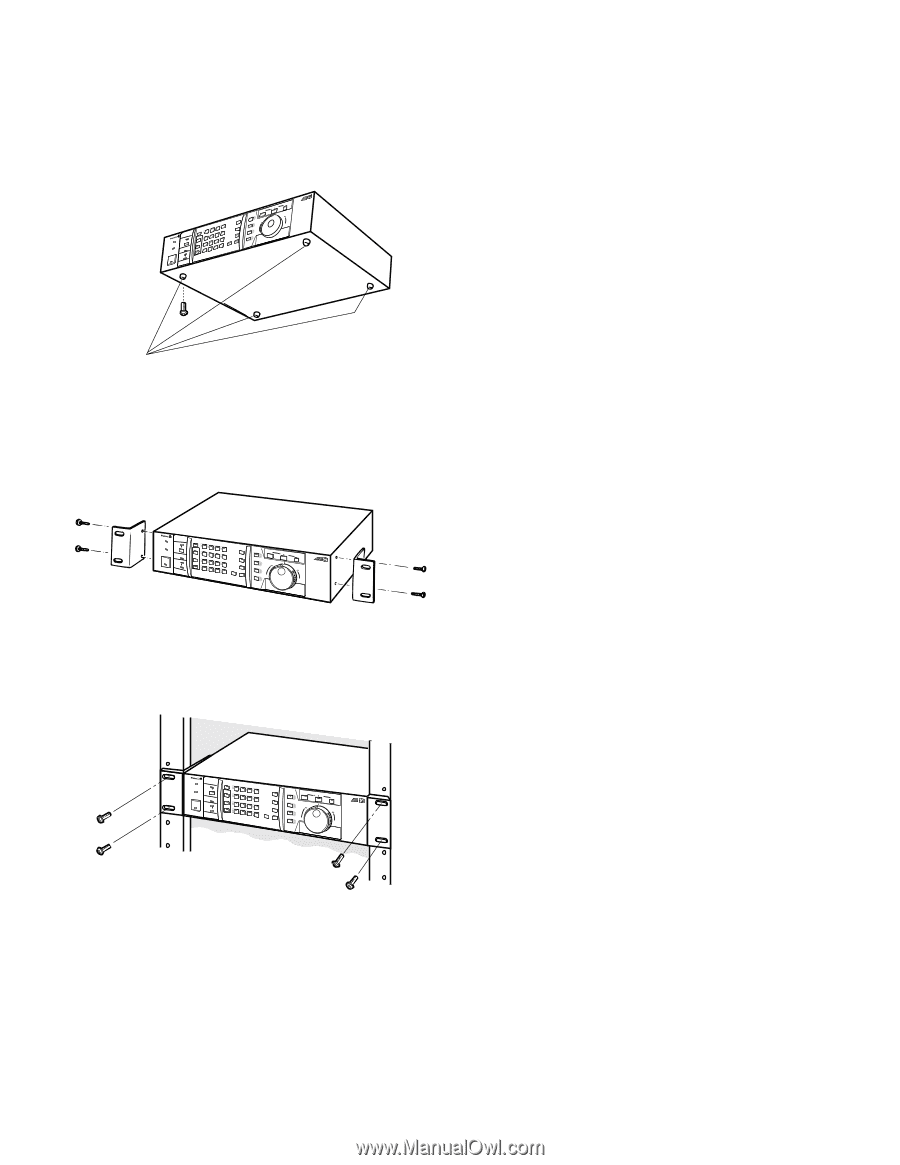
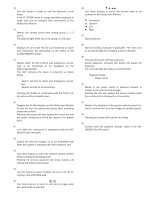
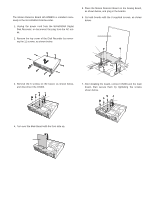
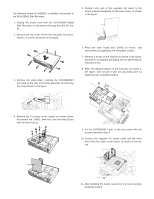
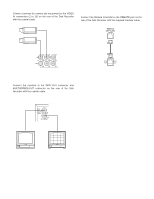
s Mounting into the Rack The Disk Recorder can be mounted into the rack as described below. 1. Remove the four rubber feet by removing the four screws from the bottom of the Disk Recorder. FS 16 • • • 500 DiRgeitcaol rDdiesrkA WJ-HD Remove 4 rubber feet 2. Place the rack mounting brackets on both sides of the Disk Recorder and tighten with the four supplied screws (M4 X10). • FS 16 • • 500 DiRgietcaol Drdisekr WJ-HD A 3. Install the Disk Recorder with the rack mounting brackets in the rack, securing it with four screws (not included). • FS 16 • • 500 DiRgietcaol Drdisekr WJ-HD A Cautions: • The cooling fan inside the Disk Recorder is subject to wear and needs to be replaced periodically. • Do not block the ventilation opening or slots in the cover to prevent the appliance from overheating. Always keep the temperature in the rack below 45°C (113°F). • If the rack is subject to vibration, secure the rear of the appliance to the rack by using additional mounting brackets (procured locally). 15
-
 1
1 -
2
-
3
-
4
-
5
-
6
-
7
-
8
-
9
-
 10
10 -
 11
11 -
 12
12 -
 13
13 -
 14
14 -
 15
15 -
 16
16 -
 17
17 -
 18
18 -
 19
19 -
 20
20 -
21
-
22
-
23
-
24
-
25
-
26
-
27
-
28
-
29
-
30
-
31
-
32
-
33
-
34
-
35
-
36
-
37
-
38
-
39
-
40
-
41
-
42
-
43
-
44
-
45
-
46
-
47
-
48
-
49
-
50
-
51
-
52
-
53
-
54
-
55
-
56
-
57
-
58
-
59
-
60
-
61
-
62
-
63
-
64
-
65
-
66
-
67
-
68
-
69
-
70
-
71
-
72
-
73
-
74
-
75
-
76
-
77
-
78
-
79
-
80
-
81
-
82
-
83
-
84
-
85
-
86
-
87
-
88
-
89
-
90
-
91
-
92
-
93
-
94
-
95
-
96
-
97
-
98
-
99
-
100
-
101
-
102
 |
 |