Panasonic WJHD500A WJHD500A User Guide - Page 73
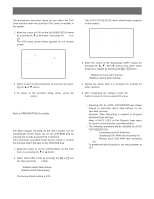
System Information, Error Report, Move the cursor to ERROR REPORT in the SYSTEM
 |
View all Panasonic WJHD500A manuals
Add to My Manuals
Save this manual to your list of manuals |
Page 73 highlights
s Error Report There are 100 error records stored in chronological order in 10 pages of tables. 1. Move the cursor to ERROR REPORT in the SYSTEM SETUP menu by pressing the C or D button, then press the SET button. The ERROR REPORT table appears on the monitor screen as shown below. s System Information The table indicates the version of the hardware and software. 1. Move the cursor to SYSTEM INFORMATION in the SYSTEM SETUP menu by pressing the C or D button, then press the SET button. The SYSTEM INFORMATION table appears on the monitor screen. 9-4 ERROR REPORT NO DATE TIME CAUSE 100 SEP12.99 23:59:59 THERMAL 6 099 SEP12.99 22:15:40 POWER RECOVER 098 SEP12.99 21:00:07 POWER LOSS 097 SEP12.99 17:33:05 ALTERED 096 SEP12.99 7:23:11 ERROR 095 SEP12.99 6:59:44 WARNING 1-5 094 SEP12.99 3:15:28 HDD EMPTY 093 SEP12.99 0:01:28 WARNING 1-5 092 SEP12.99 3:15:28 HDD EMPTY 091 SEP12.99 0:01:28 POWER LOSS (TOTAL 100) 9-5 SYSTEM INFORMATION HARDWARE VERSION MAIN VMD 1.00 1.00 SOFTWARE VERSION MAIN 1.00 N/W 1.00 2. Pressing the C or D button will move the cursor to up or down and select the next or previous page of the tables. 3. To clear the all records, press the + and - buttons simultaneously for two seconds or more. 4. To return to the previous SYSTEM SETUP menu, press the SETUP/ESC button. Note: "VMD" will be displayed when the optional motion detector board is installed in the disk recorder. 2. To return to the previous SYSTEM SETUP menu, press the SETUP/ESC button. 75
-
 1
1 -
2
-
3
-
4
-
5
-
6
-
7
-
8
-
9
-
10
-
11
-
12
-
13
-
14
-
15
-
16
-
17
-
18
-
19
-
20
-
21
-
22
-
23
-
24
-
25
-
26
-
27
-
28
-
29
-
30
-
31
-
32
-
33
-
34
-
35
-
36
-
37
-
38
-
39
-
40
-
41
-
42
-
43
-
44
-
45
-
46
-
47
-
48
-
49
-
50
-
51
-
52
-
53
-
54
-
55
-
56
-
57
-
58
-
59
-
60
-
61
-
62
-
63
-
64
-
65
-
66
-
67
-
 68
68 -
 69
69 -
 70
70 -
 71
71 -
 72
72 -
 73
73 -
 74
74 -
 75
75 -
 76
76 -
 77
77 -
 78
78 -
79
-
80
-
81
-
82
-
83
-
84
-
85
-
86
-
87
-
88
-
89
-
90
-
91
-
92
-
93
-
94
-
95
-
96
-
97
-
98
-
99
-
100
-
101
-
102
 |
 |
