Panasonic WJHD500A WJHD500A User Guide - Page 96
Data Erase Function
 |
View all Panasonic WJHD500A manuals
Add to My Manuals
Save this manual to your list of manuals |
Page 96 highlights
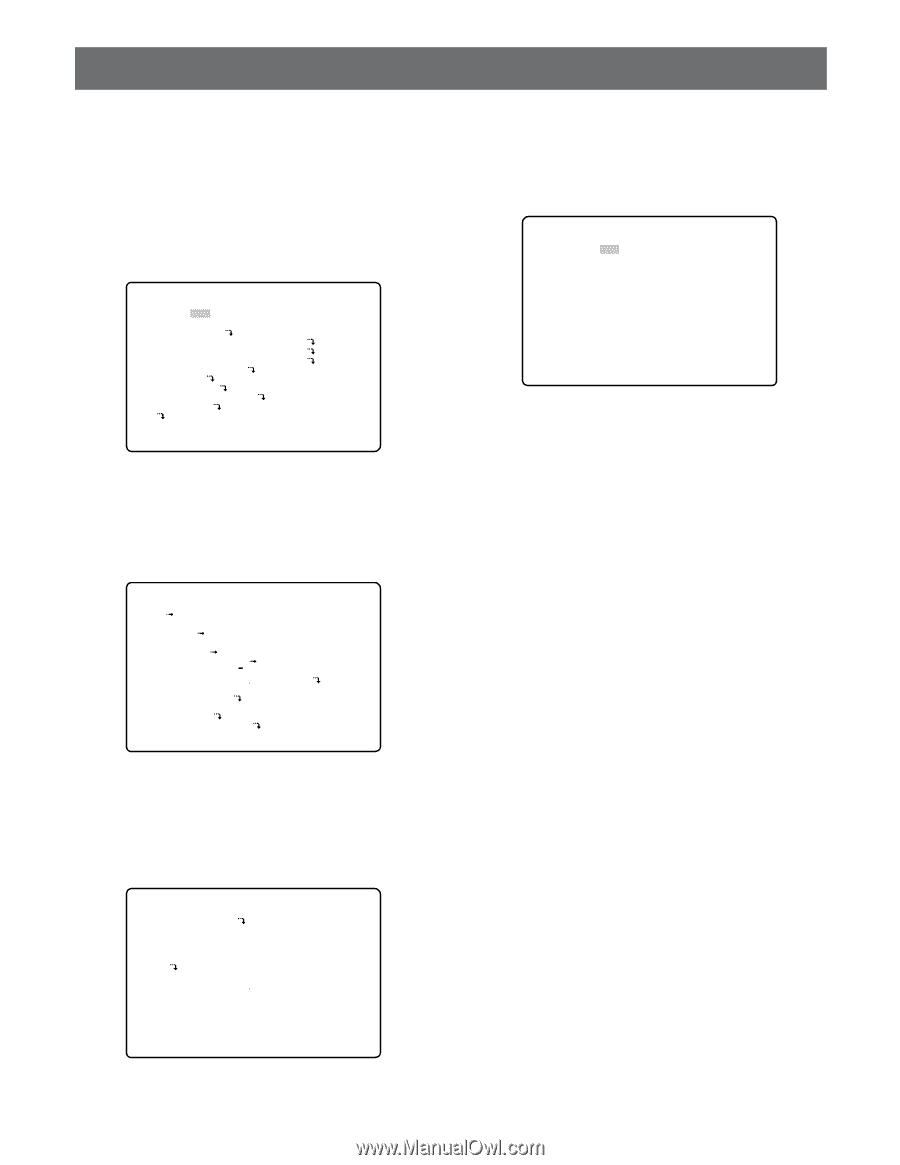
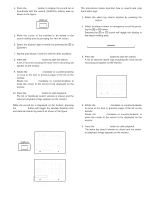
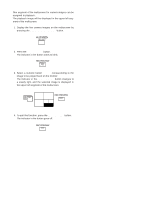
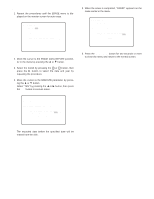
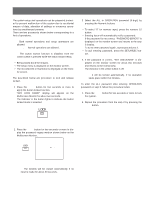
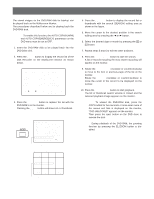
DATA ERASE FUNCTION The Disk Recorder can erase recorded data past due either automatically or manually. s Auto Erase Function 1. Press the SETUP/ESC button for two seconds or more, the WJ-HD500 SETUP menu as shown below appears on the screen of the Multiscreen Monitor. WJ-HD500 SETUP TIMER OFF REC SETUP COMMON SETUP *MANUAL WITHOUT AUDIO *TIMER WITHOUT AUDIO *EMERGENCY WITHOUT AUDIO MULTIPLEXER SETUP ALARM SETUP DISPLAY SETUP COMMUNICATION SETUP SYSTEM SETUP DVD *.** 2. Select SYSTEM SETUP in the menu by pressing the D or C button, then press the SET button. The SYSTEM SETUP menu as shown below will appear on the monitor screen 9 SYSTEM SETUP CLOCK JAN 1.00 0:00 TIME ADJUSTING OFF SET TIME 0:00 AUTO KEY LOCK OFF PASSWORD ALL ***** OPERATION ***** BUZZER ON USER DEFINED SETUP *LOAD DISK MANAGEMENT ERROR REPORT SYSTEM INFORMATION 3. Select DISK MANAGEMENT in the menu by pressing the D or C button, then press the SET button. The DISK MANAGEMENT menu as shown below will appear on the monitor screen. 4. Select ERASE in the menu by pressing the D or C button, then press the SET button. The ERASE menu as shown below will appear on the monitor screen. 9-3-2 ERASE AUTO ERASE OFF ERASE DATA BEFORE SEP12.00 ARE YOU SURE TO EXECUTE? [SET]:EXECUTE YES NO 5. Move the cursor to the AUTO ERASE parameter by pressing the D or C button, then select the storage days on the disk by pressing the + or - button. OFF: Disables auto erase function. 1 - 180 DAYS: The auto erase function is activated after the set number of days has passed. The factory default setting is OFF. 6. Press the SETUP/ESC button for two seconds or more to close the menu and return to the normal view. • The recorded data will be automatically erased the storage days set in step 5 are passed. • The data erase is executed at midnight (0:00) on the specified day. If the Disk Recorder is powered off at that time, the Disk recorder will execute erase by searching storage data when the Disk Recorder is powered on. 9-3 DISK MANAGEMENT DISK INFORMATION HDD FULL 1% ERASE 99
-
 1
1 -
2
-
3
-
4
-
5
-
6
-
7
-
8
-
9
-
10
-
11
-
12
-
13
-
14
-
15
-
16
-
17
-
18
-
19
-
20
-
21
-
22
-
23
-
24
-
25
-
26
-
27
-
28
-
29
-
30
-
31
-
32
-
33
-
34
-
35
-
36
-
37
-
38
-
39
-
40
-
41
-
42
-
43
-
44
-
45
-
46
-
47
-
48
-
49
-
50
-
51
-
52
-
53
-
54
-
55
-
56
-
57
-
58
-
59
-
60
-
61
-
62
-
63
-
64
-
65
-
66
-
67
-
68
-
69
-
70
-
71
-
72
-
73
-
74
-
75
-
76
-
77
-
78
-
79
-
80
-
81
-
82
-
83
-
84
-
85
-
86
-
87
-
88
-
89
-
90
-
 91
91 -
 92
92 -
 93
93 -
 94
94 -
 95
95 -
 96
96 -
 97
97 -
 98
98 -
 99
99 -
 100
100 -
 101
101 -
102
 |
 |