Panasonic WJHD500A WJHD500A User Guide - Page 97
Manual Erase Function, 3-2 Erase, Auto Erase Off, Erase Data Before Sep12.00, Are You Sure To Execute?
 |
View all Panasonic WJHD500A manuals
Add to My Manuals
Save this manual to your list of manuals |
Page 97 highlights
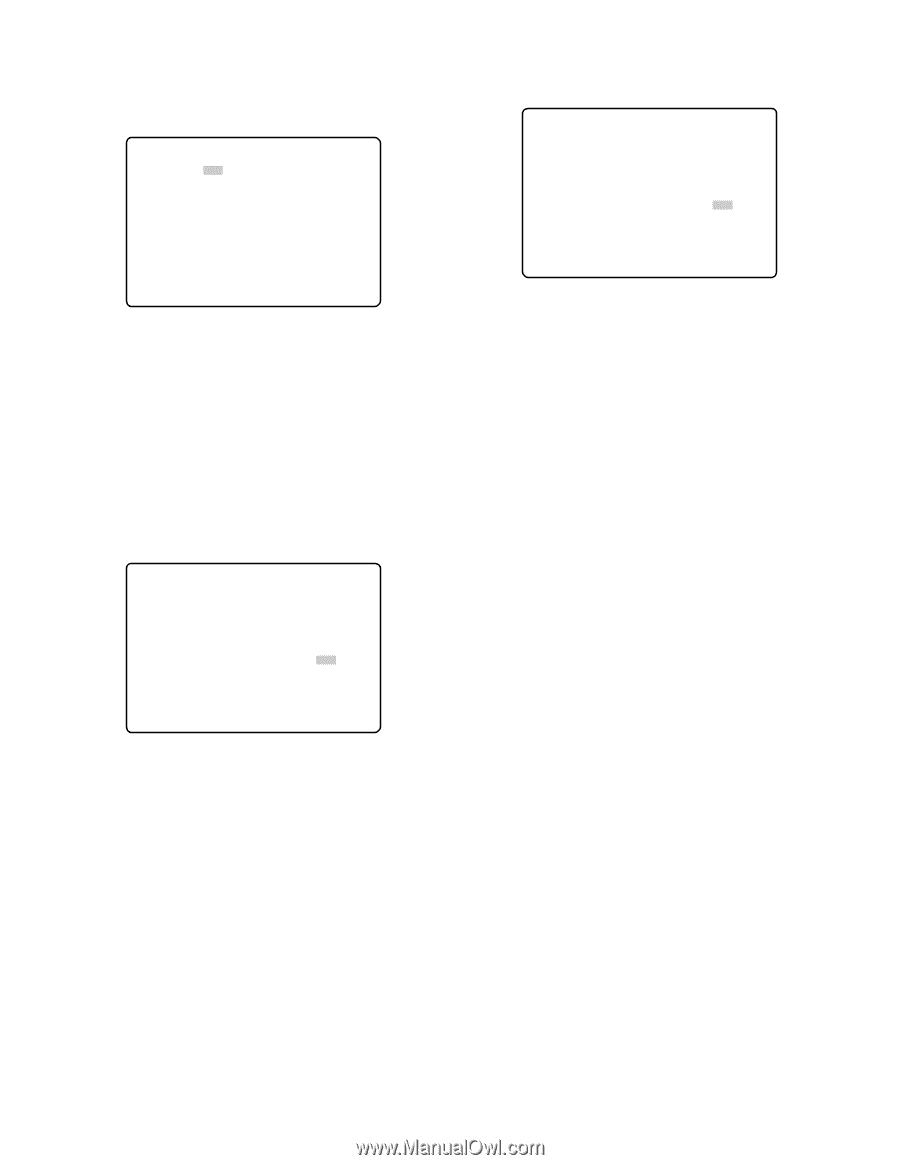
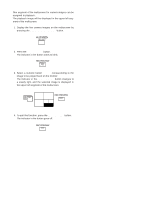
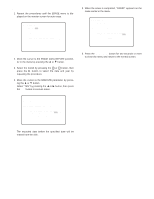
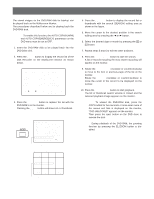
s Manual Erase Function 1. Repeat the procedures until the ERASE menu is displayed on the monitor screen for auto erase. 9-3-2 ERASE AUTO ERASE OFF ERASE DATA BEFORE SEP12.00 ARE YOU SURE TO EXECUTE? [SET]:EXECUTE YES NO 5. When the erase is completed, "DONE!" appears on the lower-center in the menu. 9-3-2 ERASE AUTO ERASE OFF ERASE DATA BEFORE SEP12.00 ARE YOU SURE TO EXECUTE? [ESC]:STOP YES NO DONE! 2. Move the cursor to the ERASE DATA BEFORE parameter in the menu by pressing the D or C button. 3. Select the month by pressing the + or - button, then press the B button to select the date and year by repeating the procedure. 4. Move the cursor to the EXECUTE parameter by pressing the D or C button. Select "YES" by pressing the A or B button, then press the SET button to execute erase. 9-3-2 ERASE AUTO ERASE OFF ERASE DATA BEFORE SEP12.00 ARE YOU SURE TO EXECUTE? [ESC]:STOP YES NO NOW ERASING 6. Press the SETUP/ESC button for two seconds or more to close the menu and return to the normal screen. The recorded data before the specified date will be erased from the disk. 100
-
 1
1 -
2
-
3
-
4
-
5
-
6
-
7
-
8
-
9
-
10
-
11
-
12
-
13
-
14
-
15
-
16
-
17
-
18
-
19
-
20
-
21
-
22
-
23
-
24
-
25
-
26
-
27
-
28
-
29
-
30
-
31
-
32
-
33
-
34
-
35
-
36
-
37
-
38
-
39
-
40
-
41
-
42
-
43
-
44
-
45
-
46
-
47
-
48
-
49
-
50
-
51
-
52
-
53
-
54
-
55
-
56
-
57
-
58
-
59
-
60
-
61
-
62
-
63
-
64
-
65
-
66
-
67
-
68
-
69
-
70
-
71
-
72
-
73
-
74
-
75
-
76
-
77
-
78
-
79
-
80
-
81
-
82
-
83
-
84
-
85
-
86
-
87
-
88
-
89
-
90
-
91
-
 92
92 -
 93
93 -
 94
94 -
 95
95 -
 96
96 -
 97
97 -
 98
98 -
 99
99 -
 100
100 -
 101
101 -
 102
102
 |
 |