Panasonic WJHD500A WJHD500A User Guide - Page 40
SETUP MENU, Displaying the SETUP Menu
 |
View all Panasonic WJHD500A manuals
Add to My Manuals
Save this manual to your list of manuals |
Page 40 highlights
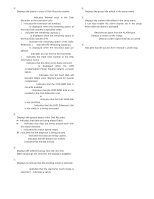
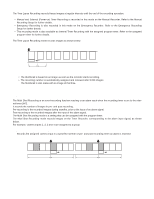
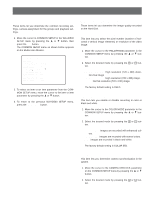
SETUP MENU The Setup Menu provides a way for controlling functions which are not available by a direct operation. s Displaying the SETUP Menu To display the setup menu follow the procedure below. 1. Confirm that the camera and peripherals are connected correctly and securely and that all system components are turned on. 2. The Disk Recorder has been powered up successfully. 3. Press the SETUP/ESC button for two seconds or more, the WJ-HD500 SETUP menu as shown below appears automatically on the screen of the Multiscreen Monitor. WJ-HD500 SETUP TIMER OFF REC SETUP COMMON SETUP *MANUAL WITHOUT AUDIO *TIMER WITHOUT AUDIO *EMERGENCY WITHOUT AUDIO MULTIPLEXER SETUP ALARM SETUP DISPLAY SETUP COMMUNICATION SETUP SYSTEM SETUP DVD *.** The following buttons are valid in the setup menu. D button: Moves the cursor up. C button: Moves the cursor down. A button: Moves the cursor to the left. B button: Moves the cursor to the right. +, - button: Selects an item parameter. SET button: Executes the selection and displays a submenu for an item with the ( ) mark. SETUP/ESC button: Returns to the previous setup menu. 4. Press the SETUP/ESC button for two seconds or more to close the setup menu and to return to the normal screen. Notes: • The playback operation is disabled during the setup. • The Disk Recorder can record the images set previously during the setup, and it pauses the recording to verify the setting presently made when the setup menu is closed. The unit stops recording if the setup menu is altered. But it will continue recording with the setting presently made when the Disk recorder is recording the images manually. 42
-
 1
1 -
2
-
3
-
4
-
5
-
6
-
7
-
8
-
9
-
10
-
11
-
12
-
13
-
14
-
15
-
16
-
17
-
18
-
19
-
20
-
21
-
22
-
23
-
24
-
25
-
26
-
27
-
28
-
29
-
30
-
31
-
32
-
33
-
34
-
 35
35 -
 36
36 -
 37
37 -
 38
38 -
 39
39 -
 40
40 -
 41
41 -
 42
42 -
 43
43 -
 44
44 -
 45
45 -
46
-
47
-
48
-
49
-
50
-
51
-
52
-
53
-
54
-
55
-
56
-
57
-
58
-
59
-
60
-
61
-
62
-
63
-
64
-
65
-
66
-
67
-
68
-
69
-
70
-
71
-
72
-
73
-
74
-
75
-
76
-
77
-
78
-
79
-
80
-
81
-
82
-
83
-
84
-
85
-
86
-
87
-
88
-
89
-
90
-
91
-
92
-
93
-
94
-
95
-
96
-
97
-
98
-
99
-
100
-
101
-
102
 |
 |