Pioneer AVIC-9DVD Owner's Manual - Page 112
How to Listen to a CD, How to use the Remote Controller
 |
View all Pioneer AVIC-9DVD manuals
Add to My Manuals
Save this manual to your list of manuals |
Page 112 highlights
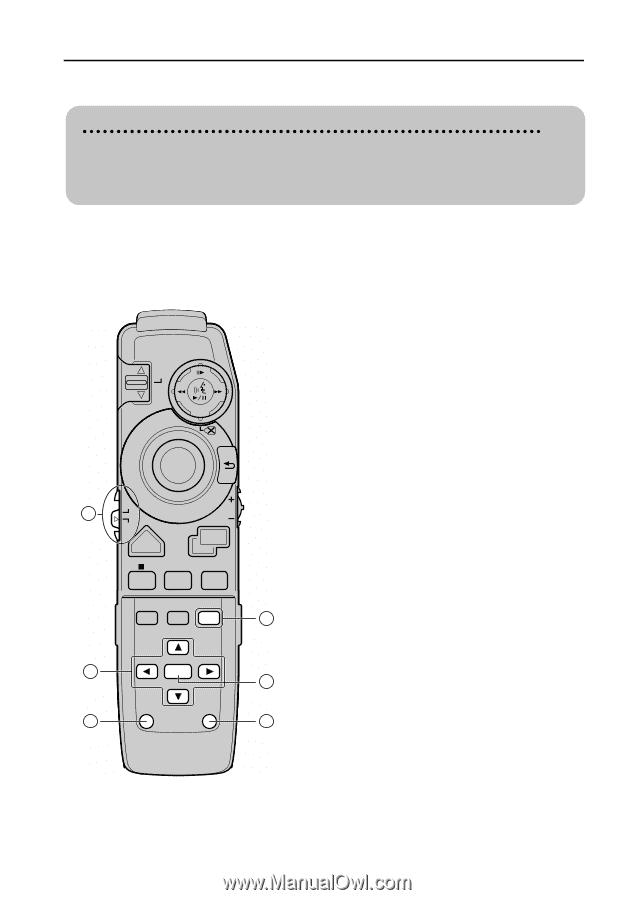
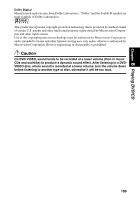
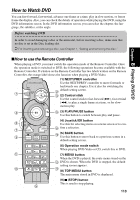
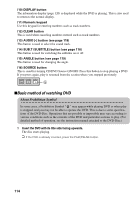
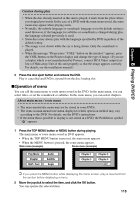
How to Listen to a CD If you set a CD to this unit, the CD is automatically played. You can select a track, or turn Repeat range, Random play or Scan play ON/OFF. Before listening to a CD In order to avoid damaging a disc or the main unit, before inserting a disc, make sure that no disc is set in the Disc loading slot. ➲ For inserting and removing a disc, see Chapter 1"Setting and removing the disc" . sHow to use the Remote Controller When playing a CD, you must switch the operation mode of the Remote Controller. Once the operation mode is switched to DVD, the following operations become available with the Remote Controller. (1) Operation mode switch When you play DVD-Video or CD, set this switch to NEXT DVD. ZOOM PREV (2) SOURCE button This is used for turning CD/DVD Source ON/OFF. Press this button to stop playing a CD. If you press again, play is resumed from the section where you stopped previously. OK (3) Cross Key / 5 ∞ 3 2 button These are used when selecting items such as skipping NAVI 1 MENU DVD NAVI VoL TOP MENU MENU a track of a CD, return to a previous track, fast-forward or fast-rewind. (4) AUDIO button AUDIO menu is shown while CD is playing. DETOUR DISPLAY CANCEL ROUTE GUIDE (5) FUNC/BACK button This button is used for returning to a previous screen PROGRAM V.CHANGE SOURCE 1PGM 2 AVBC 3SDEF in the AUDIO menu. 2 CH/DISC (6) BAND/ESC button 4 GHI 5 JKL 6MNO TRK/ This button is used when returning to the CD play 3 7 8 9 P QRS AUTDUIOV SEEK W XYZ screen from the AUDIO menu. 4 +10 0 FUNC /BACK CLEAR BAND /ESC 5 AUDIO DELETE OK SUB.T ANGLE 6 110
-
 1
1 -
2
-
3
-
4
-
5
-
6
-
7
-
8
-
9
-
10
-
11
-
12
-
13
-
14
-
15
-
16
-
17
-
18
-
19
-
20
-
21
-
22
-
23
-
24
-
25
-
26
-
27
-
28
-
29
-
30
-
31
-
32
-
33
-
34
-
35
-
36
-
37
-
38
-
39
-
40
-
41
-
42
-
43
-
44
-
45
-
46
-
47
-
48
-
49
-
50
-
51
-
52
-
53
-
54
-
55
-
56
-
57
-
58
-
59
-
60
-
61
-
62
-
63
-
64
-
65
-
66
-
67
-
68
-
69
-
70
-
71
-
72
-
73
-
74
-
75
-
76
-
77
-
78
-
79
-
80
-
81
-
82
-
83
-
84
-
85
-
86
-
87
-
88
-
89
-
90
-
91
-
92
-
93
-
94
-
95
-
96
-
97
-
98
-
99
-
100
-
101
-
102
-
103
-
104
-
105
-
106
-
 107
107 -
 108
108 -
 109
109 -
 110
110 -
 111
111 -
 112
112 -
 113
113 -
 114
114 -
 115
115 -
 116
116 -
 117
117 -
118
-
119
-
120
-
121
-
122
-
123
-
124
-
125
-
126
-
127
-
128
-
129
-
130
-
131
-
132
-
133
-
134
-
135
-
136
-
137
-
138
-
139
-
140
-
141
-
142
-
143
-
144
-
145
-
146
-
147
-
148
-
149
-
150
-
151
-
152
-
153
-
154
-
155
-
156
-
157
-
158
-
159
-
160
 |
 |