Samsung SCH-M828C User Manual (user Manual) (ver.f6) (English(north America)) - Page 78
Contacts, Creating a New Contacts Entry - how do i reset my
 |
View all Samsung SCH-M828C manuals
Add to My Manuals
Save this manual to your list of manuals |
Page 78 highlights
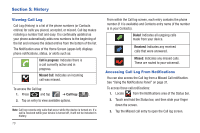
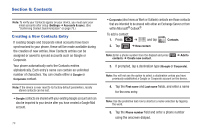
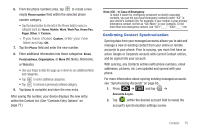
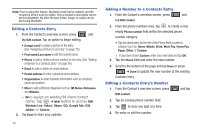
Section 6: Contacts Note: To verify your Contacts appear on your device, you must sync your email accounts after setup (Settings ➔ Accounts & sync). (See "Confirming Contact Synchronization" on page 75.) Creating a New Contacts Entry If existing Google and Corporate email accounts have been synchronized to your phone, these will be made available during the creation of new entries. New Contacts entries can be assigned or saved to synced accounts such as Google or Corporate. Your phone automatically sorts the Contacts entries alphabetically. Each entry's name can contain an unlimited number of characters. You can create either a Google or Corporate contact. Note: If the device is ever reset to its factory default parameters, locally stored contacts can be lost. • Google contacts are shared with your existing Google account and can also be imported to your device after you have created a Google Mail account. 74 • Corporate (also know as Work or Outlook) contacts are those contacts that are intended to be shared with either an Exchange Server or from within Microsoft® Outlook®. To add a contact: 1. Press ➔ and tap Contacts. 2. Tap ➔ New contact. Note: Enter a phone number from the dialpad and press contacts ➔ Create new contact. ➔ Add to 3. If prompted, tap a destination type (Google or Corporate). Note: You will not see the option to select a destination unless you have previously established a Google or Corporate account on the device. 4. Tap the First name and Last name fields, and enter a name for the new entry. Note: Use the predictive text row to shortcut a name selection by tapping the word. 5. Tap the Phone number field and enter a phone number using the onscreen dialpad.
-
 1
1 -
2
-
3
-
4
-
5
-
6
-
7
-
8
-
9
-
10
-
11
-
12
-
13
-
14
-
15
-
16
-
17
-
18
-
19
-
20
-
21
-
22
-
23
-
24
-
25
-
26
-
27
-
28
-
29
-
30
-
31
-
32
-
33
-
34
-
35
-
36
-
37
-
38
-
39
-
40
-
41
-
42
-
43
-
44
-
45
-
46
-
47
-
48
-
49
-
50
-
51
-
52
-
53
-
54
-
55
-
56
-
57
-
58
-
59
-
60
-
61
-
62
-
63
-
64
-
65
-
66
-
67
-
68
-
69
-
70
-
71
-
72
-
 73
73 -
 74
74 -
 75
75 -
 76
76 -
 77
77 -
 78
78 -
 79
79 -
 80
80 -
 81
81 -
 82
82 -
 83
83 -
84
-
85
-
86
-
87
-
88
-
89
-
90
-
91
-
92
-
93
-
94
-
95
-
96
-
97
-
98
-
99
-
100
-
101
-
102
-
103
-
104
-
105
-
106
-
107
-
108
-
109
-
110
-
111
-
112
-
113
-
114
-
115
-
116
-
117
-
118
-
119
-
120
-
121
-
122
-
123
-
124
-
125
-
126
-
127
-
128
-
129
-
130
-
131
-
132
-
133
-
134
-
135
-
136
-
137
-
138
-
139
-
140
-
141
-
142
-
143
-
144
-
145
-
146
-
147
-
148
-
149
 |
 |
