Samsung SCH-M828C User Manual (user Manual) (ver.f6) (English(north America)) - Page 81
Contacts Menu Options, to remove the current contact, from the Favorites list.
 |
View all Samsung SCH-M828C manuals
Add to My Manuals
Save this manual to your list of manuals |
Page 81 highlights
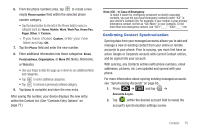
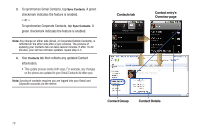
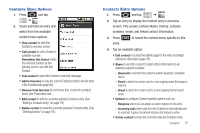
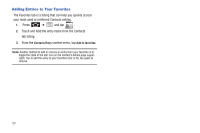
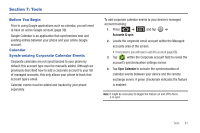
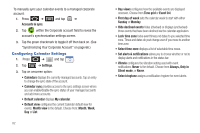
Contacts Menu Options 1. Press and tap ➔ . 2. Touch and hold an entry and select from the available contact menu options: • View contact to view the Contact's overview screen. • Call contact to call a Contact's available number. Remember this choice marks the selected number as the primary one for use with this Contact. • Text contact to send the Contact a new text message. • Add to favorites to copy the current Contacts entry to the list withi n the Favorites tab (page 80). • Remove from favorites to remove the current contact from the Favorites list. • Edit contact to edit the currently selected Contacts entry. (See "Editing a Contacts Entry" on page 78.) • Delete contact to erase the currently selected Contacts entry. (See "Deleting Entries" on page 79.) Contacts Entry Options 1. Press and tap ➔ . 2. Tap an entry to display the Contact entry's overview screen. This screen contains Name, History, contacts numbers, email, and linked contact information. 3. Press entry. to reveal the context menu specific to this 4. Tap an available option: • Edit contact to access the details page for the entry and begin editing its information (page 79). • Share to send the current Contact entry's information to an external recipient via either: - Bluetooth to transmit this contact to another bluetooth-compatible device. - Email to attach the contact card to a new outgoing email (Exchange or Internet). - Gmail to attach the contact card to a new outgoing Internet-based email. • Options to configure Contact-specific options such as: - Ringtone where you can assign a custom ringtone for this entry. - Incoming calls where calls from this Contact are automatically sent to voicemail. A green checkmark indicates this feature is active. • Delete contact to erase the currently selected Contacts entry. Contacts 77
-
 1
1 -
2
-
3
-
4
-
5
-
6
-
7
-
8
-
9
-
10
-
11
-
12
-
13
-
14
-
15
-
16
-
17
-
18
-
19
-
20
-
21
-
22
-
23
-
24
-
25
-
26
-
27
-
28
-
29
-
30
-
31
-
32
-
33
-
34
-
35
-
36
-
37
-
38
-
39
-
40
-
41
-
42
-
43
-
44
-
45
-
46
-
47
-
48
-
49
-
50
-
51
-
52
-
53
-
54
-
55
-
56
-
57
-
58
-
59
-
60
-
61
-
62
-
63
-
64
-
65
-
66
-
67
-
68
-
69
-
70
-
71
-
72
-
73
-
74
-
75
-
 76
76 -
 77
77 -
 78
78 -
 79
79 -
 80
80 -
 81
81 -
 82
82 -
 83
83 -
 84
84 -
 85
85 -
 86
86 -
87
-
88
-
89
-
90
-
91
-
92
-
93
-
94
-
95
-
96
-
97
-
98
-
99
-
100
-
101
-
102
-
103
-
104
-
105
-
106
-
107
-
108
-
109
-
110
-
111
-
112
-
113
-
114
-
115
-
116
-
117
-
118
-
119
-
120
-
121
-
122
-
123
-
124
-
125
-
126
-
127
-
128
-
129
-
130
-
131
-
132
-
133
-
134
-
135
-
136
-
137
-
138
-
139
-
140
-
141
-
142
-
143
-
144
-
145
-
146
-
147
-
148
-
149
 |
 |
