Sharp AJ-6010 AJ6010 Operation Manual - Page 27
Printing a Photograph
 |
View all Sharp AJ-6010 manuals
Add to My Manuals
Save this manual to your list of manuals |
Page 27 highlights
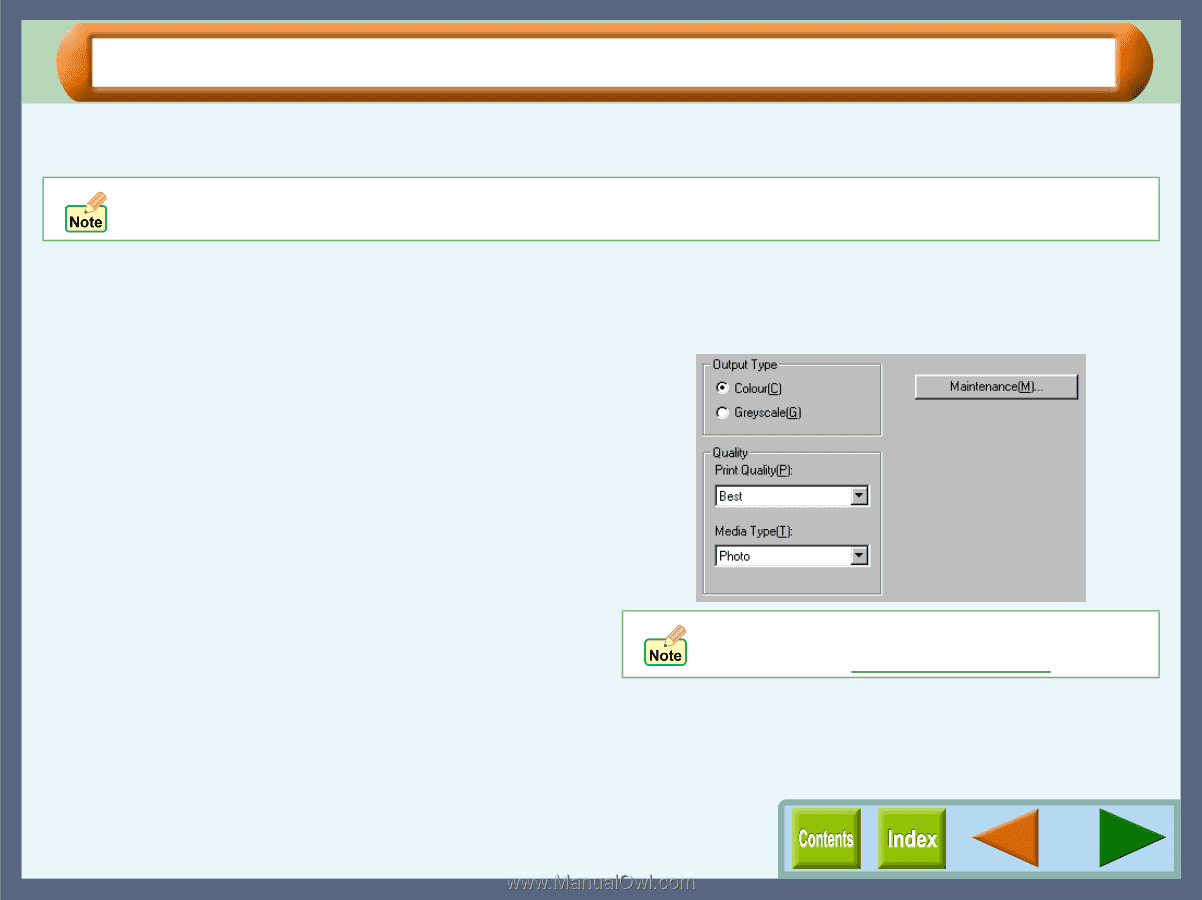
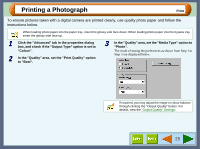
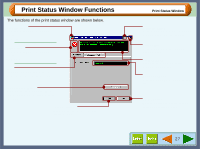
Printing a Photograph Print To ensure pictures taken with a digital camera are printed clearly, use quality photo paper and follow the instructions below. When loading photo paper into the paper tray, insert the glossy side face down. When loading photo paper into the bypass tray, insert the glossy side face up. 1 Click the "Advanced" tab in the properties dialog box, and check if the "Output Type" option is set to "Colour". 2 In the "Quality" area, set the "Print Quality" option to "Best". 3 In the "Quality" area, set the "Media Type" option to "Photo". The result of setting the preferences as shown from Step 1 to Step 3 are displayed below. If required, you may adjust the image or colour balance through clicking the "Output Quality" button. For details, view the "Output Quality" Settings. 25
-
 1
1 -
2
-
3
-
4
-
5
-
6
-
7
-
8
-
9
-
10
-
11
-
12
-
13
-
14
-
15
-
16
-
17
-
18
-
19
-
20
-
21
-
 22
22 -
 23
23 -
 24
24 -
 25
25 -
 26
26 -
 27
27 -
 28
28 -
 29
29 -
 30
30 -
 31
31 -
 32
32 -
33
-
34
-
35
-
36
-
37
-
38
-
39
-
40
-
41
-
42
-
43
-
44
-
45
-
46
-
47
-
48
-
49
-
50
-
51
-
52
-
53
-
54
-
55
-
56
-
57
-
58
-
59
-
60
-
61
-
62
-
63
-
64
-
65
-
66
-
67
-
68
-
69
-
70
-
71
-
72
-
73
-
74
-
75
-
76
-
77
-
78
-
79
-
80
-
81
-
82
-
83
-
84
-
85
-
86
-
87
-
88
-
89
-
90
-
91
-
92
-
93
 |
 |