Sharp AJ-6010 AJ6010 Operation Manual - Page 57
Print Margin Settings
 |
View all Sharp AJ-6010 manuals
Add to My Manuals
Save this manual to your list of manuals |
Page 57 highlights
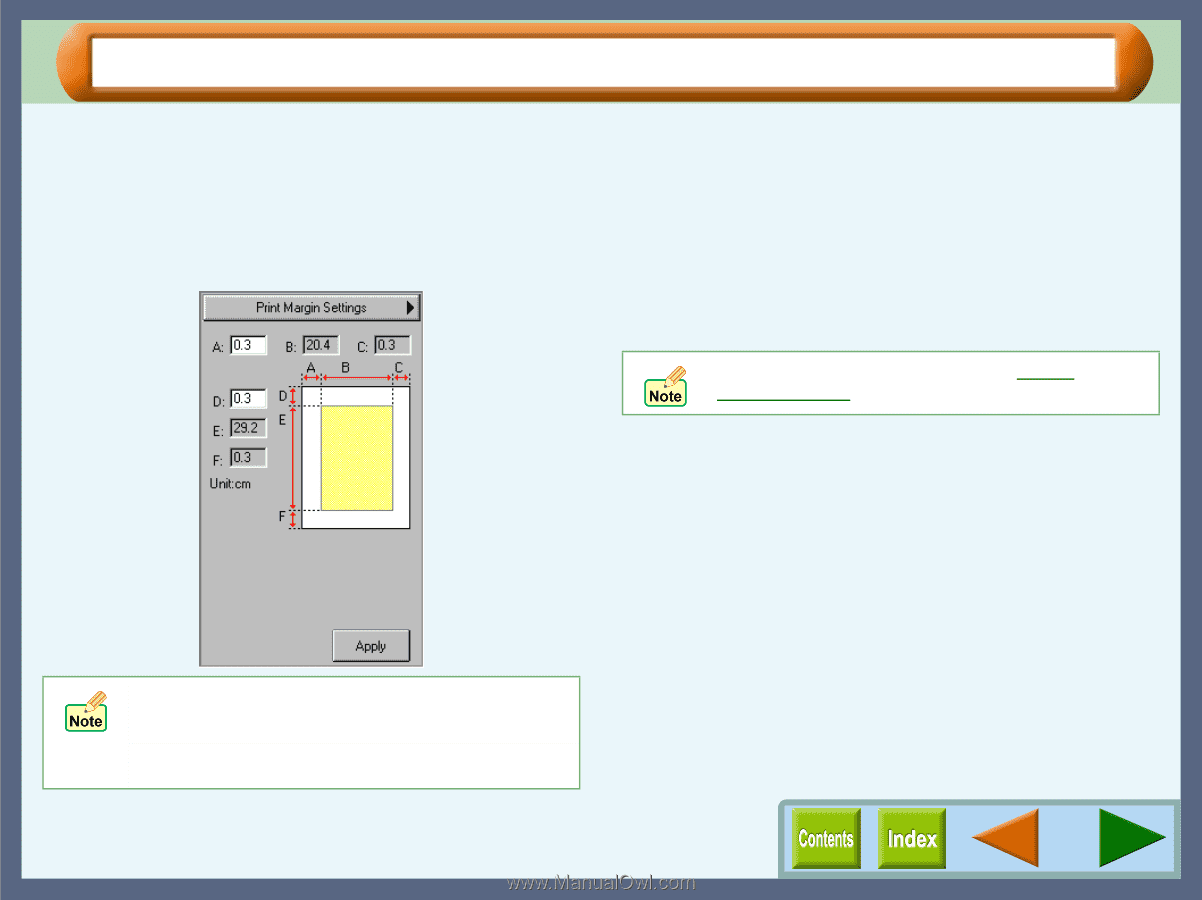
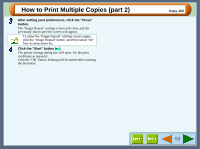
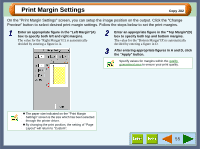
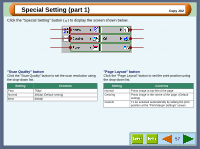
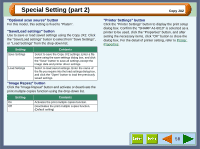
Print Margin Settings Copy JX2 On the "Print Margin Settings" screen, you can setup the image position on the output. Click the "Change Preview" button to select desired print margin settings. Follow the steps below to set the print margins. 1 Enter an appropriate figure in the "Left Margin"(A) box to specify both left and right margins. The value for the "Right Margin"(C) is automatically decided by entering a figure in A. 2 Enter an appropriate figure in the "Top Margin"(D) box to specify both top and bottom margins. The value for the "Bottom Margin"(F) is automatically decided by entering a figure in D. 3 After entering appropriate figures in A and D, click the "Apply" button. Specify values for margins within the quality guaranteed area to ensure your print quality. ! The paper size indicated on the "Print Margin Settings" screen is the size which has been selected through the printer driver. ! By changing the print position, the setting of "Page Layout" will return to "Custom". 55
-
 1
1 -
2
-
3
-
4
-
5
-
6
-
7
-
8
-
9
-
10
-
11
-
12
-
13
-
14
-
15
-
16
-
17
-
18
-
19
-
20
-
21
-
22
-
23
-
24
-
25
-
26
-
27
-
28
-
29
-
30
-
31
-
32
-
33
-
34
-
35
-
36
-
37
-
38
-
39
-
40
-
41
-
42
-
43
-
44
-
45
-
46
-
47
-
48
-
49
-
50
-
51
-
 52
52 -
 53
53 -
 54
54 -
 55
55 -
 56
56 -
 57
57 -
 58
58 -
 59
59 -
 60
60 -
 61
61 -
 62
62 -
63
-
64
-
65
-
66
-
67
-
68
-
69
-
70
-
71
-
72
-
73
-
74
-
75
-
76
-
77
-
78
-
79
-
80
-
81
-
82
-
83
-
84
-
85
-
86
-
87
-
88
-
89
-
90
-
91
-
92
-
93
 |
 |