Sharp AJ-6010 AJ6010 Operation Manual - Page 69
Changing the Ink Tank
 |
View all Sharp AJ-6010 manuals
Add to My Manuals
Save this manual to your list of manuals |
Page 69 highlights
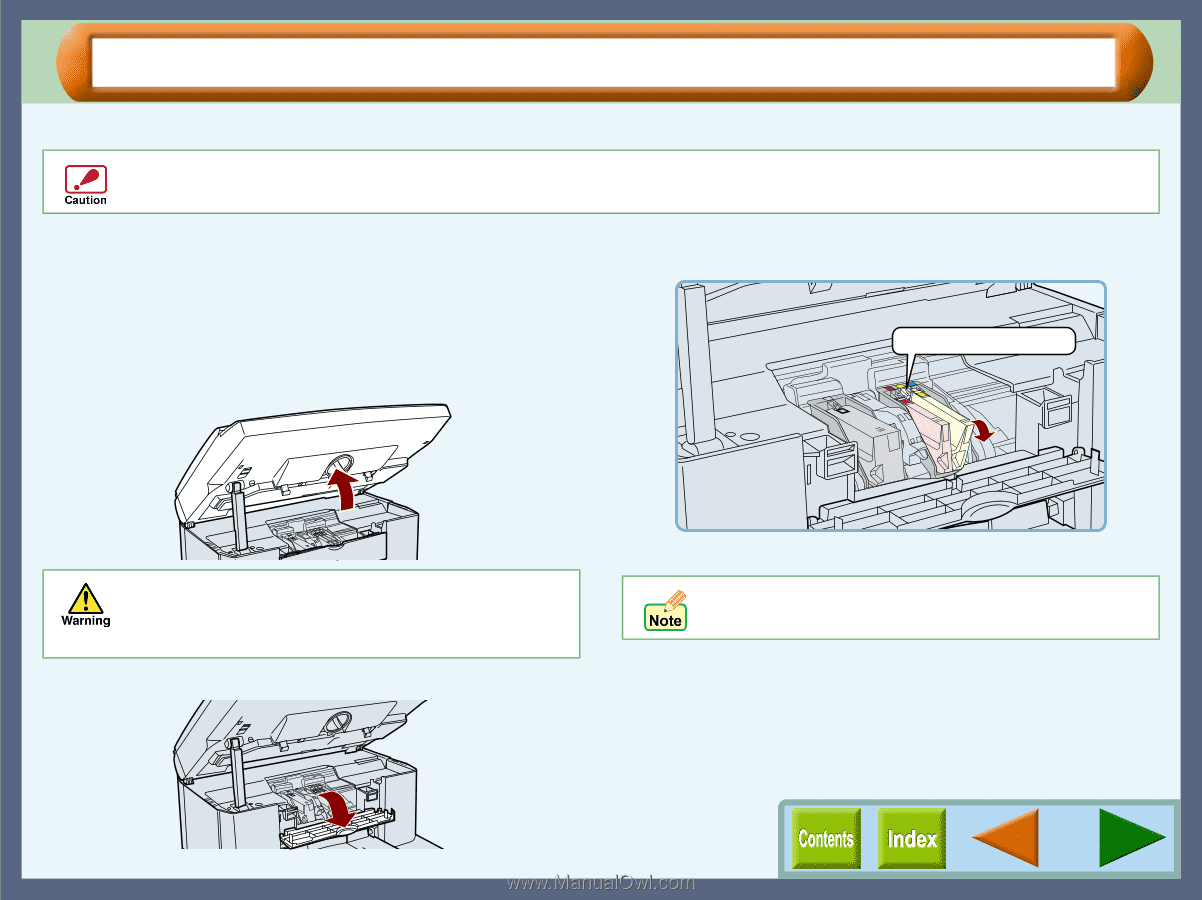
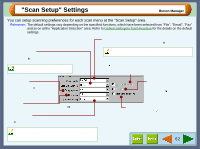
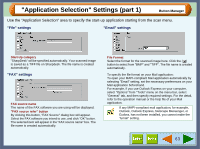
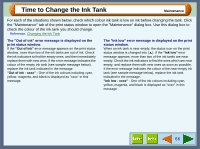
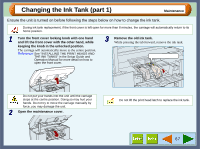
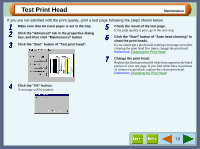
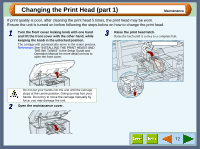
Changing the Ink Tank (part 1) Maintenance Ensure the unit is turned on before following the steps below on how to change the ink tank. During ink tank replacement, if the front cover is left open for more than 8 minutes, the carriage will automatically return to its home position. 1 Turn the front cover locking knob with one hand and lift the front cover with the other hand, while keeping the knob in the unlocked position. The carriage will automatically move to the centre position. Reference: See "INSTALLING THE PRINT HEADS AND THE INK TANKS" in the Setup Guide and Operation Manual for more detail on how to open the front cover. 3 Remove the old ink tank. While pressing the tab forward, remove the ink tank. Press the tab forward. Do not put your hands into the unit until the carriage stops at the centre position. Doing so may hurt your hands. Do not try to move the carriage manually by force, you may damage the unit. 2 Open the maintenance cover. Example: Releasing the yellow ink Do not lift the print head latch to replace the ink tank. 67
-
 1
1 -
2
-
3
-
4
-
5
-
6
-
7
-
8
-
9
-
10
-
11
-
12
-
13
-
14
-
15
-
16
-
17
-
18
-
19
-
20
-
21
-
22
-
23
-
24
-
25
-
26
-
27
-
28
-
29
-
30
-
31
-
32
-
33
-
34
-
35
-
36
-
37
-
38
-
39
-
40
-
41
-
42
-
43
-
44
-
45
-
46
-
47
-
48
-
49
-
50
-
51
-
52
-
53
-
54
-
55
-
56
-
57
-
58
-
59
-
60
-
61
-
62
-
63
-
 64
64 -
 65
65 -
 66
66 -
 67
67 -
 68
68 -
 69
69 -
 70
70 -
 71
71 -
 72
72 -
 73
73 -
 74
74 -
75
-
76
-
77
-
78
-
79
-
80
-
81
-
82
-
83
-
84
-
85
-
86
-
87
-
88
-
89
-
90
-
91
-
92
-
93
 |
 |