Sharp AJ-6010 AJ6010 Operation Manual - Page 75
Changing the Print Head part 2
 |
View all Sharp AJ-6010 manuals
Add to My Manuals
Save this manual to your list of manuals |
Page 75 highlights
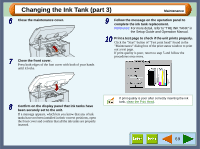
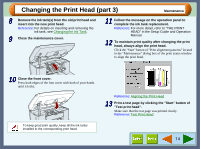
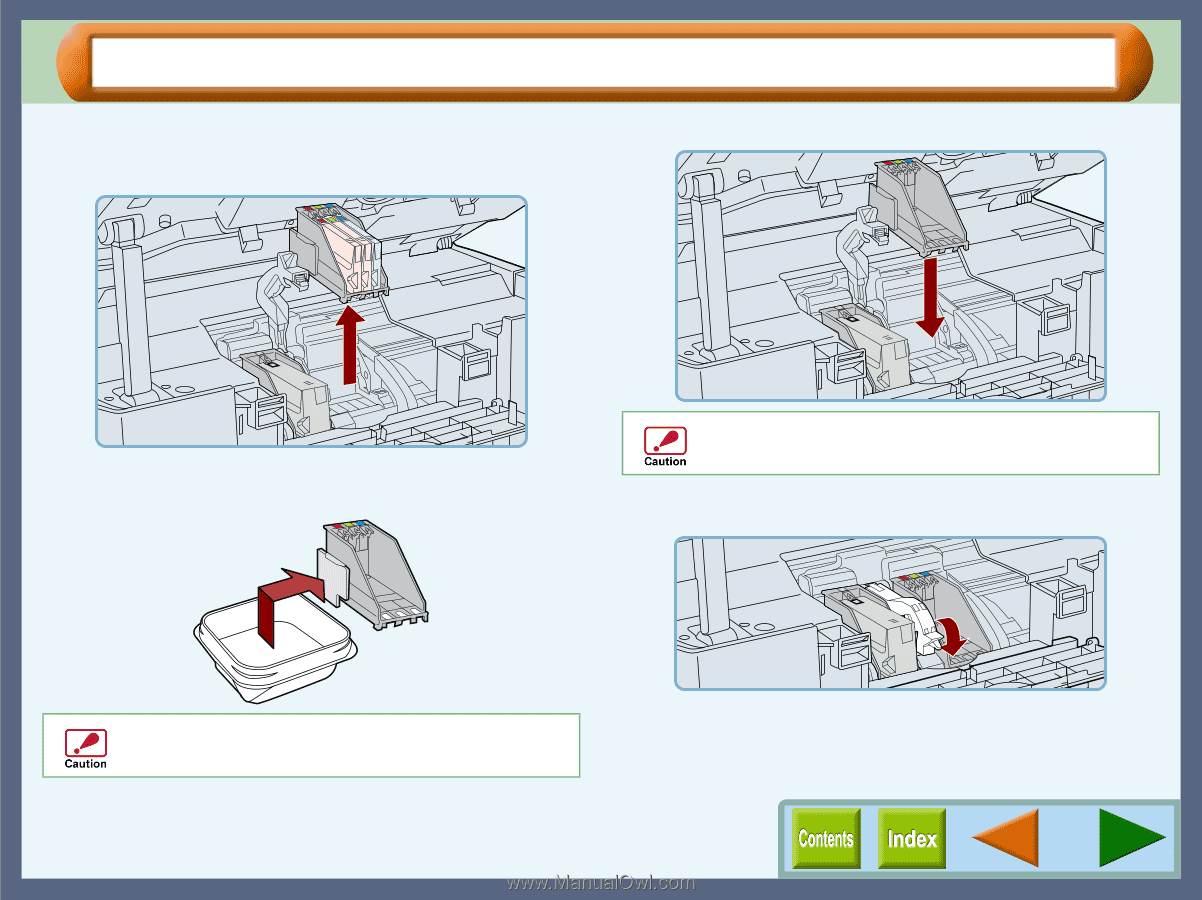
Changing the Print Head (part 2) 4 Remove the old black or colour print head with the ink tank(s) still inserted. Lift it straight up to remove. 6 Insert the new print head. Maintenance 5 Remove the new print head from its protective case. Be careful not to damage the print head. If any part is damaged, the unit may not work properly. 7 Lower the print head latch. Lower the latch until it is properly fixed into position. Do not touch the metal portion of the print head. Doing so may lead to improper printing or damage to the unit. 73
-
 1
1 -
2
-
3
-
4
-
5
-
6
-
7
-
8
-
9
-
10
-
11
-
12
-
13
-
14
-
15
-
16
-
17
-
18
-
19
-
20
-
21
-
22
-
23
-
24
-
25
-
26
-
27
-
28
-
29
-
30
-
31
-
32
-
33
-
34
-
35
-
36
-
37
-
38
-
39
-
40
-
41
-
42
-
43
-
44
-
45
-
46
-
47
-
48
-
49
-
50
-
51
-
52
-
53
-
54
-
55
-
56
-
57
-
58
-
59
-
60
-
61
-
62
-
63
-
64
-
65
-
66
-
67
-
68
-
69
-
 70
70 -
 71
71 -
 72
72 -
 73
73 -
 74
74 -
 75
75 -
 76
76 -
 77
77 -
 78
78 -
 79
79 -
 80
80 -
81
-
82
-
83
-
84
-
85
-
86
-
87
-
88
-
89
-
90
-
91
-
92
-
93
 |
 |
Maintenance
73
Changing the Print Head (part 2)
4
Remove the old black or colour print head with the
ink tank(s) still inserted.
Lift it straight up to remove.
5
Remove the new print head from its protective
case.
6
Insert the new print head.
7
Lower the print head latch.
Lower the latch until it is properly fixed into position.
Do not touch the metal portion of the print head. Doing
so may lead to improper printing or damage to the unit.
Be careful not to damage the print head. If any part is
damaged, the unit may not work properly.