Sony Ericsson R520m User Guide - Page 69
You may not need to enter all the settings below. Contact your - service manual
 |
View all Sony Ericsson R520m manuals
Add to My Manuals
Save this manual to your list of manuals |
Page 69 highlights
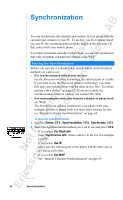
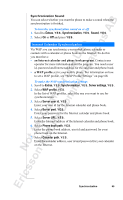
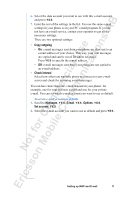
EricssonNoMtofboilreCCoommmmerucniiaclatUisoens AB Note: You may not need to enter all the settings below. Contact your network operator or service provider (a distributor of WAP pages) before you start changing the settings yourself. To enter WAP profile settings manually 1. Make sure you have created a data account between your phone and the WAP gateway. 2. Scroll to WAP services, Y E S , WAP settings, Y E S . 3. Select the profile that you want to edit and press Y E S . 4. Scroll to Rename, Y E S . Enter a name for the profile. 5. Scroll to Chg homepage, Y ES . Enter the address of the WAP page you want to have as homepage. 6. Scroll to Save to, Y E S . Select if the bookmarks that you add during browsing should be available for all your WAP profiles or only for the WAP profile you are currently using. 7. Scroll to Gateway, Y E S . 8. For GPRS and GSM data, select IP settings, Y E S . Continue as described in "To enter IP settings" below. For SMS, scroll to Change type, Y E S , SMS, Y E S . Then select SMS settings, Y E S . Continue as described in "To enter SMS settings" below. To enter IP settings 1. Select Connect using, Y E S . Select the data account you want to use when browsing. 2. Scroll to IP address, Y E S. Enter the IP address of the WAP gateway. 3. Scroll to User id, Y E S . Enter your user id for the WAP gateway. 4. Scroll to Password, Y E S . Enter your password for the WAP gateway. 5. Scroll to Data mode, Y E S . Select a data connection mode, Y E S . 6. Scroll to Security, Y E S . Select On if you want a secure connection, or Off if you do not want a secure connection. 7. Scroll to Show images, Y ES . Select On if you want to view images while browsing, or Off if you do not want to view images while browsing. 8. Scroll to Response timer, Y E S. Enter a time limit in seconds after which a download attempt will stop. Setting up WAP and E-mail 69
-
 1
1 -
2
-
3
-
4
-
5
-
6
-
7
-
8
-
9
-
10
-
11
-
12
-
13
-
14
-
15
-
16
-
17
-
18
-
19
-
20
-
21
-
22
-
23
-
24
-
25
-
26
-
27
-
28
-
29
-
30
-
31
-
32
-
33
-
34
-
35
-
36
-
37
-
38
-
39
-
40
-
41
-
42
-
43
-
44
-
45
-
46
-
47
-
48
-
49
-
50
-
51
-
52
-
53
-
54
-
55
-
56
-
57
-
58
-
59
-
60
-
61
-
62
-
63
-
 64
64 -
 65
65 -
 66
66 -
 67
67 -
 68
68 -
 69
69 -
 70
70 -
 71
71 -
 72
72 -
 73
73 -
 74
74 -
75
-
76
-
77
-
78
-
79
-
80
-
81
-
82
-
83
-
84
-
85
-
86
-
87
-
88
-
89
-
90
-
91
-
92
-
93
-
94
-
95
-
96
-
97
-
98
-
99
-
100
-
101
-
102
-
103
-
104
-
105
-
106
-
107
-
108
-
109
-
110
-
111
-
112
-
113
-
114
-
115
-
116
-
117
-
118
-
119
-
120
-
121
-
122
-
123
-
124
-
125
-
126
-
127
-
128
-
129
-
130
-
131
-
132
-
133
-
134
-
135
-
136
-
137
-
138
-
139
-
140
-
141
-
142
-
143
-
144
-
145
-
146
-
147
-
148
-
149
-
150
-
151
-
152
 |
 |