Canon CanoScan FS2700F User Manual - Page 27
Scanning Procedures, Insert the film.
 |
View all Canon CanoScan FS2700F manuals
Add to My Manuals
Save this manual to your list of manuals |
Page 27 highlights
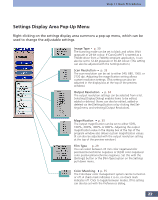
Step 2 • Scanning Scanning Procedures Although scanning procedures vary according to the image type (color, grayscale or black and white), the basic procedures are the same. Read the following procedures as a guideline for scanning. Set the film type. p. 29 Select a film type that matches the film in use from among the following options: 35 mm color negatives/color positives/monochrome negatives or IX240 color negatives/color positives/monochrome negatives. Set the image type. p. 30 For colour images, select [24-bit colour]. For grayscale images, select [8-bit grayscale]. For black and white images, select [Black and White]. If CanoCraft FS has been started as a TWAIN driver from within a TWAINcompliant application program, you can also [36-bit colour] for colour images and [12-bit grayscale] for grayscale images. Determine the image size and resolution. pp. 32-36 Set the scan resolution, output resolution and magnification to suit your requirements for the printing size and monitor size of the image. Insert the film. (Refer to the Quick Start Guide or electronic manual.) Initiate the preview scan. p. 37 Start off by previewing the image before initiating the final scan. Adjust the color balance, halftone pattern or threshold values. p. 40 If the preview image did not reproduce as well as expected, adjust the coloring and brightness of a color image, or the shadows and highlights of a grayscale image, or the threshold of a black and white image. Select the area of the image to be included in the final scan. p. 41 If you wish to crop the image, select the scan area by dragging the mouse cursor. Save (scan) the image. p. 46 When CanoCraft FS is started from within Photoshop, the scanned image cannot be saved. To save, close CanoCraft FS and save the file using the save function in Photoshop. 27
-
 1
1 -
2
-
3
-
4
-
5
-
6
-
7
-
8
-
9
-
10
-
11
-
12
-
13
-
14
-
15
-
16
-
17
-
18
-
19
-
20
-
21
-
 22
22 -
 23
23 -
 24
24 -
 25
25 -
 26
26 -
 27
27 -
 28
28 -
 29
29 -
 30
30 -
 31
31 -
 32
32 -
33
-
34
-
35
-
36
-
37
-
38
-
39
-
40
-
41
-
42
-
43
-
44
-
45
-
46
-
47
-
48
-
49
-
50
-
51
-
52
-
53
-
54
-
55
-
56
-
57
-
58
-
59
-
60
-
61
-
62
-
63
-
64
-
65
-
66
-
67
-
68
-
69
-
70
-
71
-
72
-
73
-
74
-
75
-
76
-
77
-
78
-
79
-
80
-
81
-
82
-
83
-
84
-
85
-
86
-
87
-
88
-
89
-
90
-
91
-
92
-
93
-
94
-
95
-
96
-
97
-
98
-
99
-
100
-
101
-
102
-
103
-
104
-
105
-
106
-
107
-
108
-
109
-
110
-
111
-
112
-
113
-
114
-
115
-
116
-
117
-
118
-
119
-
120
-
121
-
122
-
123
-
124
-
125
-
126
-
127
-
128
-
129
-
130
-
131
-
132
-
133
-
134
-
135
 |
 |
