Casio EX-Z12 Owners Manual - Page 135
Date Stamping Snapshots, In the REC mode, press [MENU]., On the Set Up tab, select Timestamp
 |
View all Casio EX-Z12 manuals
Add to My Manuals
Save this manual to your list of manuals |
Page 135 highlights
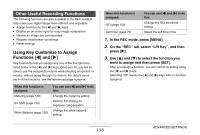
Date Stamping Snapshots You can have the snapshot's recording date only, or date and time stamped in the lower right corner of the image. 1. In the REC mode, press [MENU]. 2. On the "Set Up" tab, select "Timestamp" and then press [X]. 3. Use [S] and [T] to select the setting you want and then press [SET]. Example: December 24, 2007, 1:25 p.m. To do this: Display the date only (2007/12/24) Display the date and time (2007/12/24 1:25pm) Display nothing Select this setting: Date Date&Time Off IMPORTANT! • Even if you do not stamp the date and/or time with Timestamp, you can do so later using the DPOF function and the printing software function (page 208). • Once date and time information is stamped in a print, it cannot be edited or deleted. • Use the "Date Style" setting (page 194) to specify the Year/ Month/Day format of the date. • The recording date and time are determined in accordance with the camera's clock settings (pages 11, 193) when the snapshot is recorded. • Digital zoom is not supported while date stamping is turned on. • Date stamping is not supported for the following types of images. - Some BEST SHOT images (Auto Framing, Business cards and documents, White board, etc., Old Photo, ID Photo) 135 ADVANCED SETTINGS
-
 1
1 -
2
-
3
-
4
-
5
-
6
-
7
-
8
-
9
-
10
-
11
-
12
-
13
-
14
-
15
-
16
-
17
-
18
-
19
-
20
-
21
-
22
-
23
-
24
-
25
-
26
-
27
-
28
-
29
-
30
-
31
-
32
-
33
-
34
-
35
-
36
-
37
-
38
-
39
-
40
-
41
-
42
-
43
-
44
-
45
-
46
-
47
-
48
-
49
-
50
-
51
-
52
-
53
-
54
-
55
-
56
-
57
-
58
-
59
-
60
-
61
-
62
-
63
-
64
-
65
-
66
-
67
-
68
-
69
-
70
-
71
-
72
-
73
-
74
-
75
-
76
-
77
-
78
-
79
-
80
-
81
-
82
-
83
-
84
-
85
-
86
-
87
-
88
-
89
-
90
-
91
-
92
-
93
-
94
-
95
-
96
-
97
-
98
-
99
-
100
-
101
-
102
-
103
-
104
-
105
-
106
-
107
-
108
-
109
-
110
-
111
-
112
-
113
-
114
-
115
-
116
-
117
-
118
-
119
-
120
-
121
-
122
-
123
-
124
-
125
-
126
-
127
-
128
-
129
-
 130
130 -
 131
131 -
 132
132 -
 133
133 -
 134
134 -
 135
135 -
 136
136 -
 137
137 -
 138
138 -
 139
139 -
 140
140 -
141
-
142
-
143
-
144
-
145
-
146
-
147
-
148
-
149
-
150
-
151
-
152
-
153
-
154
-
155
-
156
-
157
-
158
-
159
-
160
-
161
-
162
-
163
-
164
-
165
-
166
-
167
-
168
-
169
-
170
-
171
-
172
-
173
-
174
-
175
-
176
-
177
-
178
-
179
-
180
-
181
-
182
-
183
-
184
-
185
-
186
-
187
-
188
-
189
-
190
-
191
-
192
-
193
-
194
-
195
-
196
-
197
-
198
-
199
-
200
-
201
-
202
-
203
-
204
-
205
-
206
-
207
-
208
-
209
-
210
-
211
-
212
-
213
-
214
-
215
-
216
-
217
-
218
-
219
-
220
-
221
-
222
-
223
-
224
-
225
-
226
-
227
-
228
-
229
-
230
-
231
-
232
-
233
-
234
-
235
-
236
-
237
-
238
-
239
-
240
-
241
-
242
-
243
-
244
-
245
-
246
-
247
-
248
-
249
-
250
-
251
-
252
-
253
-
254
-
255
-
256
-
257
-
258
-
259
-
260
-
261
-
262
-
263
-
264
-
265
 |
 |
