Casio EX-Z12 Owners Manual - Page 59
Shooting a Snapshot
 |
View all Casio EX-Z12 manuals
Add to My Manuals
Save this manual to your list of manuals |
Page 59 highlights
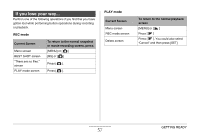
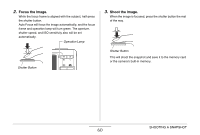
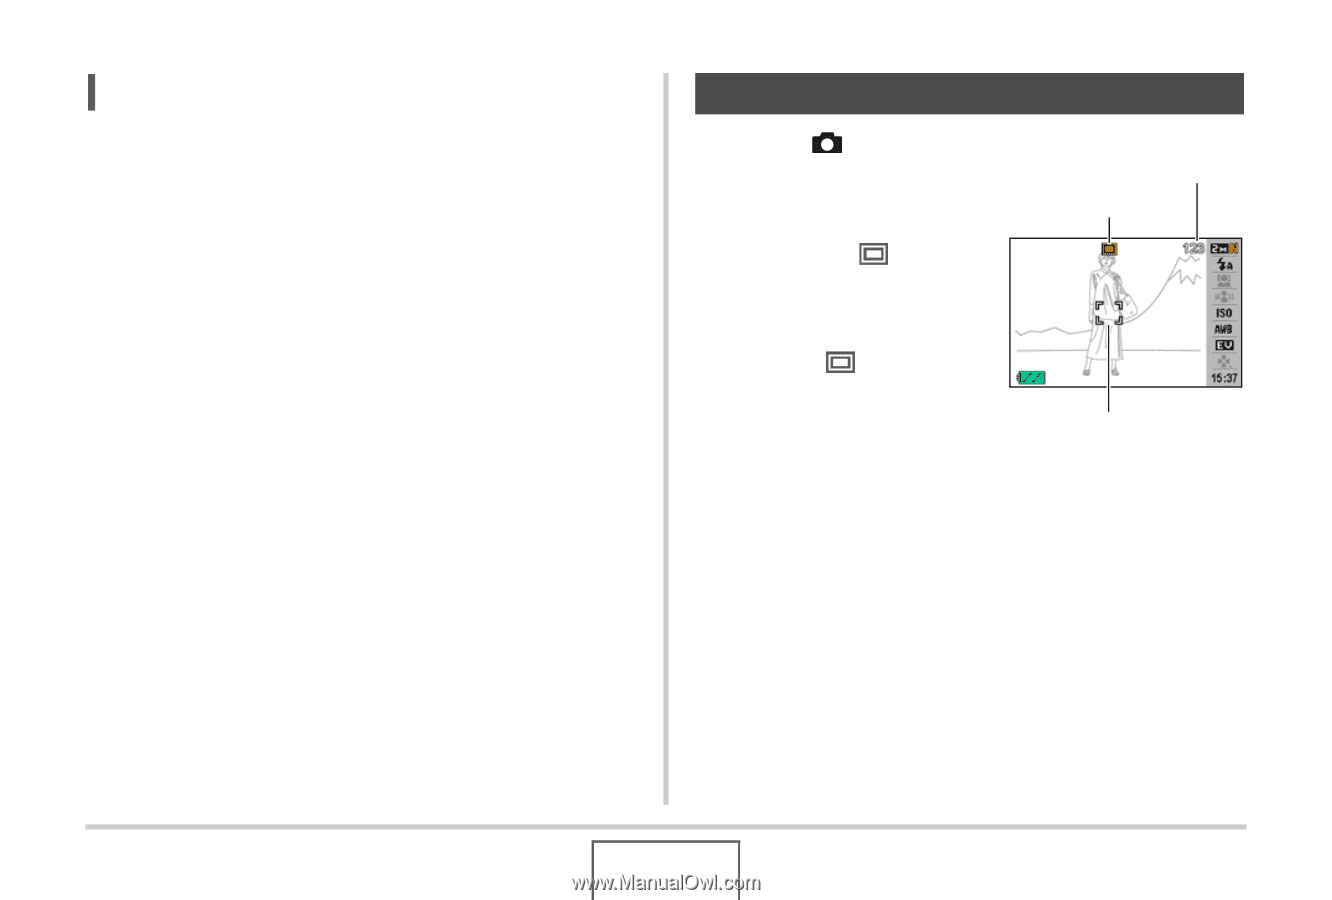
NOTE • Good-looking images are impossible if you move the camera when you press the shutter button or while the Auto Focus operation is being performed. Holding the camera correctly, carefully press the shutter button and take care that you do not move the camera as the shutter releases. This is especially important when available lighting is low, which slows down the shutter speed. Shooting a Snapshot 1. Press [ ] (REC) to enter the REC mode. Confirm that the subject (people, scenery, etc.) and the Auto icon " " are displayed on the monitor screen. If any icon other than the Auto icon " " is displayed, switch to "Auto" (page 97). Remaining Snapshot Memory Capacity Auto Icon Focus Frame SHOOTING A SNAPSHOT 59
-
 1
1 -
2
-
3
-
4
-
5
-
6
-
7
-
8
-
9
-
10
-
11
-
12
-
13
-
14
-
15
-
16
-
17
-
18
-
19
-
20
-
21
-
22
-
23
-
24
-
25
-
26
-
27
-
28
-
29
-
30
-
31
-
32
-
33
-
34
-
35
-
36
-
37
-
38
-
39
-
40
-
41
-
42
-
43
-
44
-
45
-
46
-
47
-
48
-
49
-
50
-
51
-
52
-
53
-
 54
54 -
 55
55 -
 56
56 -
 57
57 -
 58
58 -
 59
59 -
 60
60 -
 61
61 -
 62
62 -
 63
63 -
 64
64 -
65
-
66
-
67
-
68
-
69
-
70
-
71
-
72
-
73
-
74
-
75
-
76
-
77
-
78
-
79
-
80
-
81
-
82
-
83
-
84
-
85
-
86
-
87
-
88
-
89
-
90
-
91
-
92
-
93
-
94
-
95
-
96
-
97
-
98
-
99
-
100
-
101
-
102
-
103
-
104
-
105
-
106
-
107
-
108
-
109
-
110
-
111
-
112
-
113
-
114
-
115
-
116
-
117
-
118
-
119
-
120
-
121
-
122
-
123
-
124
-
125
-
126
-
127
-
128
-
129
-
130
-
131
-
132
-
133
-
134
-
135
-
136
-
137
-
138
-
139
-
140
-
141
-
142
-
143
-
144
-
145
-
146
-
147
-
148
-
149
-
150
-
151
-
152
-
153
-
154
-
155
-
156
-
157
-
158
-
159
-
160
-
161
-
162
-
163
-
164
-
165
-
166
-
167
-
168
-
169
-
170
-
171
-
172
-
173
-
174
-
175
-
176
-
177
-
178
-
179
-
180
-
181
-
182
-
183
-
184
-
185
-
186
-
187
-
188
-
189
-
190
-
191
-
192
-
193
-
194
-
195
-
196
-
197
-
198
-
199
-
200
-
201
-
202
-
203
-
204
-
205
-
206
-
207
-
208
-
209
-
210
-
211
-
212
-
213
-
214
-
215
-
216
-
217
-
218
-
219
-
220
-
221
-
222
-
223
-
224
-
225
-
226
-
227
-
228
-
229
-
230
-
231
-
232
-
233
-
234
-
235
-
236
-
237
-
238
-
239
-
240
-
241
-
242
-
243
-
244
-
245
-
246
-
247
-
248
-
249
-
250
-
251
-
252
-
253
-
254
-
255
-
256
-
257
-
258
-
259
-
260
-
261
-
262
-
263
-
264
-
265
 |
 |
59
SHOOTING A SNAPSHOT
NOTE
•
Good-looking images are impossi
b
le if yo
u
mo
v
e the
camera
w
hen yo
u
press the sh
u
tter
bu
tton or
w
hile the
A
u
to Foc
u
s operation is
b
eing performed. Holding the
camera correctly, caref
u
lly press the sh
u
tter
bu
tton and
take care that yo
u
do not mo
v
e the camera as the sh
u
tter
releases. This is especially important
w
hen a
v
aila
b
le
lighting is lo
w
,
w
hich slo
w
s do
w
n the sh
u
tter speed.
1.
Press [
] (REC) to
enter the REC mode.
Confirm that the s
ub
ject
(people, scenery, etc.) and
the A
u
to icon “
” are
displayed on the monitor
screen.
If any icon other than the
A
u
to icon “
” is displayed,
s
w
itch to “A
u
to” (page 97).
Shooting a Snapshot
Focus Frame
Auto Icon
Remaining Snapshot
Memory Capacity