Dell PowerEdge T410 Hardware Owner's Manual - Page 121
Power Supplies, Removing a Redundant Power Supply
 |
View all Dell PowerEdge T410 manuals
Add to My Manuals
Save this manual to your list of manuals |
Page 121 highlights
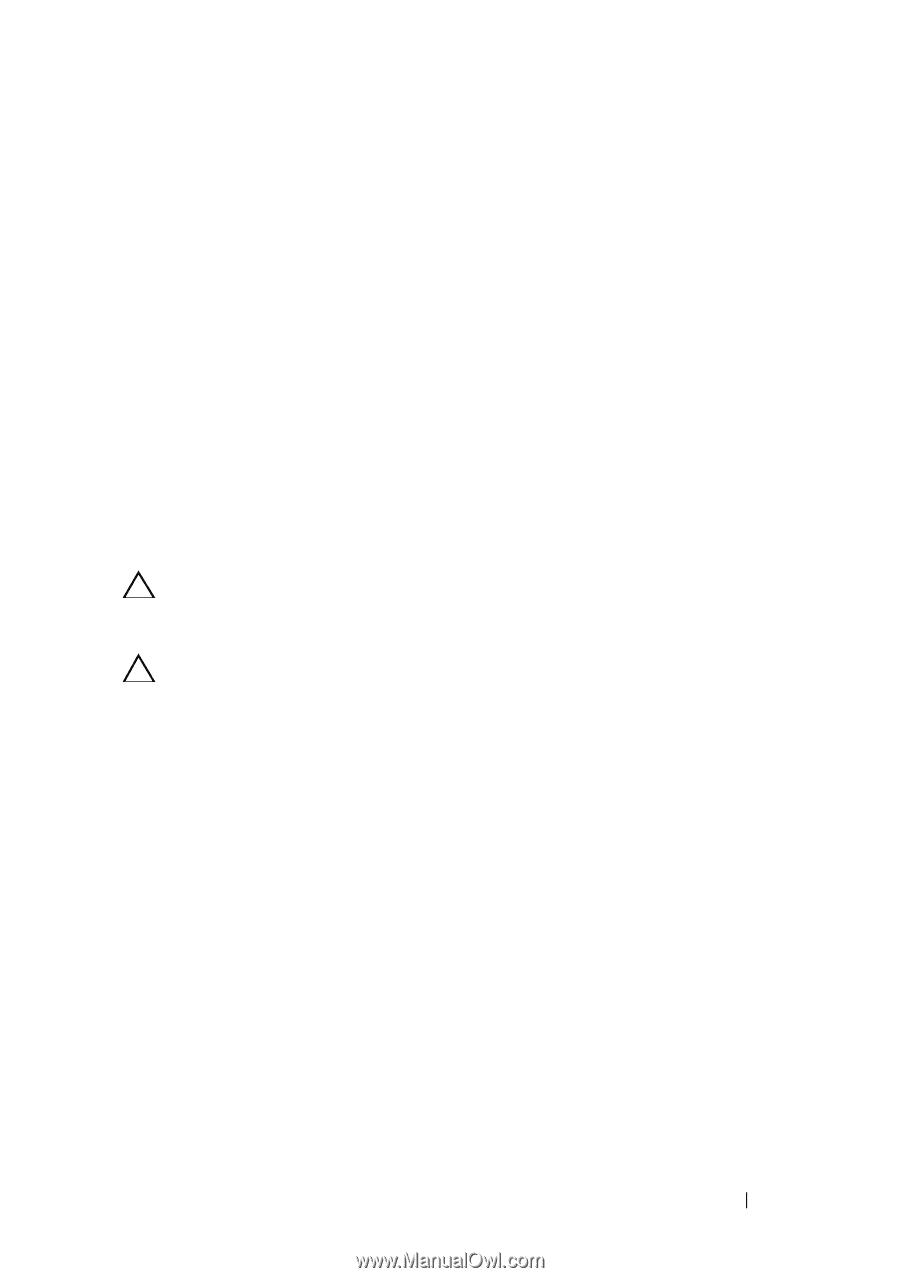
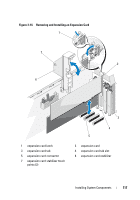
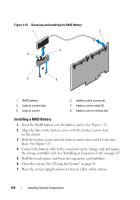
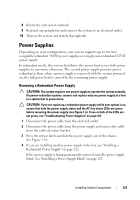
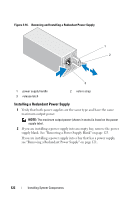
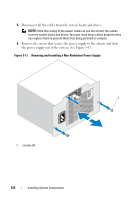
8 Rotate the system feet outward. 9 Reattach any peripherals and connect the system to an electrical outlet. 10 Turn on the system and attached peripherals. Power Supplies Depending on your configuration, your system supports up to two hotswappable redundant 580-W power supplies or a single non-redundant 525-W power supply. In redundant mode, the system distributes the power load across both power supplies to maximize efficiency. The second power supply provides power redundancy; thus, when a power supply is removed with the system powered on, the full power load is carried by the remaining power supply. Removing a Redundant Power Supply CAUTION: The system requires one power supply to operate the system normally. On power-redundant systems, remove and replace only one power supply at a time in a system that is powered on. CAUTION: If you are replacing a redundant power supply while your system is on, ensure that both the power supply status and the AC line status LEDs are green before removing the power supply (see Figure 1-6). If one or both of the LEDs are not green, see "Troubleshooting Power Supplies" on page 161. 1 Disconnect the power cable from the electrical outlet. 2 Disconnect the power cable from the power supply and remove the cable from the cable retention bracket. 3 Press the release latch and slide the power supply out of the chassis. See Figure 3-16. 4 If you are installing another power supply in the bay, see "Installing a Redundant Power Supply" on page 122. If the power supply is being permanently removed, install a power supply blank. See "Installing a Power Supply Blank" on page 123. Installing System Components 121
-
 1
1 -
2
-
3
-
4
-
5
-
6
-
7
-
8
-
9
-
10
-
11
-
12
-
13
-
14
-
15
-
16
-
17
-
18
-
19
-
20
-
21
-
22
-
23
-
24
-
25
-
26
-
27
-
28
-
29
-
30
-
31
-
32
-
33
-
34
-
35
-
36
-
37
-
38
-
39
-
40
-
41
-
42
-
43
-
44
-
45
-
46
-
47
-
48
-
49
-
50
-
51
-
52
-
53
-
54
-
55
-
56
-
57
-
58
-
59
-
60
-
61
-
62
-
63
-
64
-
65
-
66
-
67
-
68
-
69
-
70
-
71
-
72
-
73
-
74
-
75
-
76
-
77
-
78
-
79
-
80
-
81
-
82
-
83
-
84
-
85
-
86
-
87
-
88
-
89
-
90
-
91
-
92
-
93
-
94
-
95
-
96
-
97
-
98
-
99
-
100
-
101
-
102
-
103
-
104
-
105
-
106
-
107
-
108
-
109
-
110
-
111
-
112
-
113
-
114
-
115
-
 116
116 -
 117
117 -
 118
118 -
 119
119 -
 120
120 -
 121
121 -
 122
122 -
 123
123 -
 124
124 -
 125
125 -
 126
126 -
127
-
128
-
129
-
130
-
131
-
132
-
133
-
134
-
135
-
136
-
137
-
138
-
139
-
140
-
141
-
142
-
143
-
144
-
145
-
146
-
147
-
148
-
149
-
150
-
151
-
152
-
153
-
154
-
155
-
156
-
157
-
158
-
159
-
160
-
161
-
162
-
163
-
164
-
165
-
166
-
167
-
168
-
169
-
170
-
171
-
172
-
173
-
174
-
175
-
176
-
177
-
178
-
179
-
180
-
181
-
182
-
183
-
184
-
185
-
186
-
187
-
188
-
189
-
190
-
191
-
192
-
193
-
194
-
195
-
196
-
197
-
198
-
199
-
200
-
201
-
202
-
203
-
204
 |
 |