HP 2500c Service Manual - Page 164
Replacement of LCD Assembly, LED PCA, Replacement of LED PCA
 |
View all HP 2500c manuals
Add to My Manuals
Save this manual to your list of manuals |
Page 164 highlights
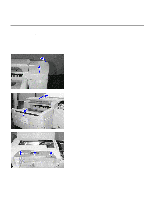
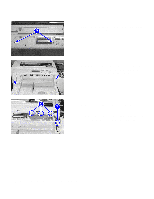
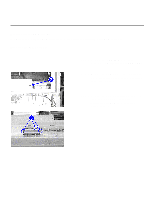
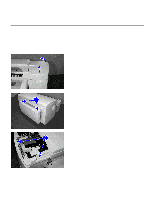
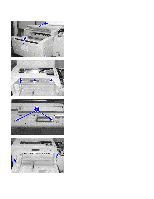
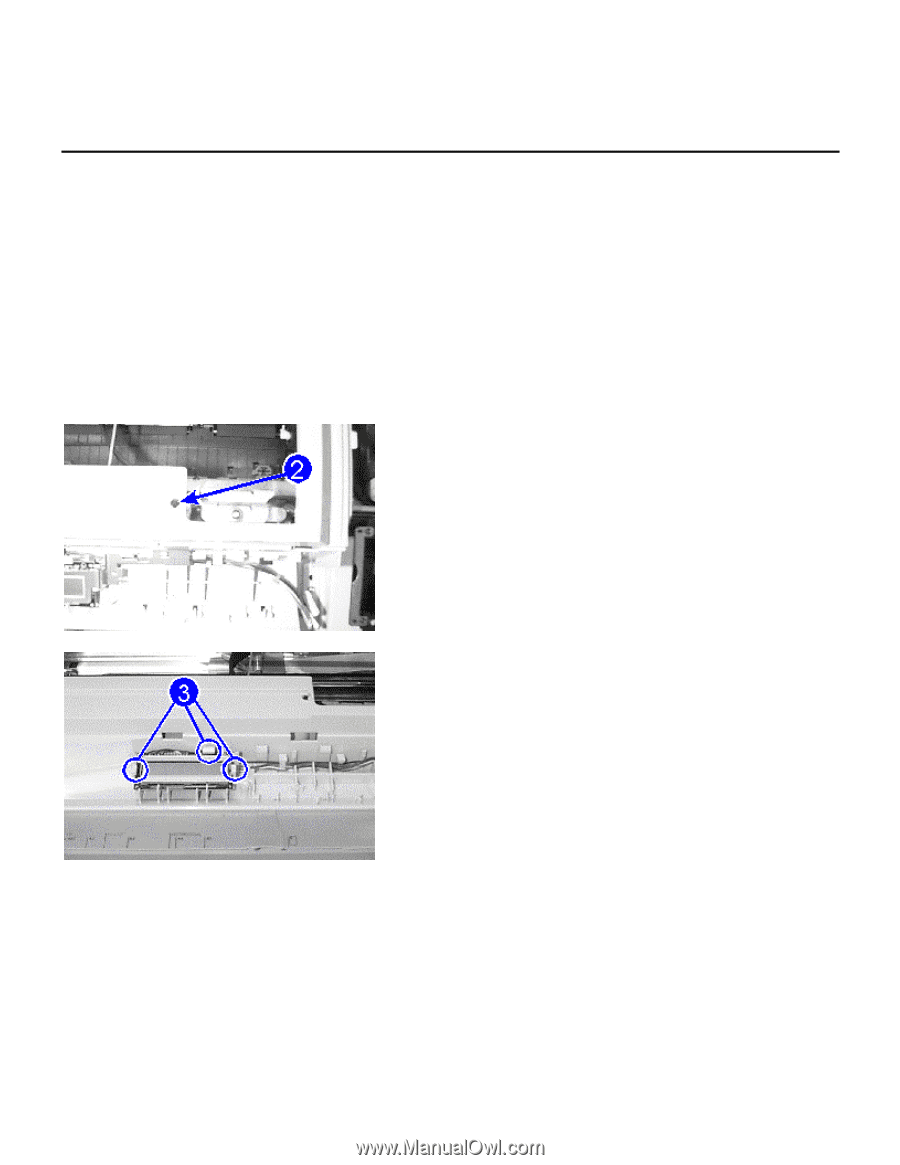
Replacement of Parts Replacement of LCD Assembly You will be removing the LCD assembly from the printer and installing a new LCD assembly. Removing the LCD Assembly Step 1. Remove the LED PCA (refer to the procedure in Replacement of LED PCA). Step 2. Remove the LCD harness by removing one screw (as indicated in callout 2) and lifting it up from the LCD. Step 3. Remove the LCD by unlatching its wiring from under the plastic hooks and unsnapping the LCD from under the plastic holders. 7-14 Removal and Replacement of Parts (without Calibration)
-
 1
1 -
2
-
3
-
4
-
5
-
6
-
7
-
8
-
9
-
10
-
11
-
12
-
13
-
14
-
15
-
16
-
17
-
18
-
19
-
20
-
21
-
22
-
23
-
24
-
25
-
26
-
27
-
28
-
29
-
30
-
31
-
32
-
33
-
34
-
35
-
36
-
37
-
38
-
39
-
40
-
41
-
42
-
43
-
44
-
45
-
46
-
47
-
48
-
49
-
50
-
51
-
52
-
53
-
54
-
55
-
56
-
57
-
58
-
59
-
60
-
61
-
62
-
63
-
64
-
65
-
66
-
67
-
68
-
69
-
70
-
71
-
72
-
73
-
74
-
75
-
76
-
77
-
78
-
79
-
80
-
81
-
82
-
83
-
84
-
85
-
86
-
87
-
88
-
89
-
90
-
91
-
92
-
93
-
94
-
95
-
96
-
97
-
98
-
99
-
100
-
101
-
102
-
103
-
104
-
105
-
106
-
107
-
108
-
109
-
110
-
111
-
112
-
113
-
114
-
115
-
116
-
117
-
118
-
119
-
120
-
121
-
122
-
123
-
124
-
125
-
126
-
127
-
128
-
129
-
130
-
131
-
132
-
133
-
134
-
135
-
136
-
137
-
138
-
139
-
140
-
141
-
142
-
143
-
144
-
145
-
146
-
147
-
148
-
149
-
150
-
151
-
152
-
153
-
154
-
155
-
156
-
157
-
158
-
 159
159 -
 160
160 -
 161
161 -
 162
162 -
 163
163 -
 164
164 -
 165
165 -
 166
166 -
 167
167 -
 168
168 -
 169
169 -
170
-
171
-
172
-
173
-
174
-
175
-
176
-
177
-
178
-
179
-
180
-
181
-
182
-
183
-
184
-
185
-
186
-
187
-
188
-
189
-
190
-
191
-
192
-
193
-
194
-
195
-
196
-
197
-
198
-
199
-
200
-
201
-
202
-
203
-
204
-
205
-
206
-
207
-
208
-
209
-
210
-
211
-
212
-
213
-
214
-
215
-
216
-
217
-
218
-
219
-
220
-
221
-
222
-
223
-
224
-
225
 |
 |
Removal and Replacement of Parts (without Calibration)
7-14
Replacement of Parts
Replacement of LCD Assembly
You will be removing the LCD assembly from the printer and installing a new LCD assembly.
Removing the LCD Assembly
Step 1.
Remove the
LED PCA
(refer to the
procedure in
Replacement of LED PCA
).
Step 2.
Remove the LCD harness by removing one
screw (as indicated in callout
2
) and lifting
it up from the LCD.
Step 3.
Remove the LCD by unlatching its wiring
from under the plastic hooks and
unsnapping the LCD from under the
plastic holders.