HP 2500c Service Manual - Page 185
Replacement of Assembly Harness Cover, Main Case, Removing the Main Case, Replacement of Main Case
 |
View all HP 2500c manuals
Add to My Manuals
Save this manual to your list of manuals |
Page 185 highlights
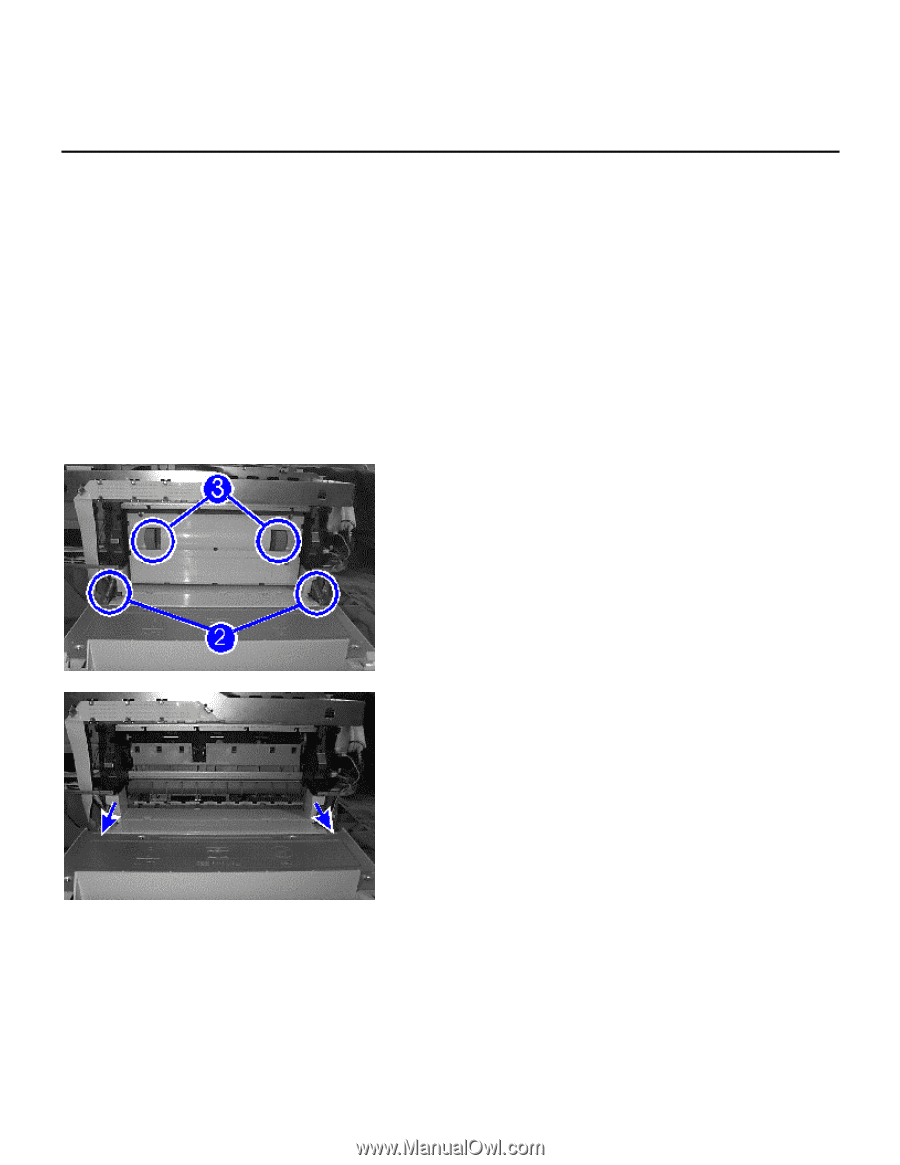
Replacement of Parts Replacement of Assembly Harness Cover You will be removing the assembly harness cover from the printer and installing a new assembly harness cover. Removing the Assembly Harness Cover Step 1. Remove the Main Case (refer to the procedures in Removing the Main Case from Replacement of Main Case). Step 2. Remove the two springs attached on both sides of the rear door. Step 3. Remove the back panel by pulling both the handles and sliding it out of the printer. Step 4. Push in the flaps of the assembly harness cover on both the right and the left. Step 5. The assembly harness cover pops out by giving it a pull. Removal and Replacement of Parts (without Calibration) 7-35
-
 1
1 -
2
-
3
-
4
-
5
-
6
-
7
-
8
-
9
-
10
-
11
-
12
-
13
-
14
-
15
-
16
-
17
-
18
-
19
-
20
-
21
-
22
-
23
-
24
-
25
-
26
-
27
-
28
-
29
-
30
-
31
-
32
-
33
-
34
-
35
-
36
-
37
-
38
-
39
-
40
-
41
-
42
-
43
-
44
-
45
-
46
-
47
-
48
-
49
-
50
-
51
-
52
-
53
-
54
-
55
-
56
-
57
-
58
-
59
-
60
-
61
-
62
-
63
-
64
-
65
-
66
-
67
-
68
-
69
-
70
-
71
-
72
-
73
-
74
-
75
-
76
-
77
-
78
-
79
-
80
-
81
-
82
-
83
-
84
-
85
-
86
-
87
-
88
-
89
-
90
-
91
-
92
-
93
-
94
-
95
-
96
-
97
-
98
-
99
-
100
-
101
-
102
-
103
-
104
-
105
-
106
-
107
-
108
-
109
-
110
-
111
-
112
-
113
-
114
-
115
-
116
-
117
-
118
-
119
-
120
-
121
-
122
-
123
-
124
-
125
-
126
-
127
-
128
-
129
-
130
-
131
-
132
-
133
-
134
-
135
-
136
-
137
-
138
-
139
-
140
-
141
-
142
-
143
-
144
-
145
-
146
-
147
-
148
-
149
-
150
-
151
-
152
-
153
-
154
-
155
-
156
-
157
-
158
-
159
-
160
-
161
-
162
-
163
-
164
-
165
-
166
-
167
-
168
-
169
-
170
-
171
-
172
-
173
-
174
-
175
-
176
-
177
-
178
-
179
-
 180
180 -
 181
181 -
 182
182 -
 183
183 -
 184
184 -
 185
185 -
 186
186 -
 187
187 -
 188
188 -
 189
189 -
 190
190 -
191
-
192
-
193
-
194
-
195
-
196
-
197
-
198
-
199
-
200
-
201
-
202
-
203
-
204
-
205
-
206
-
207
-
208
-
209
-
210
-
211
-
212
-
213
-
214
-
215
-
216
-
217
-
218
-
219
-
220
-
221
-
222
-
223
-
224
-
225
 |
 |
Removal and Replacement of Parts (without Calibration)
7-35
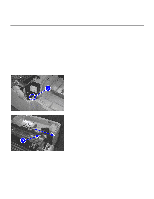
Replacement of Parts
Replacement of Assembly Harness Cover
You will be removing the assembly harness cover from the printer and installing a new assembly harness
cover.
Removing the Assembly Harness Cover
Step 1.
Remove the
Main Case
(refer to the
procedures in
Removing the Main Case
from
Replacement of Main Case
).
Step 2.
Remove the two springs attached on both
sides of the rear door.
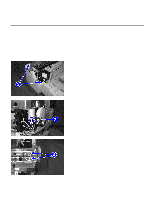
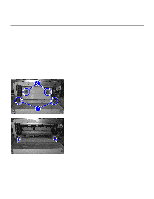
Step 3.
Remove the back panel by pulling both the
handles and sliding it out of the printer.
Step 4.
Push in the flaps of the assembly harness
cover on both the right and the left.
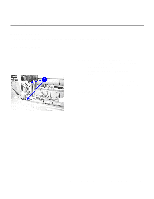
Step 5.
The assembly harness cover pops out by
giving it a pull.