HP 2500c Service Manual - Page 193
Replacement of Secondary Star Wheel, Main Case, Removing the Main Case, Replacement of Main Case
 |
View all HP 2500c manuals
Add to My Manuals
Save this manual to your list of manuals |
Page 193 highlights
Replacement of Parts Replacement of Secondary Star Wheel You will be removing the secondary star wheel from the printer and installing a secondary new star wheel. Removing the Secondary Star Wheel Step 1. Remove the Main Case (refer to the procedures in Removing the Main Case from Replacement of Main Case). Step 2. From the front of the printer, push the two small latches of the secondary star wheel in and the main latch upwards. Use a screw driver if required. Step 3. Slide the star wheel up from the top of the printer. Removal and Replacement of Parts (without Calibration) 7-43
-
 1
1 -
2
-
3
-
4
-
5
-
6
-
7
-
8
-
9
-
10
-
11
-
12
-
13
-
14
-
15
-
16
-
17
-
18
-
19
-
20
-
21
-
22
-
23
-
24
-
25
-
26
-
27
-
28
-
29
-
30
-
31
-
32
-
33
-
34
-
35
-
36
-
37
-
38
-
39
-
40
-
41
-
42
-
43
-
44
-
45
-
46
-
47
-
48
-
49
-
50
-
51
-
52
-
53
-
54
-
55
-
56
-
57
-
58
-
59
-
60
-
61
-
62
-
63
-
64
-
65
-
66
-
67
-
68
-
69
-
70
-
71
-
72
-
73
-
74
-
75
-
76
-
77
-
78
-
79
-
80
-
81
-
82
-
83
-
84
-
85
-
86
-
87
-
88
-
89
-
90
-
91
-
92
-
93
-
94
-
95
-
96
-
97
-
98
-
99
-
100
-
101
-
102
-
103
-
104
-
105
-
106
-
107
-
108
-
109
-
110
-
111
-
112
-
113
-
114
-
115
-
116
-
117
-
118
-
119
-
120
-
121
-
122
-
123
-
124
-
125
-
126
-
127
-
128
-
129
-
130
-
131
-
132
-
133
-
134
-
135
-
136
-
137
-
138
-
139
-
140
-
141
-
142
-
143
-
144
-
145
-
146
-
147
-
148
-
149
-
150
-
151
-
152
-
153
-
154
-
155
-
156
-
157
-
158
-
159
-
160
-
161
-
162
-
163
-
164
-
165
-
166
-
167
-
168
-
169
-
170
-
171
-
172
-
173
-
174
-
175
-
176
-
177
-
178
-
179
-
180
-
181
-
182
-
183
-
184
-
185
-
186
-
187
-
 188
188 -
 189
189 -
 190
190 -
 191
191 -
 192
192 -
 193
193 -
 194
194 -
 195
195 -
 196
196 -
 197
197 -
 198
198 -
199
-
200
-
201
-
202
-
203
-
204
-
205
-
206
-
207
-
208
-
209
-
210
-
211
-
212
-
213
-
214
-
215
-
216
-
217
-
218
-
219
-
220
-
221
-
222
-
223
-
224
-
225
 |
 |
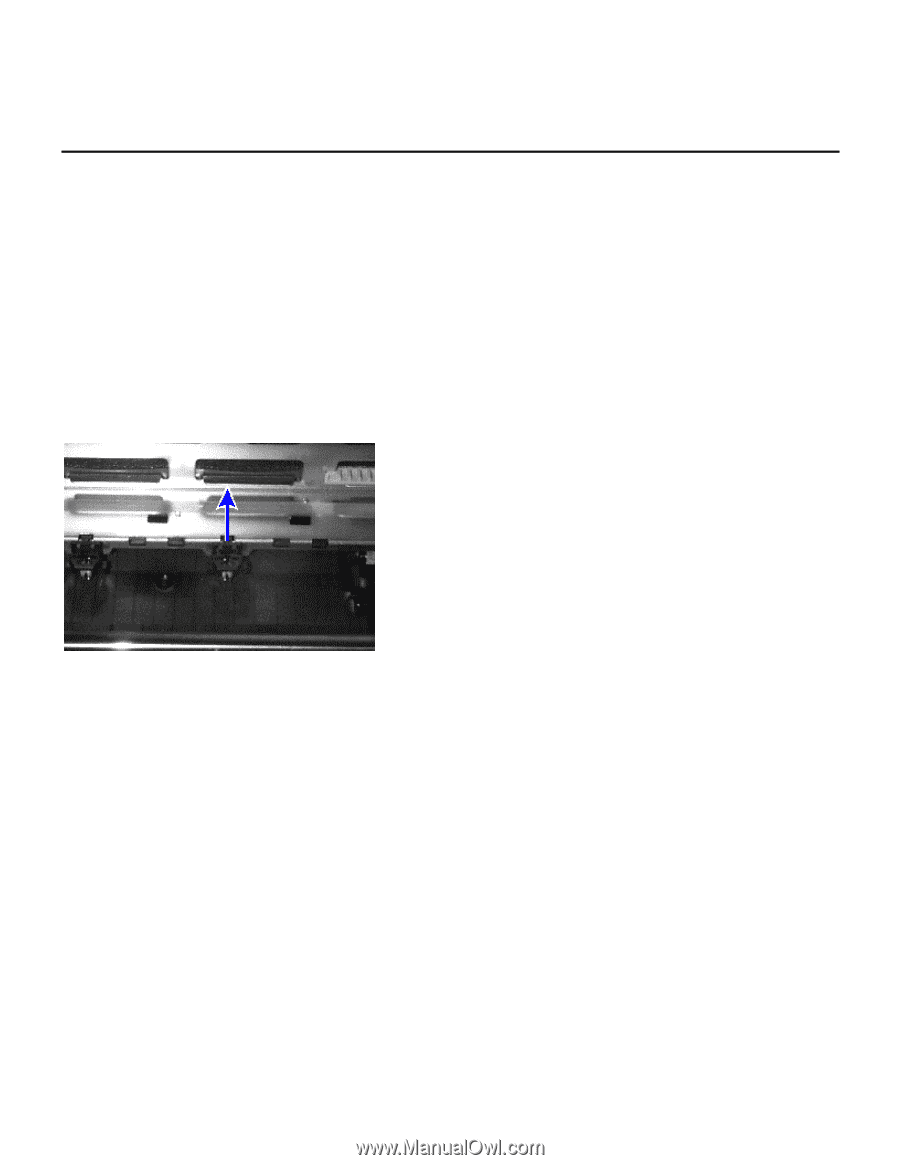
Removal and Replacement of Parts (without Calibration)
7-43
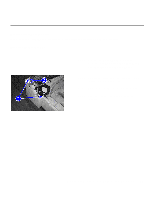
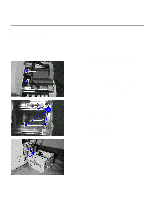
Replacement of Parts
Replacement of Secondary Star Wheel
You will be removing the secondary star wheel from the printer and installing a secondary new star wheel.
Removing the Secondary Star Wheel
Step 1.
Remove the
Main Case
(refer to the
procedures in
Removing the Main Case
from
Replacement of Main Case
).
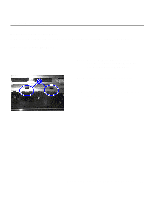
Step 2.
From the front of the printer, push the two
small latches of the secondary star wheel in
and the main latch upwards.
Use a screw
driver if required.
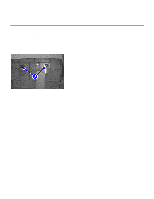
Step 3.
Slide the star wheel up from the top of the
printer.