HP 2500c Service Manual - Page 181
Replacement of Fan, Main Case, Removing the Main Case, Replacement of Main Case
 |
View all HP 2500c manuals
Add to My Manuals
Save this manual to your list of manuals |
Page 181 highlights
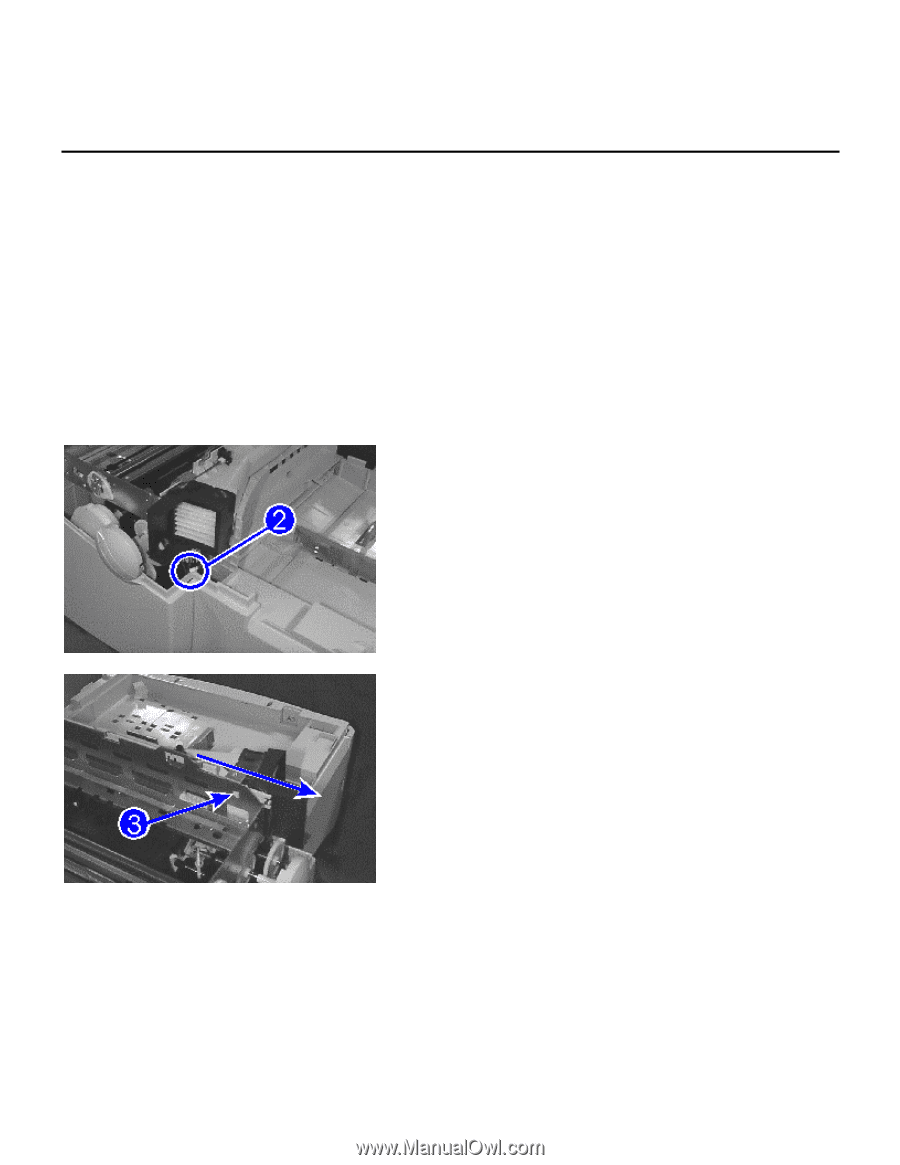
Replacement of Parts Replacement of Fan You will be removing the fan case from the printer and installing a new fan. Removing the Fan Step 1. Remove the Main Case (refer to the procedures in Removing the Main Case from Replacement of Main Case). Step 2. Disconnect the connector of the fan to the motor as well as the connector of the main access door sensor. Step 3. Remove the fan by unlatching the catch securing the fan and sliding it out. Be careful of wires and connectors. Removal and Replacement of Parts (without Calibration) 7-31
-
 1
1 -
2
-
3
-
4
-
5
-
6
-
7
-
8
-
9
-
10
-
11
-
12
-
13
-
14
-
15
-
16
-
17
-
18
-
19
-
20
-
21
-
22
-
23
-
24
-
25
-
26
-
27
-
28
-
29
-
30
-
31
-
32
-
33
-
34
-
35
-
36
-
37
-
38
-
39
-
40
-
41
-
42
-
43
-
44
-
45
-
46
-
47
-
48
-
49
-
50
-
51
-
52
-
53
-
54
-
55
-
56
-
57
-
58
-
59
-
60
-
61
-
62
-
63
-
64
-
65
-
66
-
67
-
68
-
69
-
70
-
71
-
72
-
73
-
74
-
75
-
76
-
77
-
78
-
79
-
80
-
81
-
82
-
83
-
84
-
85
-
86
-
87
-
88
-
89
-
90
-
91
-
92
-
93
-
94
-
95
-
96
-
97
-
98
-
99
-
100
-
101
-
102
-
103
-
104
-
105
-
106
-
107
-
108
-
109
-
110
-
111
-
112
-
113
-
114
-
115
-
116
-
117
-
118
-
119
-
120
-
121
-
122
-
123
-
124
-
125
-
126
-
127
-
128
-
129
-
130
-
131
-
132
-
133
-
134
-
135
-
136
-
137
-
138
-
139
-
140
-
141
-
142
-
143
-
144
-
145
-
146
-
147
-
148
-
149
-
150
-
151
-
152
-
153
-
154
-
155
-
156
-
157
-
158
-
159
-
160
-
161
-
162
-
163
-
164
-
165
-
166
-
167
-
168
-
169
-
170
-
171
-
172
-
173
-
174
-
175
-
 176
176 -
 177
177 -
 178
178 -
 179
179 -
 180
180 -
 181
181 -
 182
182 -
 183
183 -
 184
184 -
 185
185 -
 186
186 -
187
-
188
-
189
-
190
-
191
-
192
-
193
-
194
-
195
-
196
-
197
-
198
-
199
-
200
-
201
-
202
-
203
-
204
-
205
-
206
-
207
-
208
-
209
-
210
-
211
-
212
-
213
-
214
-
215
-
216
-
217
-
218
-
219
-
220
-
221
-
222
-
223
-
224
-
225
 |
 |
Removal and Replacement of Parts (without Calibration)
7-31
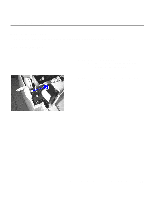
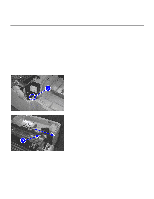
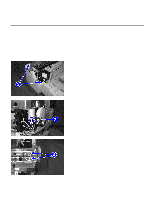
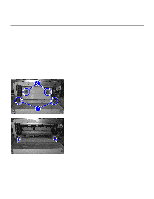
Replacement of Parts
Replacement of Fan
You will be removing the fan case from the printer and installing a new fan.
Removing the Fan
Step 1.
Remove the
Main Case
(refer to the
procedures in
Removing the Main Case
from
Replacement of Main Case
).
Step 2.
Disconnect the connector of the fan to the
motor as well as the connector of the main
access door sensor.
Step 3.
Remove the fan by unlatching the catch
securing the fan and sliding it out.
Be
careful of wires and connectors.