HP 2500c Service Manual - Page 174
Replacement of Ink Supply Station, Steps 1-9, Removing the, Power Knob, Replacement of, Power Knob.
 |
View all HP 2500c manuals
Add to My Manuals
Save this manual to your list of manuals |
Page 174 highlights
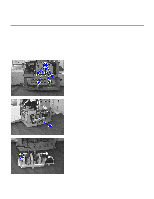
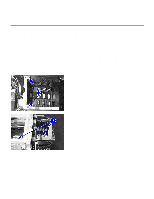
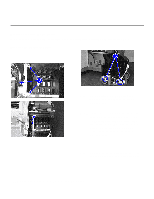
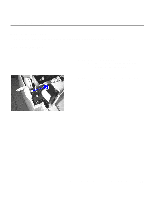
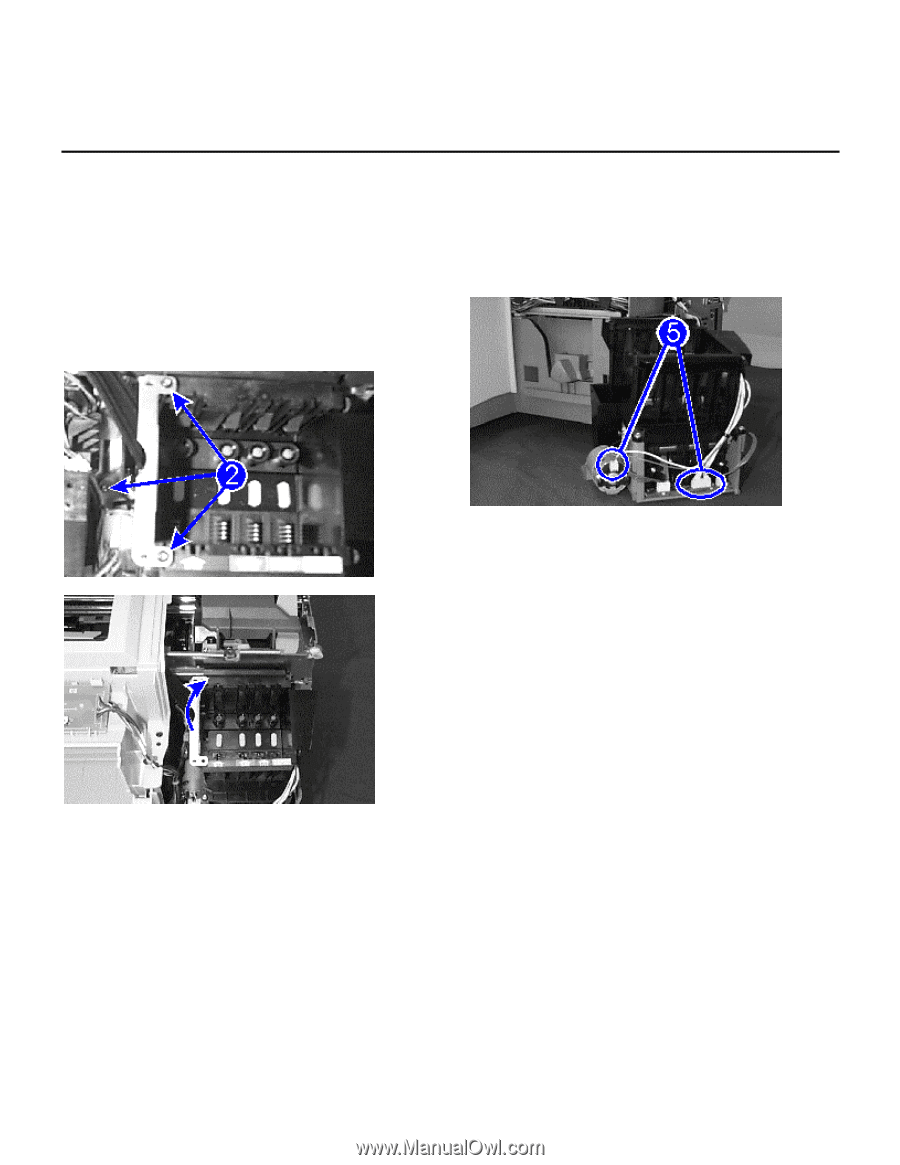
Replacement of Parts Replacement of Ink Supply Station You will be removing the ink supply station from the printer and installing a new ink supply station. Removing the Ink Supply Station Step 1. Follow Steps 1-9 of Removing the Power Knob from Replacement of Power Knob. Step 2. Locate the three screws securing the ink supply station and unscrew them. Two of the screws are at the top right of the ink supply station. The third one is at the base of the ink supply station which require long screw driver to unscrew. Set them aside. Step 3. Remove the ink delivery system by lifting the unit up and folding towards the right. 7-24 Removal and Replacement of Parts (without Calibration)
-
 1
1 -
2
-
3
-
4
-
5
-
6
-
7
-
8
-
9
-
10
-
11
-
12
-
13
-
14
-
15
-
16
-
17
-
18
-
19
-
20
-
21
-
22
-
23
-
24
-
25
-
26
-
27
-
28
-
29
-
30
-
31
-
32
-
33
-
34
-
35
-
36
-
37
-
38
-
39
-
40
-
41
-
42
-
43
-
44
-
45
-
46
-
47
-
48
-
49
-
50
-
51
-
52
-
53
-
54
-
55
-
56
-
57
-
58
-
59
-
60
-
61
-
62
-
63
-
64
-
65
-
66
-
67
-
68
-
69
-
70
-
71
-
72
-
73
-
74
-
75
-
76
-
77
-
78
-
79
-
80
-
81
-
82
-
83
-
84
-
85
-
86
-
87
-
88
-
89
-
90
-
91
-
92
-
93
-
94
-
95
-
96
-
97
-
98
-
99
-
100
-
101
-
102
-
103
-
104
-
105
-
106
-
107
-
108
-
109
-
110
-
111
-
112
-
113
-
114
-
115
-
116
-
117
-
118
-
119
-
120
-
121
-
122
-
123
-
124
-
125
-
126
-
127
-
128
-
129
-
130
-
131
-
132
-
133
-
134
-
135
-
136
-
137
-
138
-
139
-
140
-
141
-
142
-
143
-
144
-
145
-
146
-
147
-
148
-
149
-
150
-
151
-
152
-
153
-
154
-
155
-
156
-
157
-
158
-
159
-
160
-
161
-
162
-
163
-
164
-
165
-
166
-
167
-
168
-
 169
169 -
 170
170 -
 171
171 -
 172
172 -
 173
173 -
 174
174 -
 175
175 -
 176
176 -
 177
177 -
 178
178 -
 179
179 -
180
-
181
-
182
-
183
-
184
-
185
-
186
-
187
-
188
-
189
-
190
-
191
-
192
-
193
-
194
-
195
-
196
-
197
-
198
-
199
-
200
-
201
-
202
-
203
-
204
-
205
-
206
-
207
-
208
-
209
-
210
-
211
-
212
-
213
-
214
-
215
-
216
-
217
-
218
-
219
-
220
-
221
-
222
-
223
-
224
-
225
 |
 |
Removal and Replacement of Parts (without Calibration)
7-24
Replacement of Parts
Replacement of Ink Supply Station
You will be removing the ink supply station from the printer and installing a new ink supply station.
Removing the Ink Supply Station
Step 1.
Follow
Steps 1-9
of
Removing the
Power Knob
from
Replacement of
Power Knob.
Step 2.
Locate the three screws securing the ink
supply station and unscrew them.
Two
of the screws are at the top right of the
ink supply station.
The third one is at the
base of the ink supply station which
require long screw driver to unscrew.
Set them aside.
Step 3.
Remove the ink delivery system by lifting
the unit up and folding towards the right.