HP AirLife 100 Compaq AirLife 100 - User Guide - Page 37
Manage email accounts, Add email account(s), Delete an email account, Email, Add Account, Accounts
 |
View all HP AirLife 100 manuals
Add to My Manuals
Save this manual to your list of manuals |
Page 37 highlights
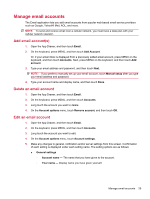
Manage email accounts The Email application lets you add email accounts from popular web-based email service providers such as Google, Yahoo!® Mail, AOL, and more. NOTE: To send and receive email over a cellular network, you must have a data plan with your cellular network operator. Add email account(s) 1. Open the App Drawer, and then touch Email. 2. On the keyboard, press MENU, and then touch Add Account. Or, if your email inbox is displayed from a previously added email account, press MENU on the keyboard, and then touch Accounts. Next, press MENU on the keyboard, and then touch Add account. 3. Type your email address and password, and then touch Next. NOTE: If you prefer to manually set up your email account, touch Manual setup after you type your email address and password. 4. Type your account name and display name, and then touch Done. Delete an email account 1. Open the App Drawer, and then touch Email. 2. On the keyboard, press MENU, and then touch Accounts. 3. Long touch the account you want to delete. 4. On the Account options menu, touch Remove account, and then touch OK. Edit an email account 1. Open the App Drawer, and then touch Email. 2. On the keyboard, press MENU, and then touch Accounts. 3. Long touch the account you want to edit. 4. On the Account options menu, touch Account settings. 5. Make any changes to general, notification and/or server settings from this screen. Confirmation of each setting is displayed under each setting name. The setting options are as follows: ● General settings ◦ Account name - The name that you have given to the account. ◦ Your name - Display name you have given yourself. Manage email accounts 29
-
 1
1 -
2
-
3
-
4
-
5
-
6
-
7
-
8
-
9
-
10
-
11
-
12
-
13
-
14
-
15
-
16
-
17
-
18
-
19
-
20
-
21
-
22
-
23
-
24
-
25
-
26
-
27
-
28
-
29
-
30
-
31
-
 32
32 -
 33
33 -
 34
34 -
 35
35 -
 36
36 -
 37
37 -
 38
38 -
 39
39 -
 40
40 -
 41
41 -
 42
42 -
43
-
44
-
45
-
46
-
47
-
48
-
49
-
50
-
51
-
52
-
53
-
54
-
55
-
56
-
57
-
58
-
59
-
60
-
61
-
62
-
63
-
64
-
65
-
66
-
67
-
68
-
69
-
70
-
71
-
72
-
73
-
74
-
75
-
76
-
77
-
78
-
79
-
80
-
81
-
82
-
83
-
84
-
85
-
86
-
87
-
88
-
89
-
90
-
91
-
92
-
93
-
94
-
95
-
96
-
97
-
98
-
99
-
100
-
101
-
102
-
103
-
104
-
105
-
106
-
107
-
108
-
109
-
110
-
111
-
112
-
113
-
114
-
115
-
116
-
117
 |
 |