HP CM3530 HP Color LaserJet CM3530 Series - Software Technical Reference (exte - Page 96
Install Windows software for networks - color laserjet mfp pcl6 driver
 |
UPC - 884420196501
View all HP CM3530 manuals
Add to My Manuals
Save this manual to your list of manuals |
Page 96 highlights
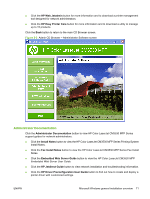
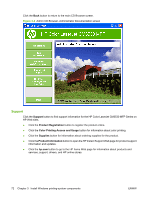
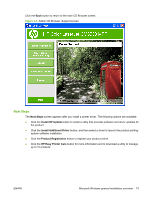
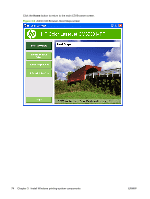
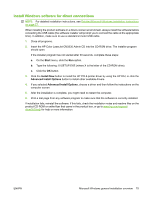
Install Windows software for networks NOTE: For detailed installation instructions, see Detailed Microsoft Windows installation instructions on page 77. The software on the HP Color LaserJet CM3530 MFP Series Admin CD supports network installation with a Microsoft network. For network installation on other operating systems, go to www.hp.com/ support/cljcm3530mfp. The installer does not support product installation or object creation on Novell servers. It supports only direct-mode network installations between Windows computers and a product. To install the product and create objects on a Novell server, use an HP utility (such as HP Web Jetadmin) or a Novell utility (such as NWAdmin). 1. Make sure that you have administrator privileges. 2. Make sure that the HP Jetdirect print server and product are correctly connected to the network. Print a configuration page, and find the HP Jetdirect page. To print a configuration page from the product control panel, perform the following: a. Touch Administration. b. Touch Information. c. Touch Configuration/Status Pages. d. Touch Configuration Page. e. Touch Print. On the HP Jetdirect page, locate the IP address that is currently configured. You might need this address to initially identify the product on your network and complete the installation. 3. Close all programs. 4. Insert the HP Color LaserJet CM3530 Admin CD into the CD-ROM drive. The installer program should open. If the installer program has not started after 30 seconds, complete these steps: a. On the Start menu, click Run. b. Type the following: X:\SETUP.EXE (where X is the letter of the CD-ROM drive). c. Click OK. 5. Click the Install Now button to install the HP PCL6 printer driver using the HP DIU, or click the Advanced Install Options button to install other available drivers. 6. If you selected Advanced Install Options, choose a driver and then follow the instructions on the computer screen. 7. After the installation is complete, you might need to restart the computer. 8. Print a test page from any software program to make sure that the software is correctly installed. 76 Chapter 3 Install Windows printing-system components ENWW
-
 1
1 -
2
-
3
-
4
-
5
-
6
-
7
-
8
-
9
-
10
-
11
-
12
-
13
-
14
-
15
-
16
-
17
-
18
-
19
-
20
-
21
-
22
-
23
-
24
-
25
-
26
-
27
-
28
-
29
-
30
-
31
-
32
-
33
-
34
-
35
-
36
-
37
-
38
-
39
-
40
-
41
-
42
-
43
-
44
-
45
-
46
-
47
-
48
-
49
-
50
-
51
-
52
-
53
-
54
-
55
-
56
-
57
-
58
-
59
-
60
-
61
-
62
-
63
-
64
-
65
-
66
-
67
-
68
-
69
-
70
-
71
-
72
-
73
-
74
-
75
-
76
-
77
-
78
-
79
-
80
-
81
-
82
-
83
-
84
-
85
-
86
-
87
-
88
-
89
-
90
-
 91
91 -
 92
92 -
 93
93 -
 94
94 -
 95
95 -
 96
96 -
 97
97 -
 98
98 -
 99
99 -
 100
100 -
 101
101 -
102
-
103
-
104
-
105
-
106
-
107
-
108
-
109
-
110
-
111
-
112
-
113
-
114
-
115
-
116
-
117
-
118
-
119
-
120
-
121
-
122
-
123
-
124
-
125
-
126
-
127
-
128
-
129
-
130
-
131
-
132
-
133
-
134
-
135
-
136
-
137
-
138
-
139
-
140
-
141
-
142
-
143
-
144
-
145
-
146
-
147
-
148
-
149
-
150
-
151
-
152
-
153
-
154
-
155
-
156
-
157
-
158
-
159
-
160
-
161
-
162
-
163
-
164
-
165
-
166
-
167
-
168
-
169
-
170
-
171
-
172
-
173
-
174
-
175
-
176
-
177
-
178
-
179
-
180
-
181
-
182
-
183
-
184
-
185
-
186
-
187
-
188
-
189
-
190
-
191
-
192
-
193
-
194
-
195
-
196
-
197
-
198
-
199
-
200
-
201
-
202
-
203
-
204
-
205
-
206
-
207
-
208
-
209
-
210
-
211
-
212
-
213
-
214
-
215
-
216
-
217
-
218
-
219
-
220
-
221
-
222
-
223
-
224
-
225
-
226
-
227
-
228
-
229
-
230
-
231
-
232
-
233
-
234
-
235
-
236
-
237
-
238
-
239
-
240
-
241
-
242
-
243
-
244
-
245
-
246
-
247
-
248
-
249
-
250
-
251
-
252
-
253
-
254
-
255
-
256
-
257
-
258
-
259
-
260
-
261
-
262
-
263
-
264
-
265
-
266
-
267
-
268
-
269
-
270
-
271
-
272
-
273
-
274
-
275
-
276
-
277
-
278
-
279
-
280
-
281
-
282
-
283
-
284
-
285
-
286
-
287
-
288
-
289
-
290
-
291
-
292
-
293
-
294
 |
 |
