HP P4000 9.0 HP StorageWorks P4000 SAN Solution User Guide - Page 221
Managing snapshot temporary space, Convert the temporary space, Prerequisites
 |
View all HP P4000 manuals
Add to My Manuals
Save this manual to your list of manuals |
Page 221 highlights
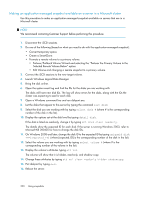
17. Verify that the disk is available by launching Windows Logical Disk Manager. You may need to assign a drive letter, but the disk should be online and available for use. 18. If the server is running Windows 2008 or later and you promoted a remote application-managed snapshot to a primary volume, start the HP StorageWorks P4000 SAN/iQ CLI and clear the VSS volume flag by typing clearvssvolumeflags volumename=[drive_letter](where [drive_letter} is the corresponding drive letter, such as G:). 19. Reboot the server. Managing snapshot temporary space You can either delete the temporary space to free up space on the cluster, or, if you need data that may have been written to the temporary space, convert that temporary space to a SmartClone volume. Convert the temporary space Convert the snapshot temporary space if you have written data to a mounted snapshot and you need to permanently save or access that data. Converting the temporary space creates a SmartClone volume that contains the original snapshot data plus any additional data written after the snapshot was mounted. Prerequisites Stop any applications that are accessing the snapshot, and log off all related iSCSI sessions 1. Right-click the snapshot for which you want to save the additional data. 2. Select Convert Temporary Space from the menu. 3. Type a name for the volume and an optional description. 4. Click OK. The temporary space becomes a volume with the name you assigned. The original snapshot becomes a clone point under the new volume. For more information about clone points, see "Rolling back a volume to a snapshot or clone point" on page 227. 5. If you converted temporary space from an application-managed snapshot, use diskpart.exe to change the resulting volume's attributes. For more information, see "Making an application-managed snapshot available" on page 218. Delete the temporary space The snapshot temporary space is deleted when the snapshot is deleted. However, you can manually delete the snapshot temporary space if you need to free up space on the cluster. Prerequisite Stop any applications that are accessing the snapshot, and log off all related iSCSI sessions. Note that if you have written any data to the snapshot, that data will be deleted along with the temporary space. If you want to save that data, convert the temporary space to a volume. 1. In the navigation window, select the snapshot for which you want to delete the temporary space. P4000 SAN Solution user guide 221
-
 1
1 -
2
-
3
-
4
-
5
-
6
-
7
-
8
-
9
-
10
-
11
-
12
-
13
-
14
-
15
-
16
-
17
-
18
-
19
-
20
-
21
-
22
-
23
-
24
-
25
-
26
-
27
-
28
-
29
-
30
-
31
-
32
-
33
-
34
-
35
-
36
-
37
-
38
-
39
-
40
-
41
-
42
-
43
-
44
-
45
-
46
-
47
-
48
-
49
-
50
-
51
-
52
-
53
-
54
-
55
-
56
-
57
-
58
-
59
-
60
-
61
-
62
-
63
-
64
-
65
-
66
-
67
-
68
-
69
-
70
-
71
-
72
-
73
-
74
-
75
-
76
-
77
-
78
-
79
-
80
-
81
-
82
-
83
-
84
-
85
-
86
-
87
-
88
-
89
-
90
-
91
-
92
-
93
-
94
-
95
-
96
-
97
-
98
-
99
-
100
-
101
-
102
-
103
-
104
-
105
-
106
-
107
-
108
-
109
-
110
-
111
-
112
-
113
-
114
-
115
-
116
-
117
-
118
-
119
-
120
-
121
-
122
-
123
-
124
-
125
-
126
-
127
-
128
-
129
-
130
-
131
-
132
-
133
-
134
-
135
-
136
-
137
-
138
-
139
-
140
-
141
-
142
-
143
-
144
-
145
-
146
-
147
-
148
-
149
-
150
-
151
-
152
-
153
-
154
-
155
-
156
-
157
-
158
-
159
-
160
-
161
-
162
-
163
-
164
-
165
-
166
-
167
-
168
-
169
-
170
-
171
-
172
-
173
-
174
-
175
-
176
-
177
-
178
-
179
-
180
-
181
-
182
-
183
-
184
-
185
-
186
-
187
-
188
-
189
-
190
-
191
-
192
-
193
-
194
-
195
-
196
-
197
-
198
-
199
-
200
-
201
-
202
-
203
-
204
-
205
-
206
-
207
-
208
-
209
-
210
-
211
-
212
-
213
-
214
-
215
-
 216
216 -
 217
217 -
 218
218 -
 219
219 -
 220
220 -
 221
221 -
 222
222 -
 223
223 -
 224
224 -
 225
225 -
 226
226 -
227
-
228
-
229
-
230
-
231
-
232
-
233
-
234
-
235
-
236
-
237
-
238
-
239
-
240
-
241
-
242
-
243
-
244
-
245
-
246
-
247
-
248
-
249
-
250
-
251
-
252
-
253
-
254
-
255
-
256
-
257
-
258
-
259
-
260
-
261
-
262
-
263
-
264
-
265
-
266
-
267
-
268
-
269
-
270
-
271
-
272
-
273
-
274
-
275
-
276
-
277
-
278
-
279
-
280
-
281
-
282
-
283
-
284
-
285
-
286
-
287
-
288
-
289
-
290
-
291
-
292
-
293
-
294
-
295
-
296
-
297
-
298
-
299
-
300
-
301
-
302
-
303
-
304
-
305
-
306
-
307
-
308
-
309
-
310
-
311
-
312
-
313
-
314
-
315
-
316
-
317
-
318
-
319
-
320
-
321
-
322
-
323
-
324
-
325
-
326
-
327
-
328
-
329
-
330
-
331
-
332
-
333
-
334
-
335
-
336
-
337
-
338
-
339
-
340
-
341
-
342
-
343
-
344
-
345
-
346
-
347
-
348
-
349
-
350
 |
 |
