HP P4000 9.0 HP StorageWorks P4000 SAN Solution User Guide - Page 225
Editing scheduled snapshots, Pausing and resuming scheduled snapshots, Pause a schedule
 |
View all HP P4000 manuals
Add to My Manuals
Save this manual to your list of manuals |
Page 225 highlights
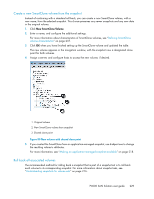
Editing scheduled snapshots You can edit everything in the scheduled snapshot window except the name. If the snapshot is part of a snapshot set, you can also verify that the volumes included in the schedule are the current volumes in the volume set. For more information, see "Understanding schedules to snapshot volume sets" on page 224. 1. In the navigation window, select the volume for which you want to edit the scheduled snapshot. 2. In the tab window, click the Schedules tab to bring it to the front. 3. Select the schedule you want to edit. 4. Click Schedule Tasks on the Details tab, and select Edit Schedule. 5. Change the desired information. 6. (Optional.) If displayed, click Verify Volume Associations to see if the volume set included in the snapshot set is up to date. The Verify Volume Associations window opens, showing the volumes currently associated with the schedule. Any volumes that have been added to or removed from the volume set are reflected. Click Close to return to the Edit Schedule to a Snapshot Volume window. The updated list of volumes is populated in the Volume Set field. For more information, see "Understanding schedules to snapshot volume sets" on page 224. This lets you see the current volume set information. The information is automatically updated when you click OK. 7. Click OK. Pausing and resuming scheduled snapshots At times it may be convenient to prevent a scheduled snapshot from taking place. Use these steps to pause and then resume a snapshot schedule. When you pause a snapshot schedule, the snapshot deletions for that schedule are paused as well. When you resume the schedule, both the snapshots and the snapshot deletions resume according to the schedule. Pause a schedule 1. In the navigation window, select the volume for which you want to pause the snapshot schedule. 2. Click the Schedules tab to bring it to the front. 3. Select the schedule you want. 4. Click Schedule Tasks on the Details tab, and select Pause Schedule. 5. In the Confirm window, click OK. In the Next Occurrence column of the Schedules tab window, this snapshot schedule is marked as paused. 6. Make a note to resume this snapshot schedule at a convenient time. Resume a schedule 1. In the navigation window, select the volume for which you want to resume the snapshot schedule. P4000 SAN Solution user guide 225
-
 1
1 -
2
-
3
-
4
-
5
-
6
-
7
-
8
-
9
-
10
-
11
-
12
-
13
-
14
-
15
-
16
-
17
-
18
-
19
-
20
-
21
-
22
-
23
-
24
-
25
-
26
-
27
-
28
-
29
-
30
-
31
-
32
-
33
-
34
-
35
-
36
-
37
-
38
-
39
-
40
-
41
-
42
-
43
-
44
-
45
-
46
-
47
-
48
-
49
-
50
-
51
-
52
-
53
-
54
-
55
-
56
-
57
-
58
-
59
-
60
-
61
-
62
-
63
-
64
-
65
-
66
-
67
-
68
-
69
-
70
-
71
-
72
-
73
-
74
-
75
-
76
-
77
-
78
-
79
-
80
-
81
-
82
-
83
-
84
-
85
-
86
-
87
-
88
-
89
-
90
-
91
-
92
-
93
-
94
-
95
-
96
-
97
-
98
-
99
-
100
-
101
-
102
-
103
-
104
-
105
-
106
-
107
-
108
-
109
-
110
-
111
-
112
-
113
-
114
-
115
-
116
-
117
-
118
-
119
-
120
-
121
-
122
-
123
-
124
-
125
-
126
-
127
-
128
-
129
-
130
-
131
-
132
-
133
-
134
-
135
-
136
-
137
-
138
-
139
-
140
-
141
-
142
-
143
-
144
-
145
-
146
-
147
-
148
-
149
-
150
-
151
-
152
-
153
-
154
-
155
-
156
-
157
-
158
-
159
-
160
-
161
-
162
-
163
-
164
-
165
-
166
-
167
-
168
-
169
-
170
-
171
-
172
-
173
-
174
-
175
-
176
-
177
-
178
-
179
-
180
-
181
-
182
-
183
-
184
-
185
-
186
-
187
-
188
-
189
-
190
-
191
-
192
-
193
-
194
-
195
-
196
-
197
-
198
-
199
-
200
-
201
-
202
-
203
-
204
-
205
-
206
-
207
-
208
-
209
-
210
-
211
-
212
-
213
-
214
-
215
-
216
-
217
-
218
-
219
-
 220
220 -
 221
221 -
 222
222 -
 223
223 -
 224
224 -
 225
225 -
 226
226 -
 227
227 -
 228
228 -
 229
229 -
 230
230 -
231
-
232
-
233
-
234
-
235
-
236
-
237
-
238
-
239
-
240
-
241
-
242
-
243
-
244
-
245
-
246
-
247
-
248
-
249
-
250
-
251
-
252
-
253
-
254
-
255
-
256
-
257
-
258
-
259
-
260
-
261
-
262
-
263
-
264
-
265
-
266
-
267
-
268
-
269
-
270
-
271
-
272
-
273
-
274
-
275
-
276
-
277
-
278
-
279
-
280
-
281
-
282
-
283
-
284
-
285
-
286
-
287
-
288
-
289
-
290
-
291
-
292
-
293
-
294
-
295
-
296
-
297
-
298
-
299
-
300
-
301
-
302
-
303
-
304
-
305
-
306
-
307
-
308
-
309
-
310
-
311
-
312
-
313
-
314
-
315
-
316
-
317
-
318
-
319
-
320
-
321
-
322
-
323
-
324
-
325
-
326
-
327
-
328
-
329
-
330
-
331
-
332
-
333
-
334
-
335
-
336
-
337
-
338
-
339
-
340
-
341
-
342
-
343
-
344
-
345
-
346
-
347
-
348
-
349
-
350
 |
 |
