HP Photosmart C6300 User Guide - Page 38
Connect to additional computers on a network - install for windows 7
 |
View all HP Photosmart C6300 manuals
Add to My Manuals
Save this manual to your list of manuals |
Page 38 highlights
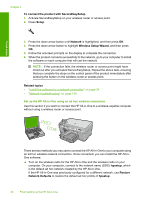
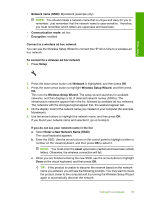
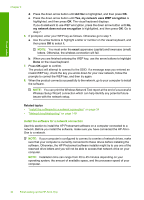
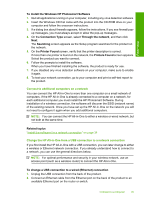
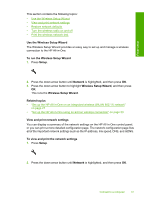
Finish setup To install the Windows HP Photosmart Software 1. Quit all applications running on your computer, including any virus detection software. 2. Insert the Windows CD that came with the product into the CD-ROM drive on your computer and follow the onscreen instructions. 3. If a dialog box about firewalls appears, follow the instructions. If you see firewall pop- up messages, you must always accept or allow the pop-up messages. 4. On the Connection Type screen, select Through the network, and then click Next. The Searching screen appears as the Setup program searches for the product on the network. 5. On the Printer Found screen, verify that the printer description is correct. If more than one printer is found on the network, the Printers Found screen appears. Select the product you want to connect. 6. Follow the prompts to install the software. When you have finished installing the software, the product is ready for use. 7. If you disabled any virus detection software on your computer, make sure to enable it again. 8. To test your network connection, go to your computer and print a self-test report to the product. Connect to additional computers on a network You can connect the HP All-in-One to more than one computer on a small network of computers. If the HP All-in-One is already connected to a computer on a network, for each additional computer you must install the HP Photosmart Software. During installation of a wireless connection, the software will discover the SSID (network name) of the existing network. Once you have set up the HP All-in-One on the network you will not need to configure it again when you add additional computers. NOTE: You can connect the HP All-in-One to either a wireless or wired network, but not both at the same time. Related topics "Install the software for a network connection" on page 34 Change the HP All-in-One from a USB connection to a network connection If you first install the HP All-in-One with a USB connection, you can later change to either a wireless or Ethernet network connection. If you already understand how to connect to a network, you can use the general directions below. NOTE: For optimal performance and security in your wireless network, use an access point (such as a wireless router) to connect the HP All-in-One. To change a USB connection to a wired (Ethernet) connection 1. Unplug the USB connection from the back of the product. 2. Connect an Ethernet cable from the Ethernet port on the back of the product to an available Ethernet port on the router or switch. Connect to a computer 35
-
 1
1 -
2
-
3
-
4
-
5
-
6
-
7
-
8
-
9
-
10
-
11
-
12
-
13
-
14
-
15
-
16
-
17
-
18
-
19
-
20
-
21
-
22
-
23
-
24
-
25
-
26
-
27
-
28
-
29
-
30
-
31
-
32
-
 33
33 -
 34
34 -
 35
35 -
 36
36 -
 37
37 -
 38
38 -
 39
39 -
 40
40 -
 41
41 -
 42
42 -
 43
43 -
44
-
45
-
46
-
47
-
48
-
49
-
50
-
51
-
52
-
53
-
54
-
55
-
56
-
57
-
58
-
59
-
60
-
61
-
62
-
63
-
64
-
65
-
66
-
67
-
68
-
69
-
70
-
71
-
72
-
73
-
74
-
75
-
76
-
77
-
78
-
79
-
80
-
81
-
82
-
83
-
84
-
85
-
86
-
87
-
88
-
89
-
90
-
91
-
92
-
93
-
94
-
95
-
96
-
97
-
98
-
99
-
100
-
101
-
102
-
103
-
104
-
105
-
106
-
107
-
108
-
109
-
110
-
111
-
112
-
113
-
114
-
115
-
116
-
117
-
118
-
119
-
120
-
121
-
122
-
123
-
124
-
125
-
126
-
127
-
128
-
129
-
130
-
131
-
132
-
133
-
134
-
135
-
136
-
137
-
138
-
139
-
140
-
141
-
142
-
143
-
144
-
145
-
146
-
147
-
148
-
149
-
150
-
151
-
152
-
153
-
154
-
155
-
156
-
157
-
158
-
159
-
160
-
161
-
162
-
163
-
164
-
165
-
166
-
167
-
168
-
169
-
170
-
171
-
172
-
173
-
174
-
175
-
176
-
177
-
178
-
179
-
180
-
181
-
182
-
183
-
184
-
185
-
186
-
187
-
188
-
189
-
190
-
191
-
192
-
193
-
194
-
195
-
196
-
197
-
198
-
199
-
200
-
201
-
202
-
203
-
204
-
205
-
206
-
207
-
208
-
209
-
210
-
211
-
212
-
213
-
214
-
215
-
216
-
217
-
218
-
219
-
220
-
221
-
222
-
223
-
224
-
225
-
226
-
227
-
228
-
229
-
230
-
231
-
232
-
233
-
234
-
235
-
236
-
237
-
238
-
239
-
240
-
241
-
242
-
243
-
244
-
245
-
246
-
247
-
248
-
249
-
250
-
251
-
252
-
253
-
254
-
255
-
256
-
257
-
258
-
259
-
260
-
261
-
262
-
263
-
264
-
265
-
266
-
267
-
268
-
269
-
270
-
271
-
272
-
273
-
274
-
275
-
276
-
277
-
278
-
279
-
280
-
281
-
282
-
283
-
284
-
285
-
286
-
287
-
288
-
289
-
290
-
291
-
292
-
293
-
294
-
295
-
296
-
297
-
298
-
299
-
300
-
301
-
302
-
303
-
304
-
305
-
306
-
307
-
308
-
309
-
310
-
311
-
312
-
313
-
314
-
315
-
316
-
317
-
318
-
319
-
320
-
321
-
322
-
323
-
324
-
325
-
326
-
327
-
328
-
329
-
330
-
331
 |
 |