Intermec PM4i EasyADC for Microsoft Great Plains User's Manual - Page 56
Printing Badges, Great Plains User ID Badge Labels
 |
View all Intermec PM4i manuals
Add to My Manuals
Save this manual to your list of manuals |
Page 56 highlights
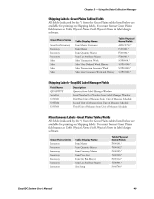
Chapter 3 - Using the Data Collection Manager 6 Specify the number of labels to print in the # Labels to Print text box. If you chose to filter items by Site, a Qty On Hand text box appears, along with a Print On Hand Qty button. Once you select an item, the quantity on hand for the chosen site displays in the associated text box. If you choose Print On Hand Qty, Label Manager prints the number of labels on hand in conjunction with the number you entered into the Qty for Label text box. 7 If you want to choose a different Miscellaneous Label, click the lookup (binoculars) button next to the text box. 8 Click Print. The labels are generated. Vendor Information Tab: Printing vendor specific labels. Printing Badges EasyADC Label Manager allows you to print labels for your Great Plains inventory and it also gives you the capability to generate badges, using either Great Plains User IDs or Employee IDs. Great Plains User ID Badge Labels To print Great Plains User ID badge labels 1 From the EasyADC Label Manager main menu, choose Modules > Badges. 2 Choose the Print Great Plains User ID option. 3 Select the Company from the drop-down list if you wish to include it on the label. 44 EasyADC System User's Manual
-
 1
1 -
2
-
3
-
4
-
5
-
6
-
7
-
8
-
9
-
10
-
11
-
12
-
13
-
14
-
15
-
16
-
17
-
18
-
19
-
20
-
21
-
22
-
23
-
24
-
25
-
26
-
27
-
28
-
29
-
30
-
31
-
32
-
33
-
34
-
35
-
36
-
37
-
38
-
39
-
40
-
41
-
42
-
43
-
44
-
45
-
46
-
47
-
48
-
49
-
50
-
 51
51 -
 52
52 -
 53
53 -
 54
54 -
 55
55 -
 56
56 -
 57
57 -
 58
58 -
 59
59 -
 60
60 -
 61
61 -
62
-
63
-
64
-
65
-
66
-
67
-
68
-
69
-
70
-
71
-
72
-
73
-
74
-
75
-
76
-
77
-
78
-
79
-
80
-
81
-
82
-
83
-
84
-
85
-
86
-
87
-
88
-
89
-
90
-
91
-
92
-
93
-
94
-
95
-
96
-
97
-
98
-
99
-
100
-
101
-
102
-
103
-
104
-
105
-
106
-
107
-
108
-
109
-
110
-
111
-
112
-
113
-
114
-
115
-
116
-
117
-
118
-
119
-
120
-
121
-
122
-
123
-
124
-
125
-
126
-
127
-
128
-
129
-
130
-
131
-
132
 |
 |
