Intermec PM4i EasyADC for Microsoft Great Plains User's Manual - Page 70
View Menu, Utilities Menu, Modules Menu, Label Manager, Remote Terminal
 |
View all Intermec PM4i manuals
Add to My Manuals
Save this manual to your list of manuals |
Page 70 highlights
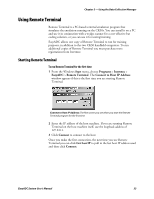
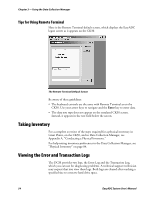
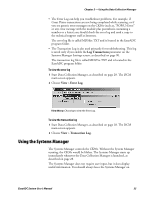
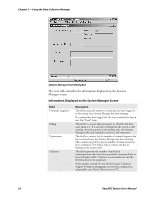
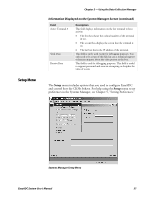
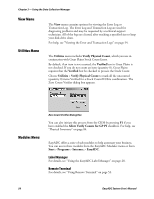
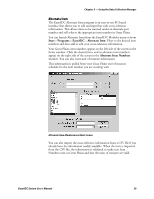
Chapter 3 - Using the Data Collection Manager View Menu Utilities Menu The View menu contains options for viewing the Error Log or Transaction Log. The Error Log and Transaction Log are used for diagnosing problems and may be requested by a technical support technician. All of the logs are cleared, after reaching a specified size to keep your disk drive clean. For help, see "Viewing the Error and Transaction Logs" on page 54. The Utilities menu includes Verify Physical Count, which you use in conjunction with Great Plains Stock Count Entry. By default, if an item is not counted, the Verified box in Great Plains is not checked. If you do not count an item (quantity 0), Great Plains requires that the Verified box be checked to process the Stock Count. Choose Utilities > Verify Physical Count to mark all the uncounted (quantity 0) items Verified for a Stock Count ID/Site combination. The Zero Count Verifier dialog box appears. Modules Menu Zero Count Verifier Dialog Box You can also initiate this process from the CK30 by pressing F1 if you have enabled the Allow Verify Counts for GP PI checkbox. For help, see "Physical Inventory" on page 84. EasyADC offers a suite of sub-modules to help automate your business. You can access these modules from the EasyADC Modules menu or from Start > Programs > Intermec > EasyADC. Label Manager For details, see "Using the EasyADC Label Manager" on page 28. Remote Terminal For details, see "Using Remote Terminal" on page 53. 58 EasyADC System User's Manual
-
 1
1 -
2
-
3
-
4
-
5
-
6
-
7
-
8
-
9
-
10
-
11
-
12
-
13
-
14
-
15
-
16
-
17
-
18
-
19
-
20
-
21
-
22
-
23
-
24
-
25
-
26
-
27
-
28
-
29
-
30
-
31
-
32
-
33
-
34
-
35
-
36
-
37
-
38
-
39
-
40
-
41
-
42
-
43
-
44
-
45
-
46
-
47
-
48
-
49
-
50
-
51
-
52
-
53
-
54
-
55
-
56
-
57
-
58
-
59
-
60
-
61
-
62
-
63
-
64
-
 65
65 -
 66
66 -
 67
67 -
 68
68 -
 69
69 -
 70
70 -
 71
71 -
 72
72 -
 73
73 -
 74
74 -
 75
75 -
76
-
77
-
78
-
79
-
80
-
81
-
82
-
83
-
84
-
85
-
86
-
87
-
88
-
89
-
90
-
91
-
92
-
93
-
94
-
95
-
96
-
97
-
98
-
99
-
100
-
101
-
102
-
103
-
104
-
105
-
106
-
107
-
108
-
109
-
110
-
111
-
112
-
113
-
114
-
115
-
116
-
117
-
118
-
119
-
120
-
121
-
122
-
123
-
124
-
125
-
126
-
127
-
128
-
129
-
130
-
131
-
132
 |
 |
