Kyocera FS-9120DN FS-9120DN/9520DN Operation Guide Rev-2 - Page 102
Installing DIMMs, 4.1 Removing DIMM, 4.2 Testing the Expansion Memory - mita fs
 |
View all Kyocera FS-9120DN manuals
Add to My Manuals
Save this manual to your list of manuals |
Page 102 highlights
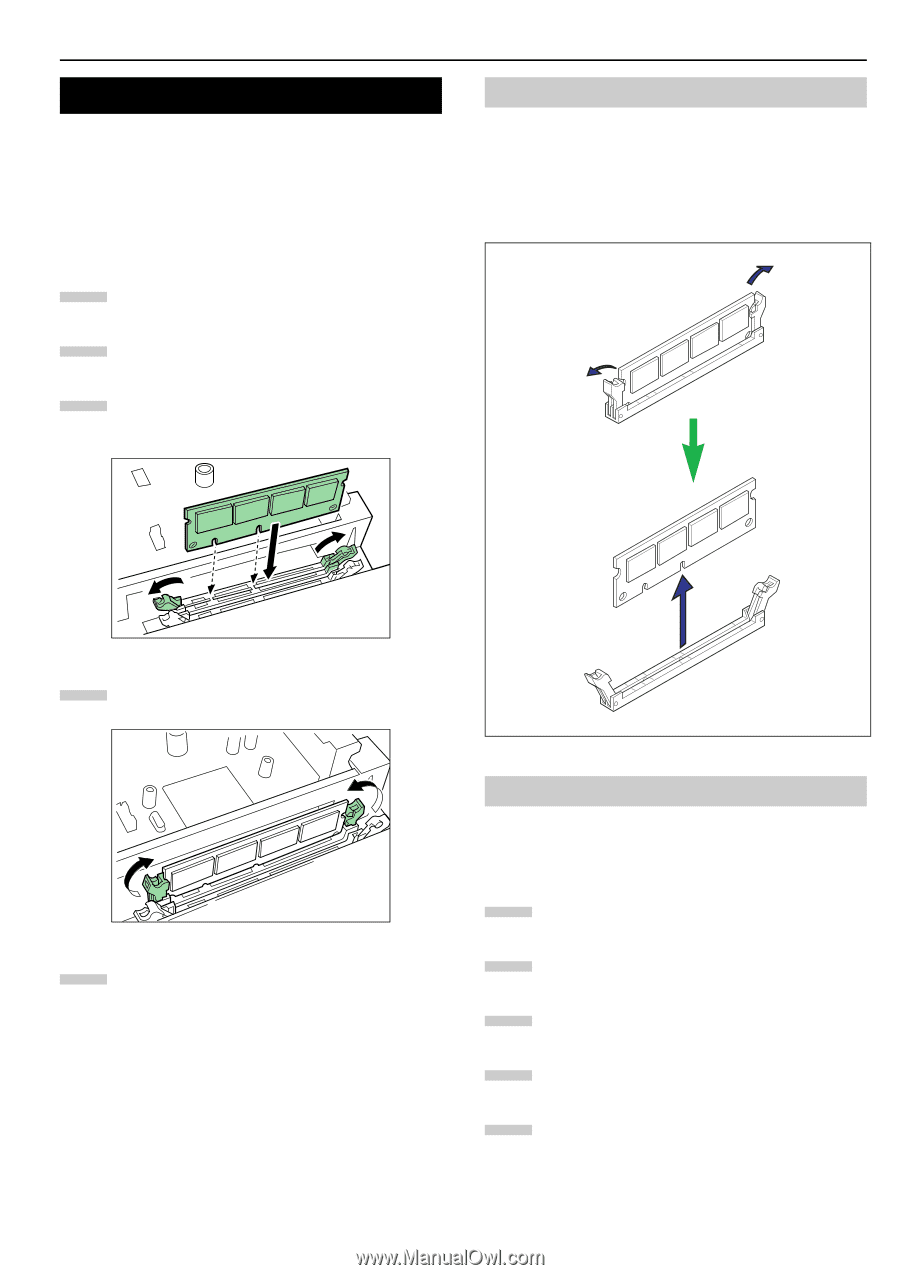
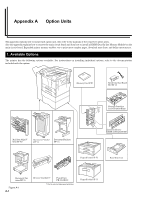
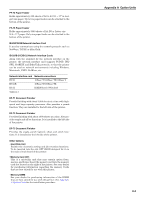
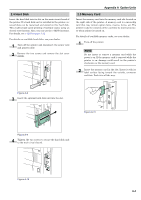
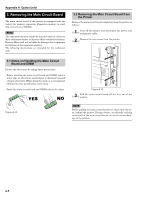
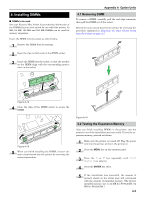
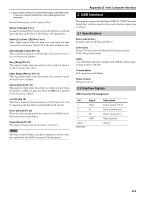
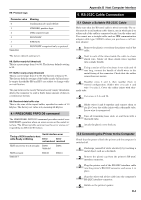
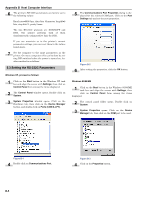
4. Installing DIMMs I DIMMs to be used See your Kyocera Mita dealer for purchasing information of the DIMMs that are best suited for use with this printer. 32 MB, 64 MB, 128 MB and 256 MB DIMMs can be used for memory expansion. Insert the DIMM into the socket as shown below. 1 Remove the DIMM from its package. 2 Open the clips on both ends of the DIMM socket. 3 Insert the DIMM into the socket, so that the notches on the DIMM align with the corresponding protrusions in the socket. Appendix A Option Units 4.1 Removing DIMM To remove a DIMM, carefully pull the end clips outwards, then pull the DIMM out of the socket. Return the main circuit board to the printer by reversing the procedure explained in Removing the Main Circuit Board from the Printer on page A-5. Figure A-14 4 Close the clips of the DIMM socket to secure the DIMM. Figure A-15 5 When you finish installing the DIMM, reinsert the main circuit board into the printer by reversing the removal procedure. Figure A-16 4.2 Testing the Expansion Memory After you finish installing DIMMs in the printer, test the printer to see if the installation was successful. To test the expansion memory, proceed as follows: 1 Make sure the printer is turned off. Plug the power cord into the printer and turn the printer on. 2 Press the MENU key on the operator panel. 3 Press the or key repeatedly until Print Status Page appears. 4 Press the ENTER key twice. 5 If the installation was successful, the amount of memory shown on the status page will correspond with the amount of expanded memory. (The factory installed memory size is 32 MB for FS-9120DN, 64 MB for FS-9520DN.) A-6
-
 1
1 -
2
-
3
-
4
-
5
-
6
-
7
-
8
-
9
-
10
-
11
-
12
-
13
-
14
-
15
-
16
-
17
-
18
-
19
-
20
-
21
-
22
-
23
-
24
-
25
-
26
-
27
-
28
-
29
-
30
-
31
-
32
-
33
-
34
-
35
-
36
-
37
-
38
-
39
-
40
-
41
-
42
-
43
-
44
-
45
-
46
-
47
-
48
-
49
-
50
-
51
-
52
-
53
-
54
-
55
-
56
-
57
-
58
-
59
-
60
-
61
-
62
-
63
-
64
-
65
-
66
-
67
-
68
-
69
-
70
-
71
-
72
-
73
-
74
-
75
-
76
-
77
-
78
-
79
-
80
-
81
-
82
-
83
-
84
-
85
-
86
-
87
-
88
-
89
-
90
-
91
-
92
-
93
-
94
-
95
-
96
-
 97
97 -
 98
98 -
 99
99 -
 100
100 -
 101
101 -
 102
102 -
 103
103 -
 104
104 -
 105
105 -
 106
106 -
 107
107 -
108
-
109
-
110
-
111
-
112
-
113
-
114
-
115
 |
 |