Kyocera FS-9120DN FS-9120DN/9520DN Operation Guide Rev-2 - Page 92
Replacing of toner and cleaning of the internal parts
 |
View all Kyocera FS-9120DN manuals
Add to My Manuals
Save this manual to your list of manuals |
Page 92 highlights
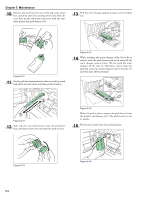
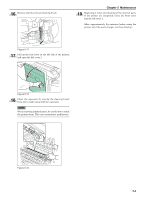
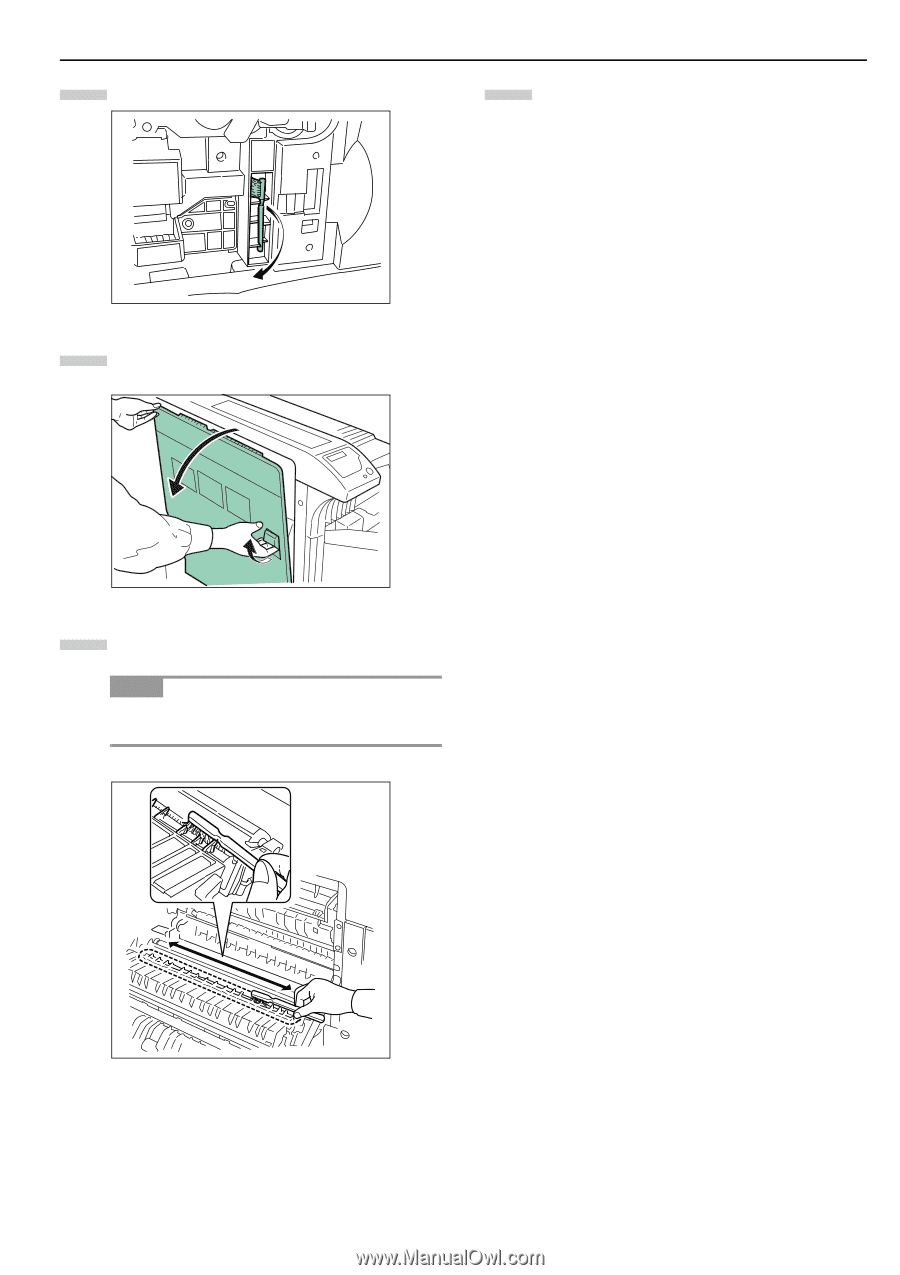
16 Remove the blue colored cleaning brush. Chapter 5 Maintenance 19 Replacing of toner and cleaning of the internal parts of the printer are completed. Close the front cover and the left cover 1. Allow approximately five minutes before using the printer until the main charger unit has dried up. Figure 5-17 17 Pull up the lock lever on the left side of the printer, and open the left cover 1. Figure 5-18 18 Clean the separator by moving the cleaning brush from left to right along with the separator. NOTE When removing jammed paper, be careful not to touch the printer drum. This can cause printer malfunction. Figure 5-19 5-4
-
 1
1 -
2
-
3
-
4
-
5
-
6
-
7
-
8
-
9
-
10
-
11
-
12
-
13
-
14
-
15
-
16
-
17
-
18
-
19
-
20
-
21
-
22
-
23
-
24
-
25
-
26
-
27
-
28
-
29
-
30
-
31
-
32
-
33
-
34
-
35
-
36
-
37
-
38
-
39
-
40
-
41
-
42
-
43
-
44
-
45
-
46
-
47
-
48
-
49
-
50
-
51
-
52
-
53
-
54
-
55
-
56
-
57
-
58
-
59
-
60
-
61
-
62
-
63
-
64
-
65
-
66
-
67
-
68
-
69
-
70
-
71
-
72
-
73
-
74
-
75
-
76
-
77
-
78
-
79
-
80
-
81
-
82
-
83
-
84
-
85
-
86
-
 87
87 -
 88
88 -
 89
89 -
 90
90 -
 91
91 -
 92
92 -
 93
93 -
 94
94 -
 95
95 -
 96
96 -
 97
97 -
98
-
99
-
100
-
101
-
102
-
103
-
104
-
105
-
106
-
107
-
108
-
109
-
110
-
111
-
112
-
113
-
114
-
115
 |
 |
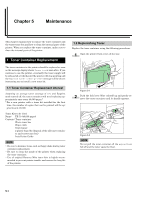
Chapter 5
Maintenance
5-4
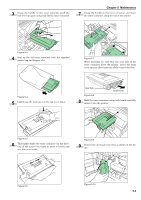
Remove the blue colored cleaning brush.
Figure 5-17
Pull up the lock lever on the left side of the printer,
and open the left cover 1.
Figure 5-18
Clean the separator by moving the cleaning brush
from left to right along with the separator.
When removing jammed paper, be careful not to touch
the printer drum. This can cause printer malfunction.
Figure 5-19
Replacing of toner and cleaning of the internal parts
of the printer are completed. Close the front cover
and the left cover 1.
Allow approximately five minutes before using the
printer until the main charger unit has dried up.
NOTE
16
17
18
19