Kyocera FS-9120DN FS-9120DN/9520DN Operation Guide Rev-2 - Page 50
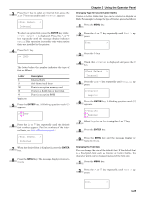
Selecting the Printing Orientation, Protect Mode, >Zoom, Set, >Orientation, Portrait
 |
View all Kyocera FS-9120DN manuals
Add to My Manuals
Save this manual to your list of manuals |
Page 50 highlights
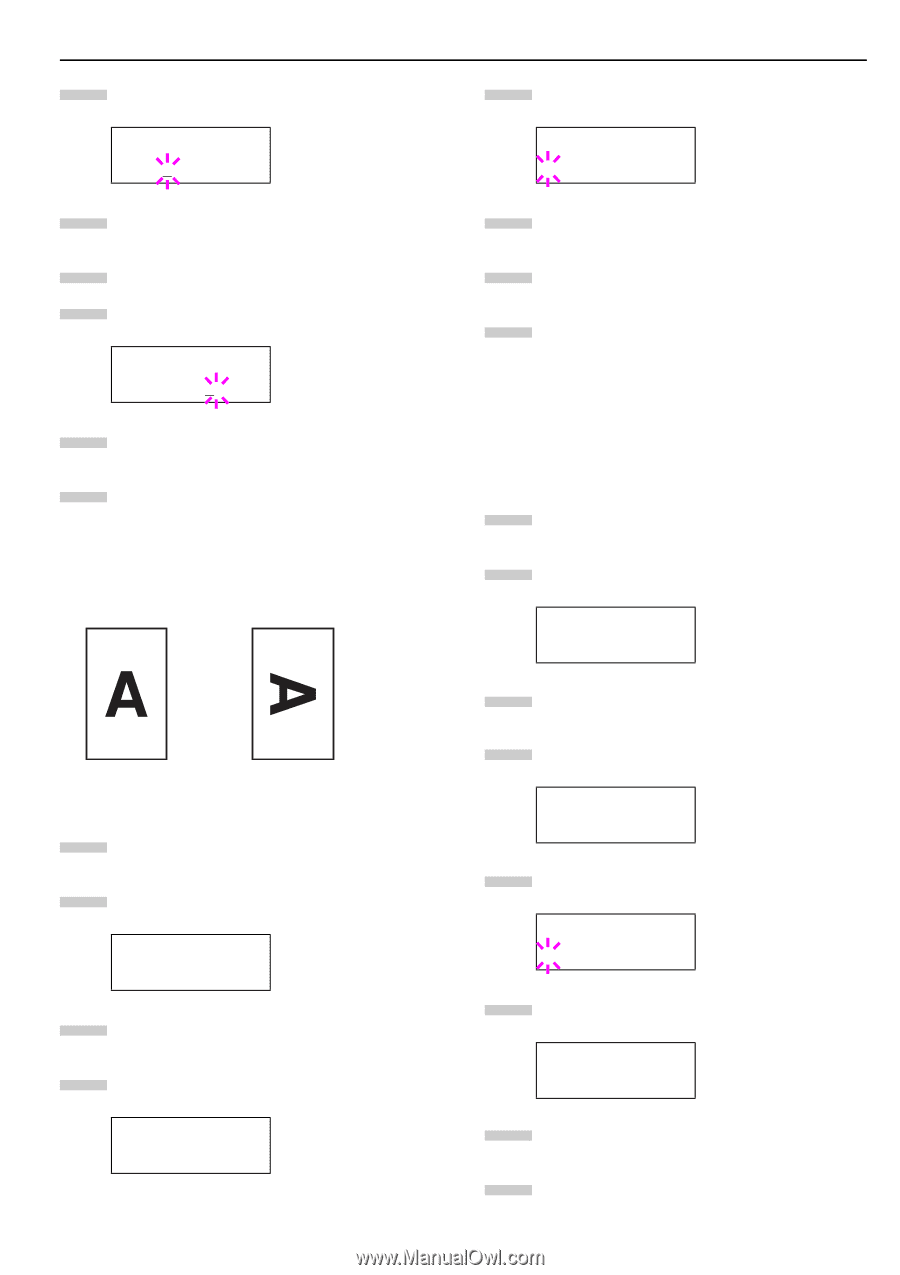
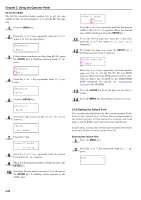
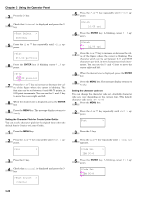
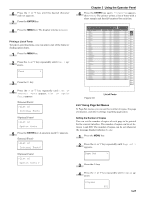
5 Press the ENTER key. A blinking cursor (_) appears under the paper size. >Zoom [CS]→[CS] 6 Press the or key to select source size. Both sizes change will simultaneously. 7 Press the key to move the cursor to the target size. 8 To make a reduced print, press the or key to se- lect the target size. >Zoom [CS]→[CS]98% 9 Press the ENTER key. 10 Press the MENU key. The message display returns to Ready. Selecting the Printing Orientation You can select the portrait or landscape page orientation. The page orientation can be set whenever the message display indicates Ready. Chapter 3 Using the Operator Panel 5 Press the ENTER key. A blinking question mark (?) appears. >Orientation ? Portrait 6 Select Portrait or Landscape using the or key. 7 Press the ENTER key. 8 Press the MENU key. The message display returns to Ready. Page Protect Mode Although Auto is the default setting and this menu does not usually appear, Page Protect will be forcibly set to On if a Print overrun Press GO error occurs due to insufficient printer memory. Be sure to return this setting to Auto in order to maintain high printer memory efficiency. This can be done as follows. 1 Press the MENU key. 2 Press the or key repeatedly until Page Set > appears. Page Set > Portrait Landscape Figure 3-10 1 Press the MENU key. 2 Press the or key repeatedly until Page Set > appears. Page Set > 3 Press the key. 4 Press the or key repeatedly until >Orientation appears. >Orientation Portrait 3 Press the key. 4 Press the or Protect appears. key repeatedly until >Page >Page Protect On 5 Press the ENTER key. A blinking question mark (?) appears. >Page Protect ? On 6 Press the pears. or key repeatedly until Auto ap- >Page Protect ? Auto 7 Press the ENTER key. 8 Press the MENU key. The message display returns to Ready. 3-29
-
 1
1 -
2
-
3
-
4
-
5
-
6
-
7
-
8
-
9
-
10
-
11
-
12
-
13
-
14
-
15
-
16
-
17
-
18
-
19
-
20
-
21
-
22
-
23
-
24
-
25
-
26
-
27
-
28
-
29
-
30
-
31
-
32
-
33
-
34
-
35
-
36
-
37
-
38
-
39
-
40
-
41
-
42
-
43
-
44
-
 45
45 -
 46
46 -
 47
47 -
 48
48 -
 49
49 -
 50
50 -
 51
51 -
 52
52 -
 53
53 -
 54
54 -
 55
55 -
56
-
57
-
58
-
59
-
60
-
61
-
62
-
63
-
64
-
65
-
66
-
67
-
68
-
69
-
70
-
71
-
72
-
73
-
74
-
75
-
76
-
77
-
78
-
79
-
80
-
81
-
82
-
83
-
84
-
85
-
86
-
87
-
88
-
89
-
90
-
91
-
92
-
93
-
94
-
95
-
96
-
97
-
98
-
99
-
100
-
101
-
102
-
103
-
104
-
105
-
106
-
107
-
108
-
109
-
110
-
111
-
112
-
113
-
114
-
115
 |
 |