Kyocera FS-9120DN FS-9120DN/9520DN Operation Guide Rev-2 - Page 74
Finishing, Duplex Printing Error Detection Setting, Staple Error Detection Setting
 |
View all Kyocera FS-9120DN manuals
Add to My Manuals
Save this manual to your list of manuals |
Page 74 highlights
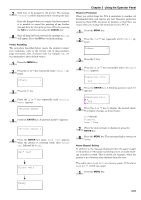
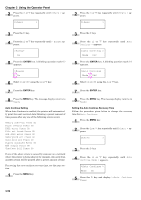
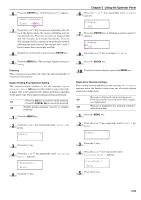
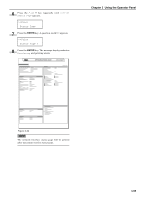
6 Press the ENTER key. A blinking cursor (_) appears. >>Auto Continue Timer 030Sec. 7 Press the or key to increase or decrease the value of the figure where the cursor is blinking and set the desired time. The time must be set between 000 and 495 seconds, in 5-second increments. If set to 000, printing will be continued immediately without allowing any time interval. You can use the and keys to move the cursor right and left. 8 Display the desired time and press the ENTER key. 9 Press the MENU key. The message display returns to Ready. Finishing These settings are possible only when the optional finisher is installed on the printer. Duplex Printing Error Detection Setting This setting controls whether or not the message Duplex disabled Press GO appears when label or some other type of paper that is not supported for duplex printing is specified as the paper type when duplex printing is being performed. On • Press the GO key to perform simple printing. • Press the CANCEL key to cancel the print job. Off Disable duplex printing. (reverts to simplex printing) 1 Press the MENU key. 2 Press the or key repeatedly until Others > appears. Others > Chapter 3 Using the Operator Panel 6 Press the appears. or key repeatedly until >>Duplex >>Duplex OFF 7 Press the ENTER key. A blinking question mark (?) appears. >>Duplex ? Off 8 Press the or key to change Off to On. 9 Press the ENTER key. 10 To exit the menu selection, press the MENU key. Staple Error Detection Setting This setting controls whether or not message Add staples appears when the finisher units runs out of staples during output of a stabled job. Message is displayed and printing pauses. On Printing resumes automatically when staples are replenished. Off Message is displayed, but printing continues without stapling. 1 Press the MENU key. 2 Press the or key repeatedly until Others > appears. Others > 3 Press the key. 4 Press the or key repeatedly until >Finishing Error > appears. >Finishing > Error 5 Press the key. 3 Press the key. 4 Press the or key repeatedly until > Finishing Error > appears. >Finishing > Error 5 Press the key. 3-53
-
 1
1 -
2
-
3
-
4
-
5
-
6
-
7
-
8
-
9
-
10
-
11
-
12
-
13
-
14
-
15
-
16
-
17
-
18
-
19
-
20
-
21
-
22
-
23
-
24
-
25
-
26
-
27
-
28
-
29
-
30
-
31
-
32
-
33
-
34
-
35
-
36
-
37
-
38
-
39
-
40
-
41
-
42
-
43
-
44
-
45
-
46
-
47
-
48
-
49
-
50
-
51
-
52
-
53
-
54
-
55
-
56
-
57
-
58
-
59
-
60
-
61
-
62
-
63
-
64
-
65
-
66
-
67
-
68
-
 69
69 -
 70
70 -
 71
71 -
 72
72 -
 73
73 -
 74
74 -
 75
75 -
 76
76 -
 77
77 -
 78
78 -
 79
79 -
80
-
81
-
82
-
83
-
84
-
85
-
86
-
87
-
88
-
89
-
90
-
91
-
92
-
93
-
94
-
95
-
96
-
97
-
98
-
99
-
100
-
101
-
102
-
103
-
104
-
105
-
106
-
107
-
108
-
109
-
110
-
111
-
112
-
113
-
114
-
115
 |
 |