Lexmark X7550 User's Guide (Mac) - Page 127
Using the Change Print File Default Settings submenu, Setup, Change Print File Default Settings
 |
View all Lexmark X7550 manuals
Add to My Manuals
Save this manual to your list of manuals |
Page 127 highlights
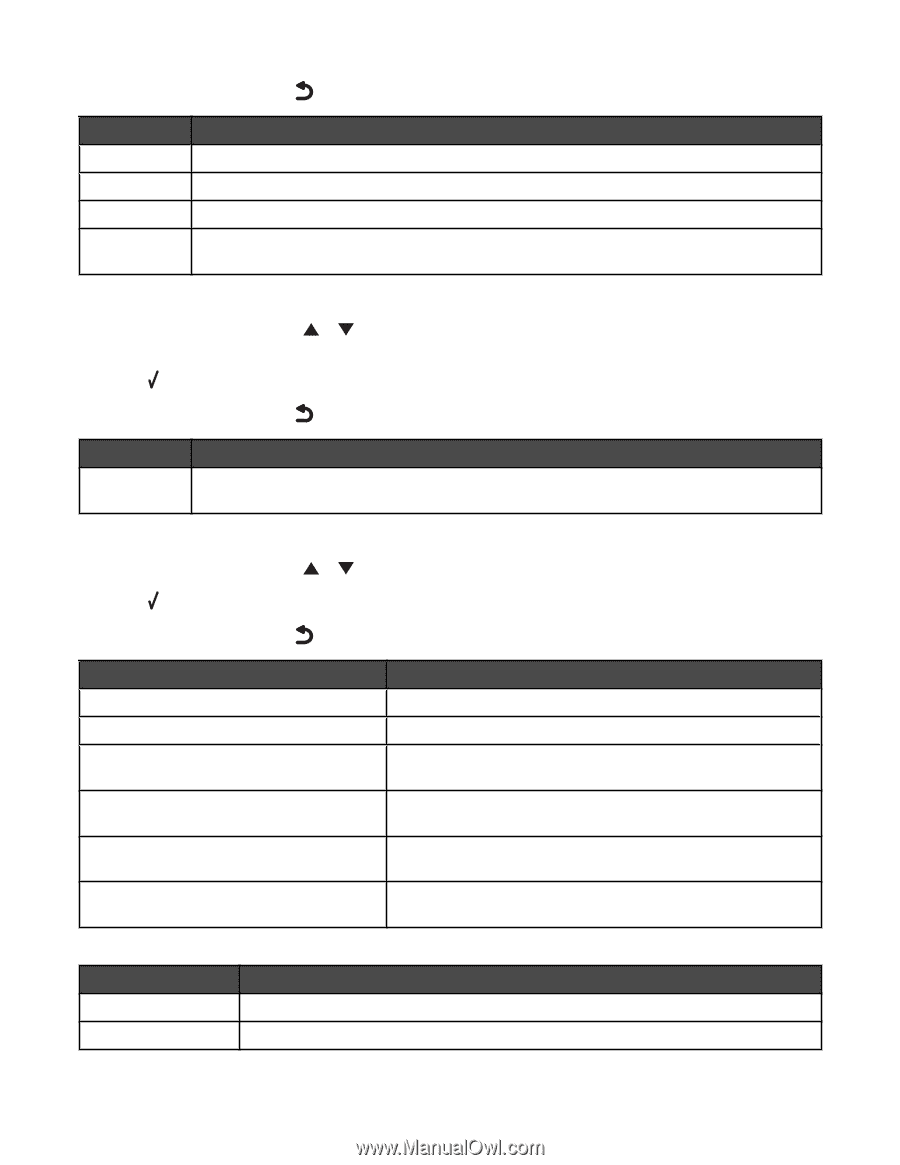
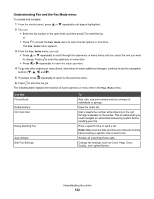
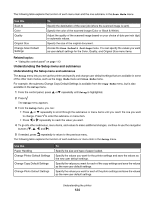
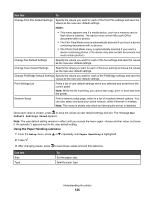
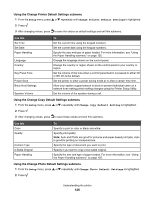
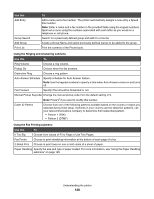
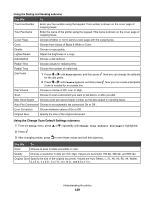
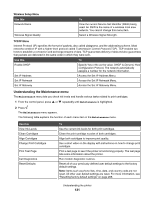
3 After changing values, press to save these values and exit this submenu. Use this To Photo Size Set the photo size. Layout Specify a layout for the photos. Quality Specify a print quality for the photos. Paper Handling Specify the size and type of paper loaded. For more information, see "Using the Paper Handling submenu" on page 125. Using the Change Print File Default Settings submenu 1 From the Setup menu, press or repeatedly until Change Print File Default Settings is highlighted. 2 Press . 3 After changing values, press to save these values and exit this submenu. Use this To Paper Handling Specify the size and type of paper loaded. For more information, see "Using the Paper Handling submenu" on page 125. Using the Change Fax Default Settings submenu 1 From the Setup menu, press or repeatedly until Change Fax Default Settings is highlighted. 2 Press . 3 After changing values, press to save these values and exit this submenu. Use this Speed Dial Phone Book History and Reports Ringing and Answering Fax Printing Dialing and Sending Fax Blocking To Access the Phone Book menu. Access the History and Reports menu. Choose specific values for receiving faxes, and opt to save them as user default settings. Choose specific values for printing faxes, and opt to save them as user default settings. Choose specific values for sending faxes, and opt to save them as user default settings. Choose specific values for blocking fax numbers, group numbers, and fax lists. Using the Phone Book submenu Use this To Name Search View and add names to a fax list. Phone Number Search View phone numbers and add numbers to a fax list. Understanding the printer 127
-
 1
1 -
2
-
3
-
4
-
5
-
6
-
7
-
8
-
9
-
10
-
11
-
12
-
13
-
14
-
15
-
16
-
17
-
18
-
19
-
20
-
21
-
22
-
23
-
24
-
25
-
26
-
27
-
28
-
29
-
30
-
31
-
32
-
33
-
34
-
35
-
36
-
37
-
38
-
39
-
40
-
41
-
42
-
43
-
44
-
45
-
46
-
47
-
48
-
49
-
50
-
51
-
52
-
53
-
54
-
55
-
56
-
57
-
58
-
59
-
60
-
61
-
62
-
63
-
64
-
65
-
66
-
67
-
68
-
69
-
70
-
71
-
72
-
73
-
74
-
75
-
76
-
77
-
78
-
79
-
80
-
81
-
82
-
83
-
84
-
85
-
86
-
87
-
88
-
89
-
90
-
91
-
92
-
93
-
94
-
95
-
96
-
97
-
98
-
99
-
100
-
101
-
102
-
103
-
104
-
105
-
106
-
107
-
108
-
109
-
110
-
111
-
112
-
113
-
114
-
115
-
116
-
117
-
118
-
119
-
120
-
121
-
 122
122 -
 123
123 -
 124
124 -
 125
125 -
 126
126 -
 127
127 -
 128
128 -
 129
129 -
 130
130 -
 131
131 -
 132
132 -
133
-
134
-
135
-
136
-
137
-
138
-
139
-
140
-
141
-
142
-
143
-
144
-
145
-
146
-
147
-
148
-
149
-
150
-
151
-
152
-
153
-
154
-
155
-
156
-
157
-
158
-
159
-
160
-
161
-
162
-
163
-
164
-
165
-
166
-
167
-
168
-
169
-
170
-
171
-
172
-
173
-
174
-
175
-
176
-
177
-
178
-
179
-
180
-
181
-
182
-
183
-
184
-
185
-
186
-
187
-
188
-
189
-
190
-
191
-
192
-
193
-
194
-
195
-
196
-
197
-
198
-
199
-
200
-
201
-
202
-
203
-
204
-
205
-
206
-
207
-
208
-
209
-
210
-
211
-
212
-
213
-
214
-
215
-
216
-
217
-
218
-
219
-
220
-
221
-
222
-
223
-
224
-
225
-
226
-
227
 |
 |