Lexmark X7550 User's Guide (Mac) - Page 181
Checking printer ports, Copy troubleshooting, Copier does not respond, Scanner unit does not close
 |
View all Lexmark X7550 manuals
Add to My Manuals
Save this manual to your list of manuals |
Page 181 highlights
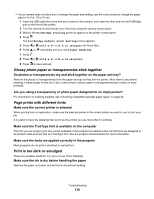
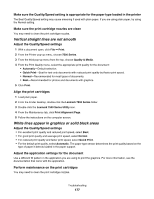
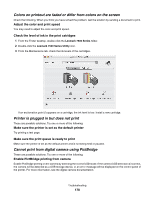
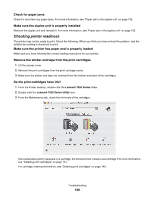
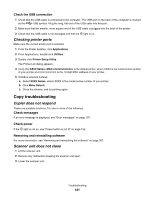
Check the USB connection 1 Check that the USB cable is connected to the computer. The USB port on the back of the computer is marked by the USB symbol. Plug the long, flat end of the USB cable into this port. 2 Make sure that the smaller, more square end of the USB cable is plugged into the back of the printer. 3 Check that the USB cable is not damaged and that the light is on. Checking printer ports Make sure the correct printer port is selected. 1 From the Finder desktop, click Applications. 2 From Applications, double-click Utilities. 3 Double-click Printer Setup Utility. The Printer List dialog appears. 4 Verify that XXXX Series is the default printer, where XXXX is the model series number of your printer and nnnnnnnnnnnn is the 12-digit MAC address of your printer. 5 If USB is selected instead: a Select XXXX Series, where XXXX is the model series number of your printer. b Click Make Default. c Close the window, and try printing again. Copy troubleshooting Copier does not respond These are possible solutions. Try one or more of the following: Check messages If an error message is displayed, see "Error messages" on page 197. Check power If the light is not on, see "Power button is not lit" on page 155. Removing and reinstalling software For more information, see "Removing and reinstalling the software" on page 207. Scanner unit does not close 1 Lift the scanner unit. 2 Remove any obstruction keeping the scanner unit open. 3 Lower the scanner unit. Troubleshooting 181
-
 1
1 -
2
-
3
-
4
-
5
-
6
-
7
-
8
-
9
-
10
-
11
-
12
-
13
-
14
-
15
-
16
-
17
-
18
-
19
-
20
-
21
-
22
-
23
-
24
-
25
-
26
-
27
-
28
-
29
-
30
-
31
-
32
-
33
-
34
-
35
-
36
-
37
-
38
-
39
-
40
-
41
-
42
-
43
-
44
-
45
-
46
-
47
-
48
-
49
-
50
-
51
-
52
-
53
-
54
-
55
-
56
-
57
-
58
-
59
-
60
-
61
-
62
-
63
-
64
-
65
-
66
-
67
-
68
-
69
-
70
-
71
-
72
-
73
-
74
-
75
-
76
-
77
-
78
-
79
-
80
-
81
-
82
-
83
-
84
-
85
-
86
-
87
-
88
-
89
-
90
-
91
-
92
-
93
-
94
-
95
-
96
-
97
-
98
-
99
-
100
-
101
-
102
-
103
-
104
-
105
-
106
-
107
-
108
-
109
-
110
-
111
-
112
-
113
-
114
-
115
-
116
-
117
-
118
-
119
-
120
-
121
-
122
-
123
-
124
-
125
-
126
-
127
-
128
-
129
-
130
-
131
-
132
-
133
-
134
-
135
-
136
-
137
-
138
-
139
-
140
-
141
-
142
-
143
-
144
-
145
-
146
-
147
-
148
-
149
-
150
-
151
-
152
-
153
-
154
-
155
-
156
-
157
-
158
-
159
-
160
-
161
-
162
-
163
-
164
-
165
-
166
-
167
-
168
-
169
-
170
-
171
-
172
-
173
-
174
-
175
-
 176
176 -
 177
177 -
 178
178 -
 179
179 -
 180
180 -
 181
181 -
 182
182 -
 183
183 -
 184
184 -
 185
185 -
 186
186 -
187
-
188
-
189
-
190
-
191
-
192
-
193
-
194
-
195
-
196
-
197
-
198
-
199
-
200
-
201
-
202
-
203
-
204
-
205
-
206
-
207
-
208
-
209
-
210
-
211
-
212
-
213
-
214
-
215
-
216
-
217
-
218
-
219
-
220
-
221
-
222
-
223
-
224
-
225
-
226
-
227
 |
 |