Lexmark X7550 User's Guide (Mac) - Page 130
Using the Change PictBridge Default Settings submenu, Printing the Fax Settings List
 |
View all Lexmark X7550 manuals
Add to My Manuals
Save this manual to your list of manuals |
Page 130 highlights
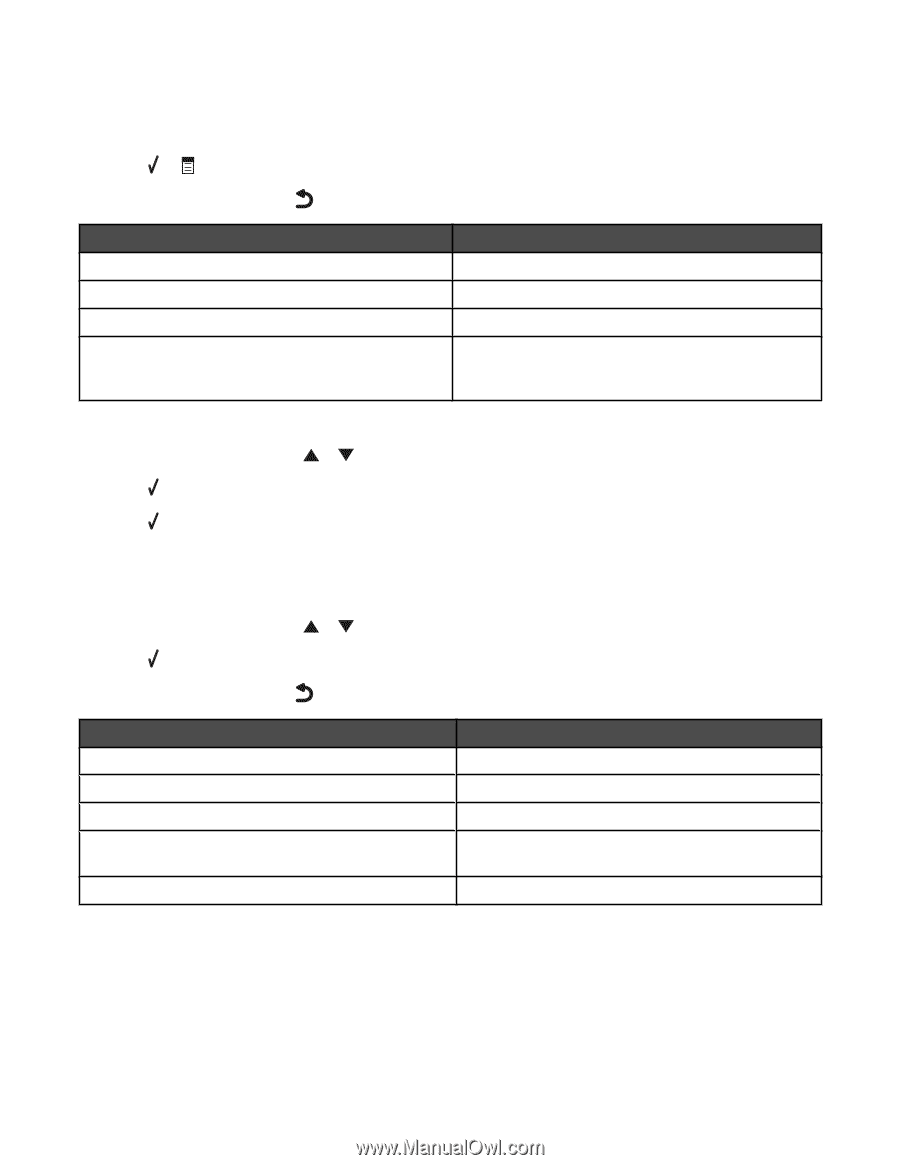
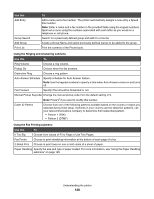
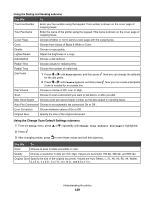
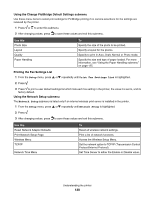
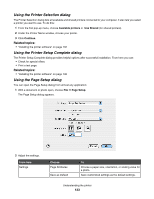
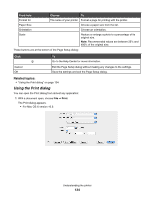
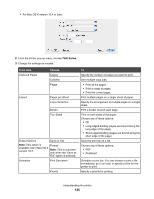
Using the Change PictBridge Default Settings submenu Use these menu items to select print settings for PictBridge printing if no camera selections for the settings are received by the printer. 1 Press or to enter this submenu. 2 After changing values, press to save these values and exit this submenu. Use this Photo Size Layout Quality Paper Handling To Specify the size of the photo to be printed. Specify a layout for the photos. Specify to print in Auto, Draft, Normal or Photo mode. Specify the size and type of paper loaded. For more information, see "Using the Paper Handling submenu" on page 125. Printing the Fax Settings List 1 From the Setup menu, press or repeatedly until Print Fax Settings List is highlighted. 2 Press . 3 Press to print a user default settings list which lists each fax setting in the printer, the value it is set to, and its factory default. Using the Network Setup submenu The Network Setup submenu is listed only if an internal wireless print server is installed in the printer. 1 From the Setup menu, press or repeatedly until Network Setup is highlighted. 2 Press . 3 After changing values, press to save these values and exit this submenu. Use this Reset Network Adapter Defaults Print Network Setup Page Wireless Menu TCP/IP Network Time Menu To Reset all wireless network settings. Print a list of network functions. Access the Wireless Setup Menu. Set the network option to TCP/IP (Transmission Control Protocol/Internet Protocol). Set Time Server to either the Enable or Disable value. Understanding the printer 130
-
 1
1 -
2
-
3
-
4
-
5
-
6
-
7
-
8
-
9
-
10
-
11
-
12
-
13
-
14
-
15
-
16
-
17
-
18
-
19
-
20
-
21
-
22
-
23
-
24
-
25
-
26
-
27
-
28
-
29
-
30
-
31
-
32
-
33
-
34
-
35
-
36
-
37
-
38
-
39
-
40
-
41
-
42
-
43
-
44
-
45
-
46
-
47
-
48
-
49
-
50
-
51
-
52
-
53
-
54
-
55
-
56
-
57
-
58
-
59
-
60
-
61
-
62
-
63
-
64
-
65
-
66
-
67
-
68
-
69
-
70
-
71
-
72
-
73
-
74
-
75
-
76
-
77
-
78
-
79
-
80
-
81
-
82
-
83
-
84
-
85
-
86
-
87
-
88
-
89
-
90
-
91
-
92
-
93
-
94
-
95
-
96
-
97
-
98
-
99
-
100
-
101
-
102
-
103
-
104
-
105
-
106
-
107
-
108
-
109
-
110
-
111
-
112
-
113
-
114
-
115
-
116
-
117
-
118
-
119
-
120
-
121
-
122
-
123
-
124
-
 125
125 -
 126
126 -
 127
127 -
 128
128 -
 129
129 -
 130
130 -
 131
131 -
 132
132 -
 133
133 -
 134
134 -
 135
135 -
136
-
137
-
138
-
139
-
140
-
141
-
142
-
143
-
144
-
145
-
146
-
147
-
148
-
149
-
150
-
151
-
152
-
153
-
154
-
155
-
156
-
157
-
158
-
159
-
160
-
161
-
162
-
163
-
164
-
165
-
166
-
167
-
168
-
169
-
170
-
171
-
172
-
173
-
174
-
175
-
176
-
177
-
178
-
179
-
180
-
181
-
182
-
183
-
184
-
185
-
186
-
187
-
188
-
189
-
190
-
191
-
192
-
193
-
194
-
195
-
196
-
197
-
198
-
199
-
200
-
201
-
202
-
203
-
204
-
205
-
206
-
207
-
208
-
209
-
210
-
211
-
212
-
213
-
214
-
215
-
216
-
217
-
218
-
219
-
220
-
221
-
222
-
223
-
224
-
225
-
226
-
227
 |
 |